Tattfoo Tan as a Visiting Artist this semester at FIT. Sponsored by a grant from the Diversity Council, Tattfoo’s visit will focus on gathering and presenting recipes from members of the college community, based on their own cultural heritage. In 2008 Tattfoo created a similar project with Staten Island residents, Nuevo Americana Recipes. This compilation of stories, recipes, and photo essays expressed the immigrant experience through cuisine. For a sampling go to: http://tattfoo.com/recipe We are looking for students, clubs, and faculty members to collaborate with Tattfoo in areas such as: campus displays, art and design projects (all departments), photography, display design, event planning, writing and editing, and broadcasting. All members of the FIT faculty, students, staff, and clubs are invited to participate. Activities planned for Tattfoo’s visit are listed below, and suggestions for others are welcome.
Project Structure
Asset based approaches is like the classic tale of stone soup. One person starts with just a few stones, another person lends a pot, some one else gives some water, some one donate a carrot and so on until a delicious soup is made that can serve all. In asset based project, the artist can act as the instigator and does not know what shape the final result will be until the community provides asset of their own. There are no set steps just a process of mutual discovery and contribution. The project will flow and develop like a rhizome. One department will build upon one another works. Being an organic working structure, sharing is important. A blog had been create to provide the platform for information sharing and critics. FIT Heirloom Recipe Blog
http://fitsheirloomrecipes.wordpress.com/
Phase One is Narrative and recipe gathering with photo of the background story, ingredients or cooked dish.
Write and post image and text on blog. Class Visits: Monday, October 5th to Friday October 9th, 2009. Tattfoo will be on campus during the sixth week of the semester to meet with classes in any
subject across the college. The artist can also work with students and faculty on assignments
related to his visit. To schedule a visit for your class, please contact Melissa Tombro
(melissa_tombro@fitnyc.edu) no later than Friday, September 18.
Turning to their own heritage or interview and investigate a fellow students and will submit a family recipe that has been passed
down from generation to generation. Using words and/or images they will tell a personal
story about this special food and their memories of it. Recipes will be solicited from across the college and compiled on a blog that will include
stories and family histories,photographs of contributors and their families, illustrations of
cooking techniques, and introductions to some of the exotic ingredients in these recipes.
Phase Two is to use those information and apply them on other medium. There are many other possibilities incorporating students’ art, design, photography,
marketing, editorial, writing, presentation, broadcasting, and other skills. Tattfoo role is to be a facilitator, a catalyst, a planner of the project and work with teacher and student
to develop each of their unique and platform of expression based on the idea of subject: recipe, food, memory.
Project Contacts:
Jean Amato, English & Speech Jean_amato@fitnyc.edu
Amy Lemmon, English & Speech AMY_LEMMON@ fitnyc.edu
Melissa Tombro, English & Speech melissa_tombro@fitnyc.edu
Charlotte Brown, Educational Skills CHARLOTTE_BROWN@fitnyc.edu
Michael Hyde, English & Speech michael_hyde@fitnyc.edu
An interview with Tattfoo by Zadrian Smith on WFIT
Elizabeth Vergara's Papa a la Huancaina and Pisco Sour
They are both well-known Peruvian dishes and drinks.
The first is called “Papa a la Huancaina”
It’s a delicious yellow sauce that is served over sliced potatoes and is made with “aji amarilo peppers”
The Ingredients are:
~4 tablespoons of vegetable oil
~1/2 cup pf chopped onions
~4 yellow chile peppers (aji amarillo)
~2 cups of white farmer’s cheese
~2 mashed cloves of garlic
~3/4 evaporated milk
~4 saltine crackers
~Salt and a little pepper – to your liking
Preparation:
1. Cut yellow chile peppers into 1″ pieces (take the seeds out first)
2. Saute’ onions, garlic, and chile peppers in oil until the onions are soft (about 4-5 mins., then let cool)
3. Blend onions, chile peppers mix and add the evaporated milk
4. And the cheese and crackers into blend. The sauce should be fairly thick (to thicken – add more saltines/ milk to soften)
5. Add salt and pepper to your liking
6. Serve over sliced potatoes, at room temp.
And the sliced potatoes are to be boiled, peeled and served with the sauce at room temp or cooled.
The best potatoes to use are Yukon Gold.
The second is a yummy Peruvian drink that is great to have on a summer weekend with great friends and toasts!
Its called “Pisco Sour”
~1 cup of sugar
~1 cup of key lime juice
~2 egg whites
~12 ice cubes, crushed
~3 drops Angostura bitters
~2 cups of Pisco
Preparation:
1.Blend pisco, sugar, lemon juice & Angostrua bitter
2. Add ice and egg whites
3. Blend few mins
4. Pour into small glasses and top it off with a few drops Angostura bitter
The drink – I only had on special occasions and holidays. Most of my family is in Peru – so its great when i visited them every few years and had a big family dinner with all my grandparents, aunts and uncles, and cousins! The dish – I also have on special days. My mother learned how to make it from my grandmother. They both taste great – but they have a different taste. When i was younger, my grandmother came to live with us for a few months. I remember her smell and her cooking the most. This was when I was in the second or third grade. She would make this dish every few weekends, and it had just the right amount of spice in the sauce. I loved it… I got the chance to taste her cooking again this past
summer, when I went to Peru for her 80th birthday…. taste
just as always… mmm.
The way my mother makes it is also great. She changes the amount of spice every-so often – so
it tastes different every time.
My ethnic background is a little
mix of the world.
I’m Peruvian, Italian, Spaniard, and Japanese.
I was born in Peru, and i moved here with my parents and
brother when I was one.
My brother was born here in the US
one year before me – when we moved back to Peru for a little
while. I hope you enjoy looking through the images. It was
fun for me to look through a whole bunch of my old pictures
and get a sense of nostalgia.
A old picture of my parents when they first started
dating in college.
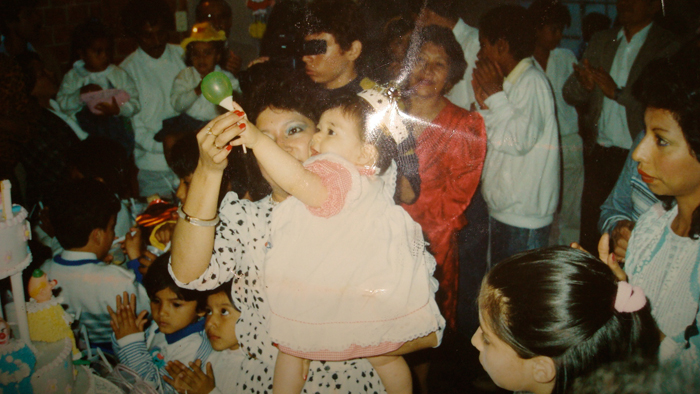
A picture of me on my first birthday! When we lived in Peru - they threw big fun family parties for all the family events.
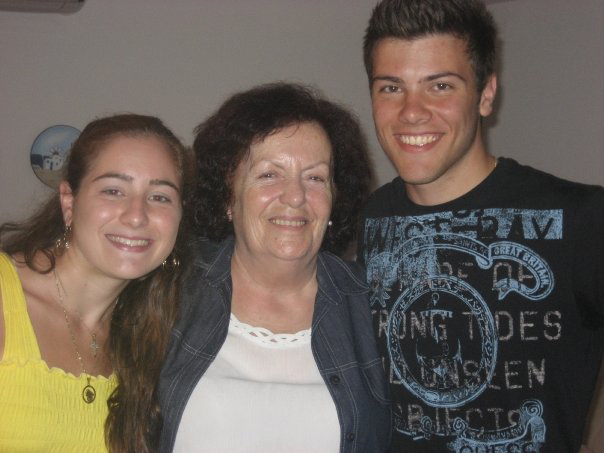
A recent picture of my parents, my brother and me.
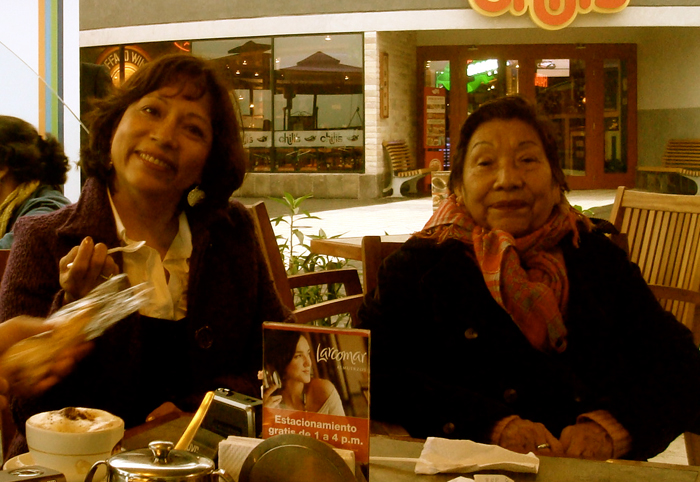
A picture of my mom and my grandmother, who lives in Peru.
I got to see her again this summer for her 80th birthday!
Hi Tattfoo,
My name is Elizabeth Vergara. I'm a I'm a Senior majoring in the BFA Interior Design program.
My Professor e-mailed us information about the project and it caught my attention. I'd like to work with you on the Student Recipe project. I have some yummy Peruvian recipe's that I'd love to share with you. My mother and grandmother prepared these dishes all the time when i was younger. My grandmother lives in Peru, but she taught my mother the recipes and i think they're wonderful dishes other people haven't tried and may like s well.
SO i searched through a lot of photos - and i found a few great ones that can give you the sense of my family and culture. I hope you enjoy looking through the images. It was fun for me to look through a whole bunch of my old pictures and get a sense of nostalgia. Please let me know what you think!
Thanks!
Elizabeth
Laurel Adams's
Betty Crocker’s Chocolate Chip Cookies
1 C butter or margarine, softened
¾ C packed brown sugar
¾ C granulated sugar
1 egg
1 tsp vanilla extract
2 ¼ C all-purpose flour
1 tsp baking soda
1 tsp baking powder
½ tsp salt
1 bag chocolate chips
Preheat oven to 375°
In a large bowl, combine butter, sugar, egg and vanilla extract. Slowly mix in flour, soda, powder and salt. Stir in chocolate chips.
Drop dough by rounded tablespoonfuls onto a baking sheet.
Bake for 8-10 minutes.
Stuff face (don’t forget milk!)
Kids want to get their hands into everything. I remember the first time I decided to bake cookies I looked to my mom for a recipe. She pulled this big, faded red binder out of a cabinet I couldn’t even reach and told me it was Betty Crocker (why we had some other woman’s cookbook, I didn’t figure out until a few years later). Together we leafed through the tattered and stained pages until we found this recipe for chocolate chip cookies. The very best chocolate chip cookies, if I may say so. To this day, I’ve never used another recipe, but that isn’t to say I haven’t deviated from Betty Crocker’s sweet, buttery path.
As I’ve grown and changed, this recipe has evolved with me. Early variations used half the sugar and nearly quartered the chocolate chips, then there was a phase when baking was completely unnecessary. At 16, I became a vegan, so out went the butter and eggs. I’ve replaced them with everything from margarine and bananas to soy butter and a gooey mixture of starches and water. Since then, I’ve seen whole wheat versions, sugar-free, gluten-free, coconut, soft, crispy, you name it. They don’t all turn out as well as the original, but they all bring me right back to the big double-oven in my old home, with my mom and Betty Crocker by my side.
Brittany Lopez's Cuban Style Black Beans
- 1 (16 oz) can of black beans
- 1 small chopped onion
- 1 clove of garlic
- 1/4 tablespoon pepper
- 1 tablespoon of fresh cilantro
- 1 tablespoon of salt
- 1 tablespoon of hot sauce
- Pinch of sugar
I choose black beans because my family and I are 100% Cuban.
Cubans live off of black beans; they eat black beans with every
meal. Not just any color beans, but black. There are many different ways you can eat black beans. For example, you can eat black
beans with white rice, in a bowl, or as a dipping sauce. The possibilities
are endless. The taste of black beans in my mouth brings me back to
my grandmother’s vintage wood kitchen table, where I as well as my
entire family have had so many memories!
Barbara Vintzileos's Greek Roasted Lamb on a Spit and Potatoes
Greek Roasted Lamb
1 whole lamb, dressed
aromatic wood (olive, oak, apple, cherry), or hardwood charcoal
olive oil
lemon juice
sea salt
pepper
crushed Greek oregano (rigani)
crushed garlic (optional)
Preparation:
Tip: According to local experts, the best size lamb for spit roasting is generally around 22-25 pounds (10-11 kilos). Cooking time is 3-5 hours.)
Start the fire about 2 hours before cooking. The spit should be at least 20 inches longer than the lamb (10 inches or more to extend out each side).
Sprinkle the inside of the lamb liberally with salt and pepper and rub in. Lay the lamb on a flat surface and pass the spit between the hind legs, through the stomach cavity and out through the mouth. The lamb's spine should be straight along the line of the spit. Tie the front and hind legs to the spit. Tie the middle of the lamb to the spit or clamp along the spine. (For a larger lamb, tie in two places: behind the front legs and at the top of the hind leg. Sew the stomach cavity closed with butcher's twine or aluminum wire (use a pliers). The lamb should be tied securely and not slip when turned.
With hands rub the entire lamb with lemon juice and oregano. Place the spit over the fire and spread the coals so they are under the shoulder and thigh (thickest parts). A drip pan can be set under the middle of the animal to catch the juices. Keep olive oil at hand with a paint brush.
At the beginning, the lamb needs to be turned quickly in order not to burn. Once the fire settles and the lamb is golden all around and starting to crisp, turning can slow, to approximately 1/4 turn every 15 minutes. Replenish wood or charcoal as needed. Brush occasionally with the oil. Cooking time will depend on the size of the lamb. The skin on the legs and chest of the lamb will crisp and crack open. The color should be a deep brown.
Testing for doneness: With a meat thermometer, internal temperature at the thickest part should be 155°F for medium. If you don't have a meat thermometer, stick a knife or skewer into the thigh (thickest part). The juice should run clear. Lift the spit with the lamb and place on carving surface. Remove wire, ties, clamps, or straps, and carve.
Greek Potatoes
2 pounds potatoes, peeled & cut into large chunks
2 onions, sliced
2 tablespoons olive oil
1/3 cup vegetable broth
1 teaspoon oregano
3 garlic cloves, minced or grated
2 lemons, zested & juiced
Dried parsley
Sea salt & pepper
Paprika powder
Preheat oven to 400 degrees. Place the cut up potatoes and onions in a 9 x 13-inch baking dish. Set aside while you make the lemon dressing. In a medium bowl, combine lemon juice, zest, broth, oregano, garlic, and a little salt and pepper. Whisk in olive oil, in a slow steady stream. Pour the dressing over the potatoes and onions, and give everything a good toss. Sprinkle with additional salt (for crunch), paprika (for color), and parsley (for presentation), and put into your preheated oven. Bake for 30 minutes, give the potatoes a toss, then bake for an additional 45-50 minutes, tossing every 20 minutes or so.
One of my favorite movies is My Big Fat Greek Wedding. In this movie, there are several scenes depicting life as a Greek daughter. The character that portrays the daughter, Toula Portokalos, played by Nia Vardalos, had a father with strong family values, similar to mine. In a particular scene her father stated, “There are three things that every Greek woman must do in life: marry Greek boys, make Greek babies, and feed everyone.” In another scene, Toula is talking with Ian Miller played by John Corbett, about what Toula does on Christmas with the family. She highlights Greek traditions and declares “ …we're always together, just eating, eating, eating! The only other people we know are Greeks, 'cause Greeks marry Greeks to breed more Greeks, to be loud breeding Greek eaters”. Eating around a table with an array of Greek delicacies is an integral part of being Greek. Family recipes are passed down from generation to generation by the women of the family watching and helping to prepare meals. They are never written down. A favorite dish of mine is roasted lamb with potatoes. This is a traditional Greek dish which is served at Greek Easter and special occasions. The lamb is roasted for hours and hours on a spit outside in the front yard just like the scene in the movie; surrounded by family
and those considered family. Every summer I help my aunt prepare Greek dishes and try to memorize all the steps to the final product. To make the best roasted potatoes, you have to peel about forty kilos which is converted to twenty pounds of potatoes. You cover the potatoes with olive oil however we only use olive oil from Kalamata in Peloponneses. Pelopennesses is the southern part of Greece where my uncle was born and where my grandmother, Varvara was raised on a farm. In addition, you sprinkle sea salt and fresh rosemary picked from the garden. Potatoes are roasted until they are light brown and crispy. The aroma of the rosemary fills the house with a warm fragrance which makes your mouth water. The meat from the roasted lamb is sliced with a knife off the lamb from the spit. The lamb is then drizzled with fresh squeezed lemons and served. Other Greek dishes served would include a traditional Greek salad, saganaki which is fried cheese, tzatziki, and spanakopita, keftedes which are Greek meatballs, and wine for the adults. To complete the meal, watermelon known as karpoozi, and honey soaked desserts are served. In the end, no matter what recipe you follow, what dish you make, or what the occasion may be, family is always the key ingredient to making every meal meaningful.
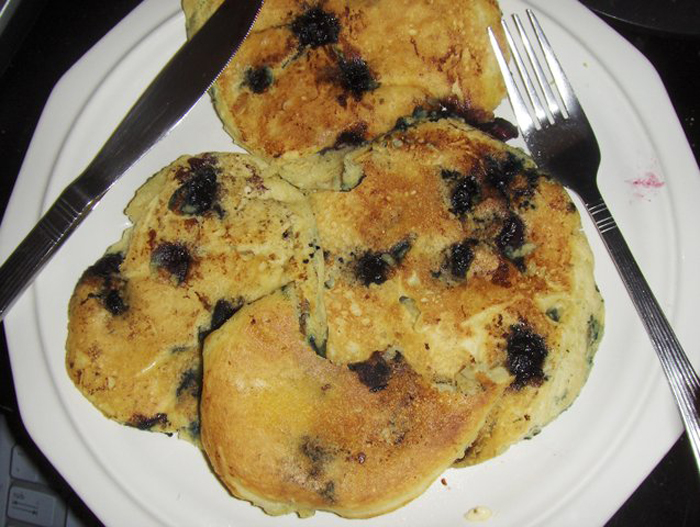
Kári Emil Helgason's Skonsur
3 cups flour
1 cup sugar
3 teaspoons baking powder
3 eggs
pinch of salt
milk
Each skonsa is fried from a little bit of margarine on an
Icelandic pancake pan preferably. The skonsur are then
served with
butter and sometimes also regular bread
cheese. My mom loves to add cheese. I just want lots of
butter. Skonsur are similar to American pancakes but they
taste differently and we never eat them with syrup or anything
sweet. I often eat them for breakfast over here since I often
run out of cereal but usually we would make them around
3 back home and have them as an afternoon meal, maybe
with some sweeter cakes too and some milk or coffee.
Icelandic pancakes are similar to French crêpes but a bit smaller and never eaten with anything non-sweet.
Similarly, our skonsur are nothing like scones (little biscuits)
even
though that is the etymolgy of the word. It’s interetsing to
note that my family’s recipe does not indicate the amount of
milk required—it’s something you’re supposed to know
intrinsically. It took quite a few times making them to get that
part of it right. I still don’t know how much milk I use, exactly,
because it’s impossible
to measure. You just keep adding
until you can feel it’s right. I defintely prefer skonsur to
American pancakes. For one, they are sweeter by themselves
and I think they smell better. And I only just had American
pancakes for the first time a year ago so they have no
emotional meaning or significance to me.
Jessica Suazo's Tembleque Puertorriqueno
Ingredients
7 ounces cream of coconut
2 1/2 cups milk
1/2 cup cornstarch
4 tablespoons sugar
1 teaspoon vanilla
ground cinnamon, and or flaked coconut
Directions
1) In a saucepan combine milk and cream of coconut, cornstarch, vanilla and sugar mix very well.
2) Stir constantly on medium high until mixture begins to boil and gets thick.
3)
Let boil a couple more minutes still keep stirring, then you can either pour into individual dessert cups or a mold.
4) Let cool on tabletop, then refrigerate.
5) Enjoy.
People often say that with time you acquire different tastes
in clothing, music, and even hobbies. As for me, I literally
acquired a different taste. I used to absolutely hate and
despise a dessert that my mother’s side of the family
absolutely enjoyed. The dish is called tembleque and it
used to be my least favorite part of Christmas and New
Year’s. It’s a traditional Puerto Rican, coconut custard that
shakes as much as Jell-O. Unlike Jell-O-O, it is white and
is often sprinkled with cinnamon. After having tons of food,
my family would laugh and talk about the past with a fork in
their right hand and a plate of tembleque on the left.
I too,
would laugh as we would reveal the details of such small
yet profound memories. But, I refused to have any of
that slimy tembleque, although it smelled like delicious
coconut. As the Christmases and the New Years passed by, I
decided to give the white, nasty version of Jell-O another try. Suddenly
and what seemed to be unnaturally I actually liked the taste.
I couldn’t believe it, so I had more. More eventually turned out
to be about six fat slices. Tembleque was now this soft, creamy dessert with a rich taste of coconut that made me feel as
if I was on a resort on the Island. This acquired taste led me to be an
expert on making tembleque; I’m almost certain I can it make
with my eyes closed. Not only is tembleque my favorite dessert,
it is also able to bring back memories that I shared with my crazy,
yet beautiful family. It is also proof that with time, things
can
change so never consider “never” an option.
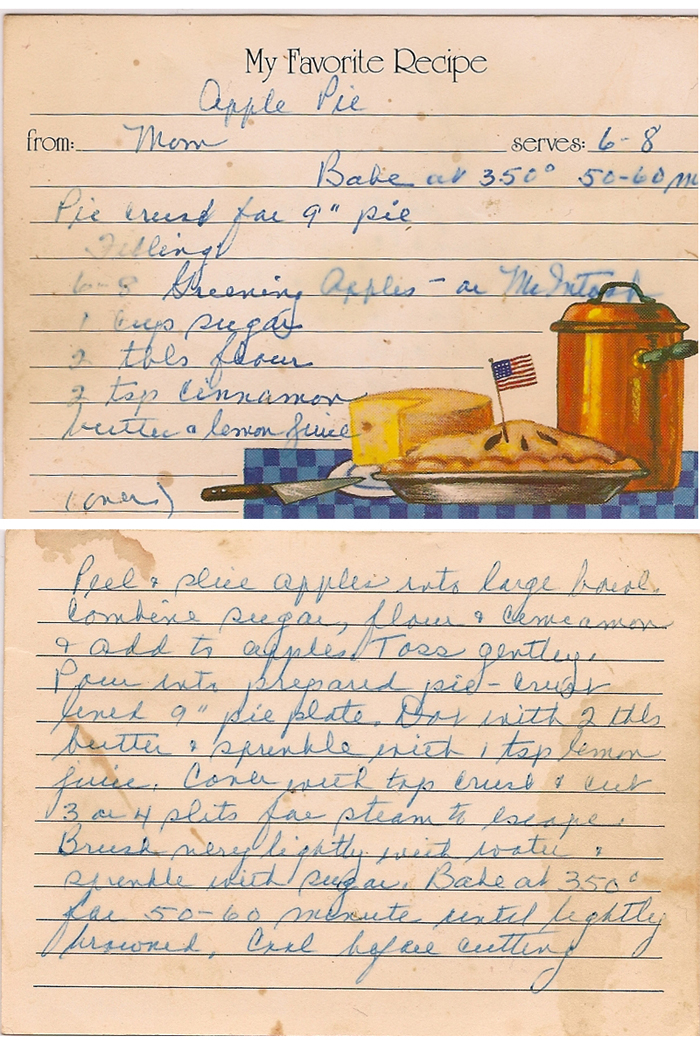
Sydney DeBolt's Apple Crisp
4 cups tart apples
2/3 cups packed brown sugar
½ cup flour
½ cup oats
¾ teaspoons cinnamon
¾ teaspoons nutmeg
heat oven to 365 degrees
grease a 8 by 8 by 2 pan
arrange sliced in pan
mix remaining ingredients
sprinkle over apples
bake until golden brown and apples are tender (about 30 min)
Every fall when the leaves start to change color and the air starts to get bitter in Upstate New York, my mother will make Apple Crisp. Its
one of the most simplest recipes yet nobody
can make it quite like her.
Whenever I smell that musty smell
of cinnamon I know that summer is
over and that fall has
sprung from sleep. It is one of the few things I
look forward
to every year.
She usually makes in on Sunday because that’s when my Grandmother will
come over for dinner each week. She always has the same response “Mary
Jo this is
delicious!” I can picture it in my mind perfectly. Even my
older sister Courtney who is the pickiest eater I know always begs
my
mother to make apple crisp for when she is home at Thanksgiving.
Although it is wonderful at Thanksgiving,
it’s best at the beginning of
fall. This is because apples are in
season and she always uses apples
fresh from our back yard. The trees were just another wonder to the
house that we
moved into 10 years ago, but another reason to me why
apple crisp is so special. She fallows the same recipe, being from
a
very old Betty Crocker cookbook that came from my other Grandmother.
But even when I made the recipe once, there
was something off about it.
It wasn’t like when my mother
made it. There must be a secret
ingredient then, but what was
it. I’m not a cook in any way so I
couldn’t think of anything that
I could taste missing. I asked my mom
and she replied “No I make it just like it is in the book.” Was she
lying? I’ll
never know. Even a few weeks ago when I went home for a
long weekend she made it for me. I was home at the perfect
time when fall comes alive and it was the perfect apple crisp.
Rachel Weaver's Sweet Potato Poem
4 Sweet Potatoes
2 Eggs
1 tsp of Vanilla
1 cup of Coconuts
1 ½ stick of butter
8 oz can milk
(Consistency like mashed potatoes)
1 cup of Raisins
2 cups of sugar
Boil potatoes until they are soft enough to mash
Mash them up
Then pour in vanilla, butter, canned milk, sugar and eggs
Mix with electrical mixer until fluffy
Add in raisons and coconut (mix with spoon)
Fill a small Pyrex or glass pan with the mashed potatoes
Cover the top with a thin layer of coconut
Pre heat the oven to 350
Bake for 20-30 minutes until edges begin to brown
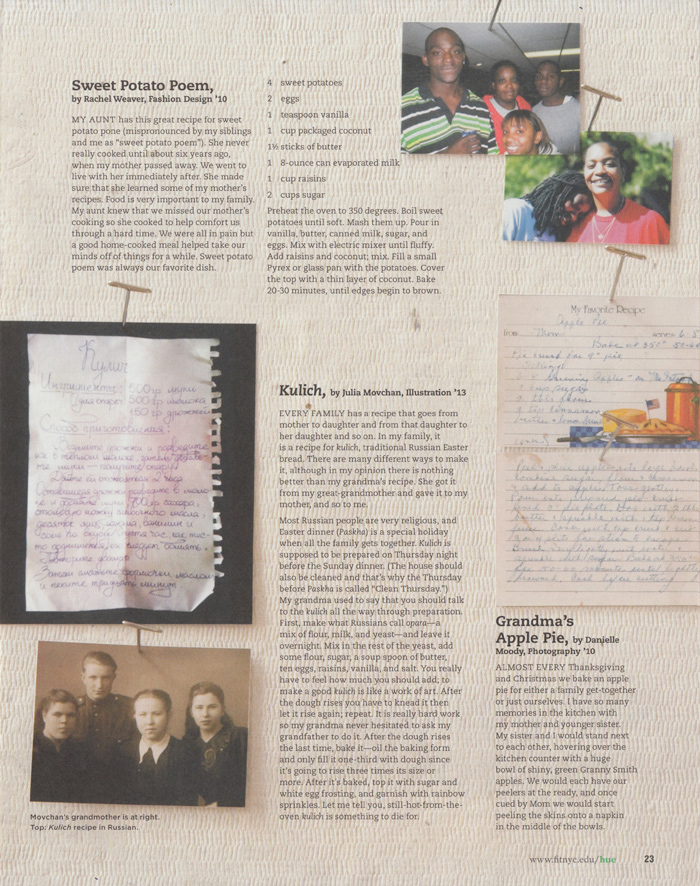
My aunt has this great recipe for sweet potato pone formally mispronounced by my siblings and I as “sweet potato poem” She never really cooked until about six years ago when my
mother passed away. We went to live with her immediately
after. She always made sure that she learned some of my
mother’s recipes and learned new ones. She would cook
dinner for us when she could. We were all in pain but a good
home cooked meal helped take our minds off of things for a while. Sweat potato poem was always our favorite dish.
I still remember the first time I tried sweet potato poem,
I had to be about 6 or 7, at that time I didn’t really like to eat.
The ingredients were very strange to me.
Much to my surprise
it was delicious, it was sweet and it didn’t even take long to prepare. My aunt always had to make two pans of it on
special occasions because my mother didn’t like coconut.
Food is very important to my family. My aunt knew that we missed our mother’s cooking so she cooked to help comfort
us through
a hard time.
Here are some pictures of my family. I have two brothers and one sister. Her name is Tiffany and my brother's names are Anthony and Darius. Anthony appears in two pictures. My aunt's name is Lisa and my mom's name is Cheryl.
Enjoy the sweet potato poem!!!
Talia Zimmerman's Cholent
1 ¼ cups dry mixed beans
2 Tbsp vegetable oil
200 g (8 oz or one large) onion, coarsely chopped
3 cloves garlic, minced
1 ½ Tbsp Hungarian paprika
1 ½ tsp salt
1 ½ tsp pepper
¾ cup barley
1 ½ lb (700 g) potatoes, peeled, cut into large chunks
1 chunk (about ½ kg or 1 lb) beef brisket
1 smoked beef bone or marrow bone
6 eggs in shell, washed
You may use one kind of beans or mix several kinds. For eye-appeal, I
like to mix small white navy beans and large red kidney beans or black
beans. Rinse beans then soak for 5 to 8 hours in enough water to have
three finger-deep water over top of
beans. When soaked, drain.
Heat oil in a large heavy skillet over medium heat and sauté onion
until transparent. Add garlic,
stir for several minutes over heat then
add paprika, salt and pepper, and continue to cook for a minute. Remove
from heat.
Combine beans, onion mixture, barley, potatoes, brisket and bone in a
large baking dish or dutch oven with a tightly-fitting lid.
Carefully
slip in raw unshelled eggs and bury them under cholent mix. Add water
to cover.
Place tightly covered pot in oven (seal lid with aluminum foil if not
absolutely tight) and bake at 100 degrees C (200 degrees F)
for at
least 6 hours and up to 18 hours. Check liquid level occasionally to
prevent cholent from drying out and replenish if needed.
When ready to serve, dig out eggs, shell them and serve in quarters as
first course with fresh raw vegetables or crackers.
Remove brisket and
slice. Serve brisket and cholent family style on serving dish. The best
accompaniment with cholent is an assortment of good pickles and
sauerkraut. Yields 6 to 7 generous servings.
Cholent has been a food in my Jewish culture for hundreds of years. The main objective of cooking this fascinating dish is to allow it to cook over Friday night until Saturday afternoon, the holy Sabbath. Since turning on a flame on the holy Sabbath is forbidden in my Jewish culture, people began to cook cholent, which can cook over night. One would prepare
the cholent before sunrise on Friday, and allow it to
cook until
the next day. When it comes to eating lunch on Saturday,
observant Jews can eat the cholent that had been cooking
for 18 hours.
Cooking cholent has made it easier for Jews to observe the holy
Sabbath, since there is no need to turn on
or off the flame.
Christian Maya's Bunelos y Natilla
Ingredients:
4 cups whole milk
8 ounces panela, or 1 cup packed dark brown sugar
3-4 cinnamon sticks
1/2 teaspoon baking soda
1/2 teaspoon salt
1 cup cornstarch
2 tablespoons butter
1 cup frozen fresh shredded coconut (optional)
1 teaspoon vanilla
3/4 cup chopped nuts (optional)
Preparation:
Pour the mik into a heavy-bottomed pot. Dissolve the cornstarch in the
milk over low heat. Grate the panela and add to the milk mixture, or add the brown sugar to
the milk mixture. Add the baking soda, cinnamon sticks, and salt. Heat the milk/sugar mixture over low heat, stirring, until it starts to
thicken. Add the coconut (optional). Cook at barely a simmer for 20-25 minutes, stirring constantly, until
mixture has thickened. Stir constantly so that the corn starch doesn't
clump, and the mixture doesn't burn. The mixture will get very thick and hard to stir, and turn a medium
caramel brown. If you scrape a spatula along the bottom of the pot, you
should be able to see the bottom for several seconds before the mixture
closes in on itself. Remove from heat. Take out the cinnamon sticks and stir in the butter
and vanilla (and nuts, if desired). Pour mixture into a greased 8 inch square pyrex pan, or in any greased
mold. Let cool. Cut into 1-2 inch square pieces, sprinkle with cinnamon if desired, and
serve.
Note: The corn starch has a strange taste until the natilla is
thoroughly cooked.
Ingredients:
2 cups grated white farmer's cheese or queso fresco
1/2 cup cornstarch
1.5 tablespoons light brown sugar
1/2 teaspoon salt
1 egg
Vegetable oil for frying
Preparation:
Make sure that the cheese is grated very finely. You can use a food
processor for this. Mix the cheese, corn starch, sugar, salt, and egg in a large bowl until
well blended. Shape the dough into 1 inch diameter balls. Heat several inches of oil in a heavy pot to 325 degrees. Add the buñuelos, a few at a time, and cook. They will sink to the
bottom, then rise and expand. Raise the temperature to 250 degrees.
Cook for 3-4 minutes, turning them occasionally, until they are golden
brown and very round. Drain on a plate lined with paper towels. Dust with powdered sugar if
desired. Serve warm or at room temperature.
Ever since I can remember, Christmas was always spent with family and some important traditions were always kept. When I was little I always remember that Halloween would come around and it was alright, then Thanksgiving. but once December came around I knew that soon, but not soon enough I would get to taste the great and amazing flavor of my grandmother’s Bunelos and Natilla. I would be so excited for them that sometimes I would even forget that Christmas was also around the conner and thats why she was making them. One year I actually started a calender where I would start a countdown. my grandma saw it once and thought I was so silly, but cute that I would care some much about such a simple recipe. But it was more than that, it was the two best things that I would taste in the
whole entire year. Yeah they have them at some colombian restaurants and delis, but it’s never the same, and never as good. Christmas eve would come around and I could already smell that glorious smell in my nose. I felt as if I was flying through the smell, as if it had grabbed me by the neck and pulling me in it’s direction. I would grab one Bunelo, my eyes would open as big as my mouth. The first bite was always the best, it was the bite thatIi been waiting for the whole month and year. Then came the slice of Natilla, I can’t even describe it. Both of them combined make an incredible taste in my mouth that I will never forget. The recipe is your and it will taste amazing if you do it just right, but I know it will never be as good as that day in December.
Jiun Yong's Bulgogi
Last week was Korean Thanksgiving Day, and as I look back, I remember the past Thanksgiving Day that I was in Korea
spending time with my family. As with any other country, we have our own traditional dishes on Thanksgiving, and one of my
favorite dishes is Bulgogi. Nowadays, it disappeared in most districts, but as an old Korean custom, we set two different tables,
one for the elders of a family, and one for the children. Of course, more variety of food goes to the elders’ table, but I remember
my grandmother always filled the plate full of Bulgogi for the children, so that there were not many to go to the elders’ table.
My sisters and I were little back then, so the house was full of our happy faces, and our stomachs were always full with
grandmother’s delicious Bulgogi. Because I have this sweet memory, whenever I eat Bulgogi, I think of those days of a warm
and enjoyable atmosphere.
Because Bulgogi that my grandmother made was so special and delicious, I always wanted to learn how to make it, and
I finally got a chance just before I came to the United States. I was thinking about cooking Korean traditional food for my host family, and of course the first thing I thought of in my head was Bulgogi.
According to my grandmother’s recipe, first, combine soy sauce, sesame oil, sesame salt chopped scallion, garlic, onion, carrot, mushroom, and grated pear in a medium-sized bowl. Usually, people use sugar, but my grandmother put grated pear instead of sugar, and she also uses little bit of wine to make the meat much more tender. Then, add meat and marinate it for about a couple of hours before cooking it, so that it can develop a special flavor. Cook the meat over medium-high heat on a stove. Heat the pan first, and then cook the marinated meat and vegetables for about 20 to 30 minutes, browning it nicely. When it is done, garnish with sesame seeds and serve with rice and other side dishes.
1 In a large heavy based soup pot, heat the oil and fry the onions till soft over a low-medium heat.
2 Stir in the spices and fry for another 1-2 minutes.
3 Add the pumpkin, potato, lentils and stock.
4 Bring to a boil; cover and simmer for half an hour. Stir occasionally.
5 Puree the soup using a handheld blender or food processor.
6 Re-heat if necessary and serve garnished with croutons and chopped parsley or cilantro.
“A Ruby Thanksgiving tradition”, my mother calls it. Every year, as the end of November nears, my family begins to hype
about my mother’s pumpkin lentil soup. While it has been a popular family favorite for all fall and winter holiday dinners
and homecomings, not once in my eighteen years have I
desired to taste it. The look, the smell, the thick texture that
reminds me of a wool sweater,
has simply never appealed to
me. My brother and father wait all year
for it to be in season for
my mother to start cooking her famous soup, but I, on the other
hand, can keep waiting. No insult to my mother’s cooking,
though. I am a huge fan of her holiday dinners and chocolate
chip cookies, but this is one course I’d prefer to skip, as I just
find it unappealing to my taste buds. While I do not enjoy our
family’s favorite delicacy, I gladly refer to it as one of our
trademarks, and I mind my words, as I sit pleasantly, the only
one eating a salad at Thanksgiving dinner.
Tara Iannotti's Banana Bread
½ cup of shortening
1 cup of sugar
2 eggs
3 bananas mashed
1 ¼ cup of all purpose flour
¾ teaspoon of baking soda
½ teaspoon of salt
½ cup of walnuts/ chocolate chips ( optional)
Mix all ingredients and add the bananas and chocolate chips last. Bake for 50 minutes at 350 degrees.
For the short amount of time that this Banana Bread recipe
has been in my family, it has created many memories for us.
This simple and uncomplicated recipe can be made by
anyone. It's golden baked outside is filled with moist, soft,
banana goodness on the inside. It is a treat you cannot
say no to. It's fluffy texture and rich flavor will have you screaming
for seconds! Whether it is served with a tall glass of milk or a
hot cup of coffee, it definitely hits the spot. The first recipe that
many of my family members
first learned to make was this
banana bread one. This is my Grandma's custom because
she feels that cooking should be fun and as stress less as
possible. That is exactly what this recipe is, fun to make and
stress free. After years of making this sweet treat the
ingredients
have not changed! We add chocolate chips or
walnuts to
it every once in awhile, but other than that it has
remained the same due
to tradition. This was the first recipe
that my grandma ever taught to me as well. I use to make it
with her all of the time when I was younger and we still make
it together today. It always made me feel good about myself
knowing that I can make this delicious dessert
that my family
knew and loved. My grandma had gotten this recipe from
my Aunt Belinda, who married into the family 16 years ago. Although my Aunt Belinda was German, this recipe has
nothing to do with her heritage. She was a short, round
woman who happened to have a few mouth watering family recipes up her sleeve. No matter how many times we make
it no one ever gets tired of it. Whether you serve it at Thanksgiving or after a Monday night dinner it doesn't matter.
It isn't a fancy dessert; it is a very casual one. It's mouth
watering taste is what enables it be served at any occasion!
It may not be expensive in cost, but this banana bread is rich
with memories and history. I hold this recipe very close to my
heart not only because it was the first recipe I ever learned,
but because of the memories it holds. From the bonding that
my grandma and I have done while making it,
to the laughs
and conversations that my family and I shared while eating
it, this recipe is not just a recipe but the key to the past,
present and future. One day I will teach this recipe to my
own family and we will continue to make memories of
our own!
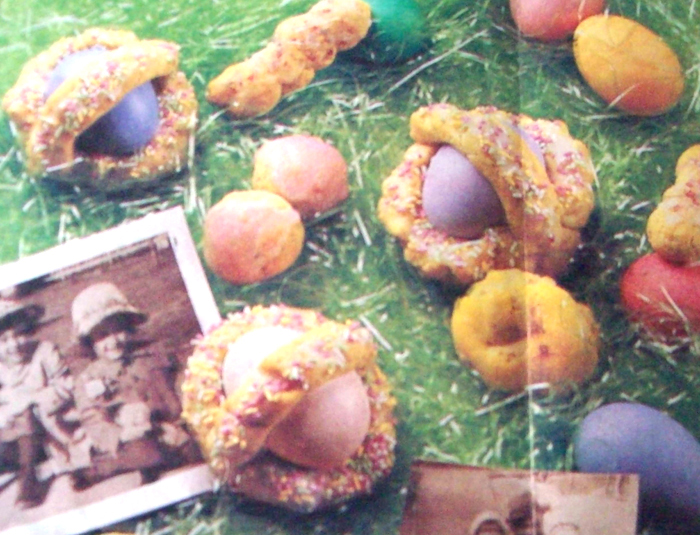
SzeMan So's Chinese doughnut
Ingredients:
6 cups (1 Ibs) high protein flour
2 cups water
2 tsp. ammonium bicarbonate or 1 TBSP. baking powder
2 tsp. baking soda
1 tsp. alum
1 tsp. salt
oil
Instructions:
1. Place ingredients of ammonium bicarbonate, baking soda, alum and salt in a mixing bowl; add water and stir until the ingredients have dissolved.
2. Add flour and mix well; let stand for 15-20 minutes.
3. Use hand to take some dough from around edges and drop into the center of the dough; let stand for 15-20 minutes.
4. Continue to drop the dough in the center of the bowl 3 or 4 times until the dough is elastic and smooth.
5. Turn the dough over and lightly coat the surface with oil so that the dough will stay moist.
6. Let it stand for 1 hour.
7. Remove the dough from the bowl and place it on a sheet of plastic wrap; wrap the dough and form it into a rectangular shape.
8. Let it stand for 4 hours.
9. If a large batch is made, cut the dough into several 1 lbs. pieces, then wrap each piece in a sheet of plastic wrap.
10. Unwrap the dough. Use a rolling pin to roll the dough and stretch it into a long strip.
11. Roll the dough into a rectangular shape, 3''wide and 0.1'' thick.
12. Crosswise cut the rectangular shaped dough into strips wide.
13. Put two strips on top of each other; Use a thin rod (skewer) or the back of a cleaver to press lengthwise in middle of the strips; this will attach them securely to each other.
14. Follow the same step for the other strips.
15. Heat the oil for deep-frying; pick up a strip from the ends and gently stretch it to make it longer.
16. Carefully drop it into the hot oil and turn it over continuously with chopsticks until the cruller expands and turns golden brown; remove from oil.
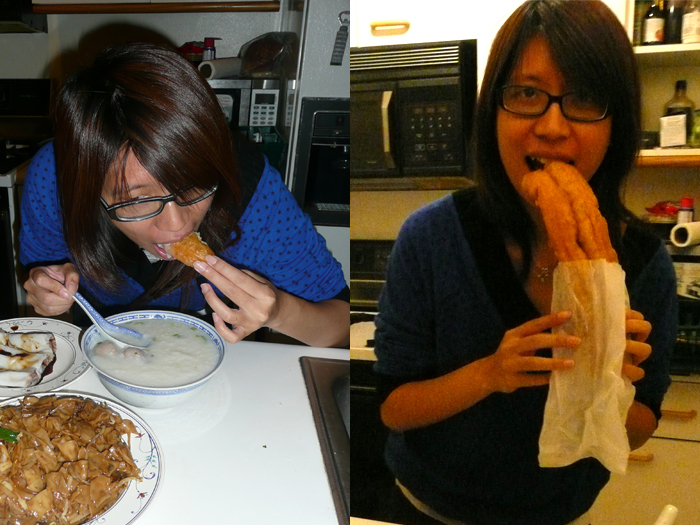
One of my family’s favorite dishes on the breakfast table is the Chinese doughnut. Each morning, my mom would wake up in the early morning and make congee (rice soup) and fried noodles at home, while my dad would go to a nearby restaurant and buy Chinese doughnuts and soymilk. The interesting thing about Chinese doughnuts is that they are quite different than American-styled doughnuts. First, unlike American-styled doughnuts which are usually round-shaped and have a hole in the middle, Chinese doughnuts are two long sticks of fried dough of golden brown color attached and served together. Second, Chinese doughnuts are not sweet and certainly not topped with sugar, chocolate, or glaze. Instead, Chinese doughnuts are soft and have relatively little taste by themselves. It tastes great when the Chinese doughnut is cut into small pieces and served together with congee and soymilk. Once my dad came home with the Chinese doughnuts and all the other dishes were ready, my family would gather and happily enjoy breakfast together to start our day. The tradition of having breakfast with my family everyday was one of the things I enjoyed most when I was young.
When I started attending elementary school, I found myself becoming more curious about the origins behind Chinese doughnuts because of its interesting name. For those who don’t know much about this dish, the literal translation of Chinese doughnut is actually called “oil fried ghosts”, which is certainly not a very appealing, if not scary name for a dish. So am I really eating fried ghosts? If I’m indeed eating fried ghosts, who are these ghosts and where did these ghosts come from? Wouldn’t we run out of ghosts to eat by now if we eat ghosts everyday? If “oil fried ghosts” are not made of ghosts, why would someone give such a strange and scary name to something we eat so often? One day, I finally succumbed to my curiosity and decided to ask my mother about the name of Chinese doughnuts and why they’re called “oil fried ghosts”.
It was very early in the morning and my dad had just left home to buy breakfast. I had just finished playing with my younger sister, and my mom was getting ready to help me get dressed for school. My younger sister and I usually played nicely; unfortunately this was one of those days where I took her toy away from her and made her cry in front of my mom. While my mom was helping me get dressed before breakfast, I finally decided to ask my mom the question about why Chinese doughnuts are called “oil fried ghosts”. Seeing that I had just made my younger sister cry, my mom decided to play a joke on me and told me we were eating ghosts of bad people who went to jail and died, and if I do bad things in life would end up just like them, being fried in very hot oil and end up getting eaten by other people. I became scared; after all, I had just taken a toy away from my sister and made her cry, and it was not the first time I had done this to my sister. Am I one of the bad people that my mom is referring to? Would I get fried and eaten just like these bad people? The mere thoughts of this made me shiver. When my dad finally came home with the Chinese doughnuts, I had already lost all my appetite and ended up eating very little for breakfast.
When I went to school that day, my history teacher noticed something was wrong with me. I was still somewhat shaken from what my mom told me in the morning, and since
I ate very little for breakfast I had very little energy compared to my usual self. My teacher asked me what happened, and I told her about what my mom told me in the morning before breakfast. I also told her that I was still feeling scared and I would never eat Chinese doughnuts again. To my surprise, she looked at me and started laughing about what I had just told her. Realizing that I was still a harmless kid and I would believe in most things my mom says (although separate from listening to my mom’s orders, of course), my teacher assured me that what my mom said was merely a joke and most importantly was not true. Instead, the name “oil fried ghosts” came from an urban legend which honors Yue Fei, one of the most famous generals in Chinese history. Being a history teacher, she went on and explained in details the story behind Chinese doughnuts to me and the rest of the class.
During the Song dynasty, Yue Fei was a famous and well-respected general best known for his loyalty towards the kingdom and the emperor. He had fought numerous battles against the Jin Dynasty and protected invasion into his kingdom’s territory. Yue Fei was so loyal that he even had the words “utmost loyalty serving the country” tattooed onto his back by his similarly patriotic mother. However, Qin Gui, the prime minister of the Song dynasty at the time, resented Yue Fei and saw him as a threat to himself. With the help of his wife and to gain more power within the kingdom, Qin Gui approached the emperor and convinced him to make peace with the invading Jin Dynasty and accused Yue Fei of fabricated charges. Unfortunately, Yue Fei was convicted and eventually executed by the emperor as a result, much to the public’s outrage. The public hated Qin Gui afterwards, and a dough maker took two pieces of dough, shaped them into Qin Gui and his wife, dipped them in boiling hot oil, and invited people to take bites out of his new delicacy. Because Qin Gui’s name (specifically the character Gui) has the same sound as ghosts in Chinese, people started calling this new dish “oil fried ghosts”, carrying the symbolic meaning of frying Qin Hui and his wife and eating them together as retaliation. This eventually evolved into the Chinese doughnuts we eat today.
Needless to say, I was relieved after hearing the folklore behind Chinese doughnuts, and that they are made from dough instead of real ghosts of bad people. I was no longer worried about eating “oil fried ghosts”; instead, I actually felt good about eating these Chinese doughnuts, knowing symbolically that I’m honoring one of the greatest heroes and patriots in Chinese history. When I left history class, my history teacher kindly reminded me to not take my sister’s toys away and make her cry. I immediately told her that I would be nice to my sister from now on. To my mom’s surprise, I started eating the “oil fried ghosts” again for breakfast the next day, and proudly told her what I had learned from history class on the previous day. While the “oil fried ghost” carries much symbolic meaning behind its name, fortunately the English translation of this highly popular Chinese dish does not accurately portray the literal scary name of this dish, and the look of this dish today does not resemble two human beings tied together and fried in hot oil. It’s a great tasting dish available in many Chinese restaurants in Chinatown, and it’s definitely worth a try next time you head to Chinatown for authentic Chinese food.
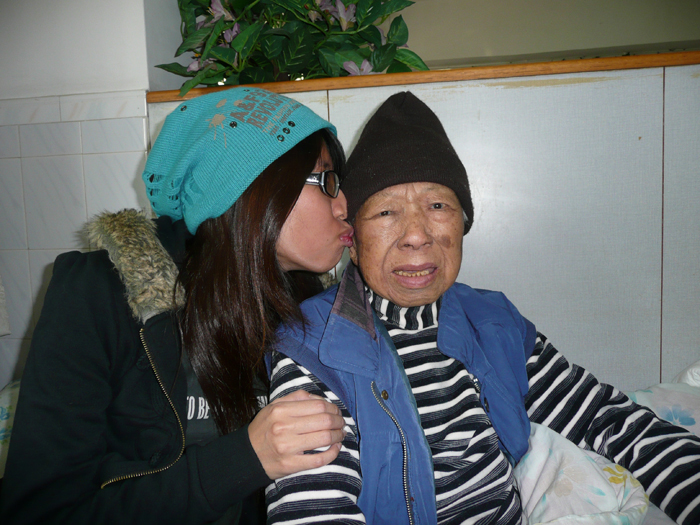
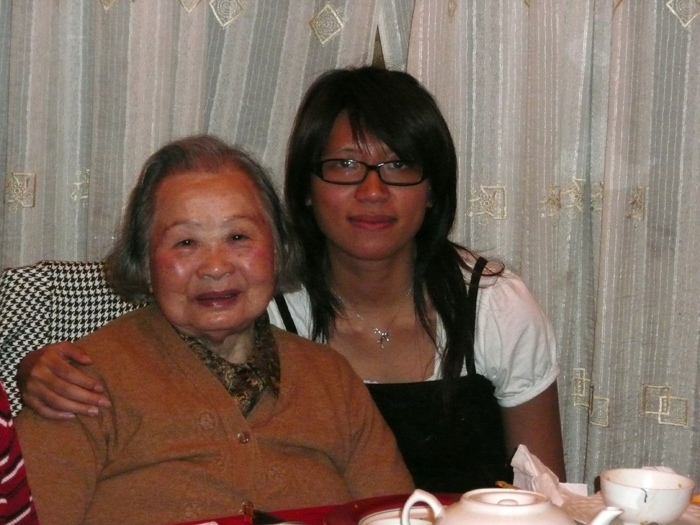
Picture with my another grandmother.
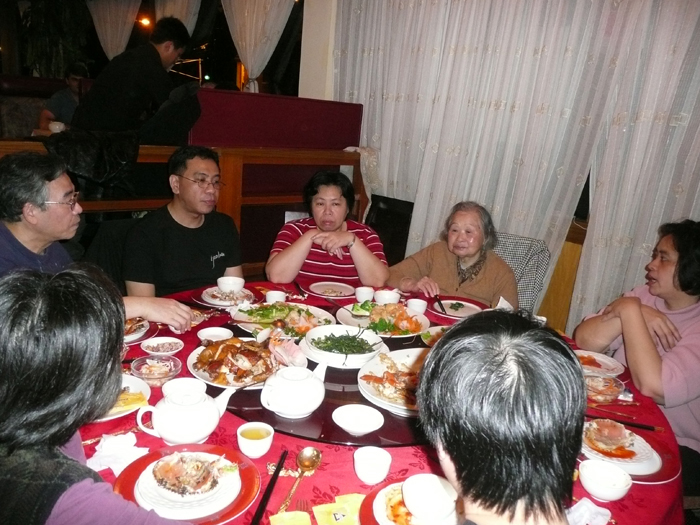
Dinner with my family at New Jersey.
Picture with my grandmother.
Eating my congee, Chinese doughnut, fried noble as my traditional Chinese breakfast.
Danielle Hiller's Baklava
Ingredients:
2 cups honey
1 cup sugar
1 cup water
1 tablespoon grated orange rind
1 teaspoon cinnamon
14 filo pastry sheets
1 cup melted butter
2 cups chopped roasted nuts
Boil honey, sugar, water, orange rind and cinnamon on low for 10 min and let cool down for one day before preparing dish. Preheat oven to 350F degrees. Grease baking pan and line with 4 pastry sheets. Glaze each sheet with butter using a bakers brush. Evenly distribute nuts over each pastry sheet and again brush butter all over. Pour the syrup all over and place to sheets
of filo over. Cover sheets with nuts, syrup and butter and then put 4 more pastry sheets on top each brushed with butter. Cut Baklava into 24 diamond shaped pieces and bake in oven for 30 minutes. After 30 minutes increase heat to 400 degrees F and bake for another 15 minutes.
After it is done in the oven pour the remainder of the syrup on top and let cool down and brush top with butter
I choose to do a recipe for Baklava because my grandparents are originally from Greece so this is a part of their culture and has become a part of mine as well. I chose this dish in particular over any other dish because my grandfather was a baker and owned his own bakery in Los Angeles, and because this desert is part of their Greek heritage it combines my grandfather’s skill of baking and my family’s culture. Every holiday my entire family on my mom’s side would get together at my grandparents home and have dinner and just spend time together. As a child and still to this day I look forward to when dinner time is over and the desert comes out. Each time my grandfather would make some different kind of
desert and every so often baklava was one of the deserts. Although it is not one of my favorites, I actually don’t even like it all because of how sweet it is, I have memories of this pastry more than some of the others he had made because it is related to my heritage and it reminds me of the stories my grandparents tell me about Greece and their past. When I see this desert in the bakery windows or at the grocery store I can’t help but think about the past and the holiday season when my family would sit around the kitchen table and catch up on everyone’s lives and just spend quality time laughing, sharing stories and unknowingly making memories that would last lifetimes.
Nicolas Turek's Chili
1. Beef
2. Water
3. Tomatoes/Tomato Sauce
4. Garlic
5. 2 spoons of chili powder
6. 2 Jalapeno peppers
7. Chopped onions
8. ½ salt
9. Pinto Beans
10. ½ Oregano
11. Sour Cream
12. Side of bread
My mother made this recipe of chili when I was growing up and I really think it has to be the best chili I ever had. All the store brand and restaurant chili cannot live up to my mother’s chili. Since I grew up eating this meal, it was the first chili I have ever tasted. When I visited Wendy’s, I exclusively bought the chili just to see what it would look like and was quite a disappointment. Obviously, it’s a fast food restaurant but it was quite a shock how low the standard was. It looked like red water with some beans, it was practically soup. Whenever my
mom makes it for dinner I know I am going to be well fed.
I usually end up eating everyone’s leftover chili at the dinner table because my mom makes such an abundance of it. Some of my family members don’t eat too much because it is too spicy for them. Afterwards, I do the dishes because I ate everything and save some chili to have in the morning. Having chili for breakfast is somewhat odd but you get used to it. It’s kind of like coffee, it gives you a lot of energy and you might get the runs which of course you become immune to over time.
Sofia Dimovska's Russian Salad
1. 700g - potatoes
2. 500g - ham or italian mortadella
3. 300g - carrots
4. 300g - cheese
5. 200g - green beans
6. 1 jar of pickles
7. 1 jar of mayonnaise
8. 3 eggs
The potatoes, carrots, green beans and eggs get boiled separately. Meantime, you can cut the cheese, mortadella and pickles into tiny little cubes (m&m size) and once the rest is boiled you finish cutting all of the ingredients. Then, when everything is cut up and thrown together into a big bowl, you put the mayonnaise in and stir it up. Salt and pepper are added to your taste. Salad should be cold so make sure you refrigerate it. When ready to be served, you can decorate in however you like, goes with everything.
Serving size: a scoop of ice cream per serving
Serving: 15-20 people
The Russian Salad, or better yet 'Ruska Salata' as we Macedonians call it, is nothing much special then a delicious
cold chicken salad, or a tuna salad. However, in Macedonia, everyone prepares the salad on special occasions. It could be a birthday, name day, holidays, many many family members and friends are invited and brought together to celebrate the significant event. The host usually holds the gathering at their house and prepares ALL of the food. Some of the older generations still bake the bread from scratch. Ruska Salata is especially made and designed in a way that people can
not get enough of it no matter how many years
they have
had it. It's the first food preparation that pops up on your
plate and there's always a second helping. Like a gucci
bag, or something expensive, you very much appreciate this
high caloric salad. It stands as sort of a symbol of celebration.
I always get the privilege to prepare it at my house and I'm
always diligently enthused. Makes me feel a tad bit special
when someone compliments the taste of the salad and my
mom proudly exclaims it was all done by me.
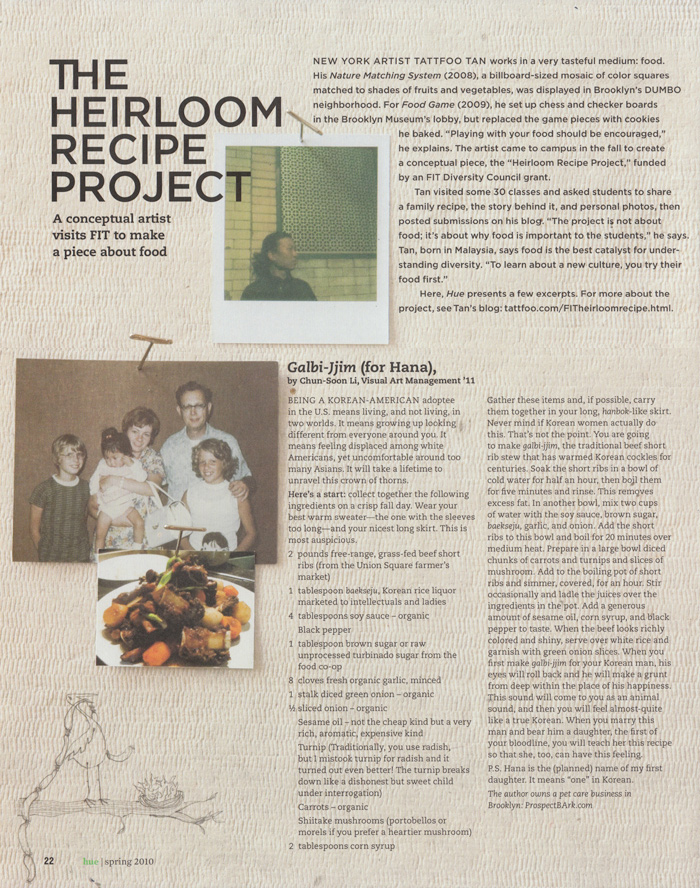
Chun Soonli's Galbi-Jjim
Heirloom Recipe: galbi-jjim for Hana
Being a Korean-American adoptee in the US means living in, and not living in, two worlds. It means growing up looking different from everyone around you. It means feeling displaced among white Americans (though you are much too young to think in this way) yet uncomfortable around too many Asians. This is a marked alienation that marks you when you are very, very young, and its effects are total.
It will take a lifetime to unravel this crown of thorns.
Here’s a start: collect together the following ingredients, on a crisp Fall day, when the sky is clear from any hint of rain. Wear your best warm sweater, the one with the sleeves too long, and your nicest long skirt. This is most auspicious.
2 lbs of free-range, grass-fed beef shortribs (from the U.Square farmer’s market)
1 Tbsp bek seju, Korean rice liquor marketed to intellectuals and ladies
4 Tbsp. soy sauce - organic
black pepper
1 Tbsp. brown sugar – or raw unprocessed turbinado sugar from the food coop
8 cloves fresh organic garlic, minced
Diced 1 stalk green onion – organic
½ sliced onion – organic
sesame oil, not the cheap kind but a very rich, aromatic expensive kind!
turnip (traditionally, use radish, but I mistook turnip for radish and it turned out even better! The Turnip breaks down like a dishonest but sweet child under interrogation)
carrots – organic
shitake mushrooms (portabellos or morrels if you prefer a heartier mushroom)
2 Tbsp. corn syrup, even though corn is already 80% of the American diet and the harbinger of our agricultural doom
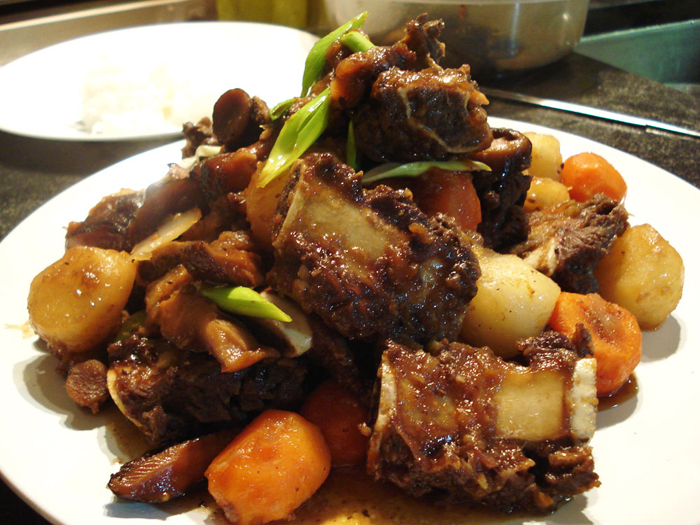
On this auspicious day, this most blessed Day of our Lord, gather these items and, if possible, carry them together in your long skirt, just like a hanbok. Never mind if Korean women actually do this. That’s not the point. You are going to make galbi-jjim, the traditional beef sparerib stew that has warmed Korean cockles for centuries, to be enjoyed by your Korean lover on a crisp Fall day in the city, a cold city after all. His mother made this for him, every day she made him Korean food that touched his heart and filled his belly, and you will now do the same. Start by “cleaning the meat”. Soak the spareribs in a bowl of cold water for half an hour, then boil them for five minutes and rinse. This removes all excess fat, though free-range beef is lean to begin with. In another bowl, mix 2 cups of water with the soy sauce, brown sugar, bek seju, garlic and onion. Add the spareribs to this bowl and boil for 20 mins over medium heat. While this is boiling, prepare the other
ingredients in a large bowl: Diced chunks of carrots, chunks of turnips, and hearty slices of mushroom. Add these ingredients to the boiling pot of spareribs and let simmer, covered, for an hour. Stir occasionally and ladle the juices over the ingredients in the pot, mixing well. Add a generous amount of sesame oil, corn syrup and black pepper to taste. When the beef is looking richly-colored and shiny, serve with some green onion slices as a garnish and serve ladled over white rice, or with the rice on the side. When you first made kalbi-jjim for your Korean man, his eyes lolled back and he made a grunt from deep within the place of his happiness. This sound of happiness came to you as an animal sound, and you felt almost-quite like a true Korean, then. When you marry this man and bear him a daughter, Hana, the first of your bloodline, you will teach her this recipe so that she, too, can have this feeling. The feeling of being in the world.
ps: Hana is the (planned) name of my first daughter. It means "one" in Korean.
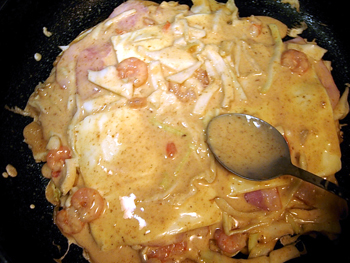
Jessica Kropp's Roasted Pork Chops and Potatoes
Ingredients:
4 thin pork chops
Flour or bread crumbs
2 to 3 large ripe tomatoes, thickly sliced
3 to 4 large potatoes peeled, and thinly sliced
1 to 2 large onion peeled, and sliced
1 teaspoon fennel crushed seeds
1 to 2 springs fresh crushed thyme
2 to 3 sprigs fresh crushed sage leaves
Kosher salt, and freshly ground peeper
2 cups vegetable or beef stock or dry white wine
Method:
4 servings
Preheat the oven to 350F
In a large flat bottomed dish dredge pork chops in flour or bread
crumbs. Set aside.
In a large casserole dish, layer in this order:
½ of the tomatoes
½ of the potatoes
½ of the onions
Carefully place the pork chops over the onions Sprinkle fennel, thyme,
sage, salt, and pepper to taste over pork chops.
Place the remaining
tomatoes, potatoes, and onions in layers over the pork chops. Cover
with stock or dry white wine.
Bake for approximately 45 minutes to 1
hour or until the chops are tender, and the potatoes are cooked. Add
more water
if the liquid appears to be drying up.
In years before my time, home owners in Marsaxlokk, Malta did not have the luxury of home ovens. So how in the world would they cook something? The only other alternative they had was to use the local baker’s oven. Mothers, grandmothers and grandaunts used to be busy in their kitchens Sunday morning after Mass, preparing for a family dinner like roasted pork chops and potatoes. They would carefully place the pork chops neatly surrounded by sliced potatoes and thinly sliced onions in an aluminum roasting pan. They placed a tea cloth over the pan, leave their house, and hurried along the seaside of Marsaxlokk Harbor to a baker whose bakery was behind the town church, Lady of the Rosary the Madonna of Pompeii. These elderly women, all dressed in black, entered a side-opening garage door, which from the outside, was
indistinguishable from the other on the block. Inside the bakery, these women and other women clutched their heavy pans and casserole dishes such as baked ziti, tuna pies, and the dish above, which would soon be their family’s Sunday dinner. Later in the day, at about noon, they returned to the baker to pick up the cooked entrees which would be ready for serving. On their return home all the neighbors would know what his or her neighbor would be having for dinner. The food’s aroma seeped through the tea cloth. The families gathered around a large table, where the adult males got first preference. After payers, food was slowly digested accompanied by homemade wine. Once plates were cleaned, everyone made their way into the living room and where they ended up taking a nap.
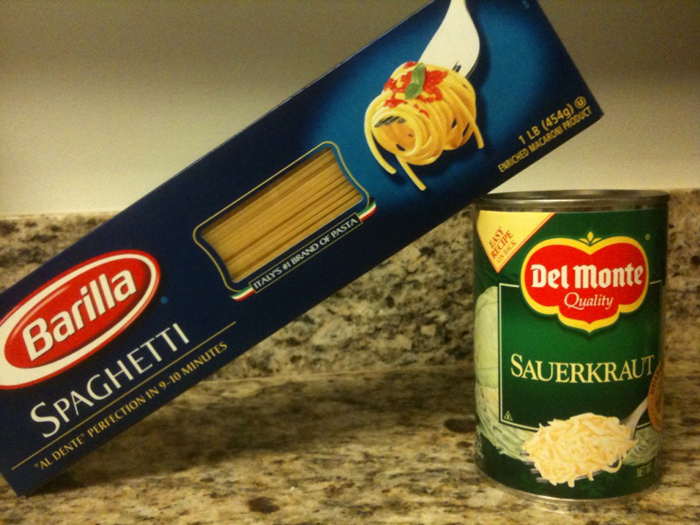
Michael Hyde's Sour Spaghetti
1 jar/can sauerkraut
1 pork roast
salt and pepper to taste
Roast the pork and heat the sauerkraut and then combine. There's not really a process to follow.
I grew up in the middle of Pennsylvania, near Lancaster county, well-known residence of the Amish, so many of my own family traditions were influenced by German-settler traditions and by those who have come to be called the “Pennsylvania Dutch” (people who were not actually “Dutch” but “Deutsch,” “Dutch” being a mispronunciation of the German). On New Year’s Day, our family meal was pork and sauerkraut, a meal drawn from German tradition, and eating it meant prosperity and good tidings for the New Year. I never liked pork and sauerkraut growing up (although as an adult I often crave it), so for most of my youth, I found myself hating New Year’s Day because it meant that we would be eating pork and sauerkraut, not the more luxurious and labored turkeys and foody sidecars of Thanksgiving and Christmas, but pork (which I only liked in bacon form), soaked in salty, vinegary cabbage.
I was a very picky eater, and although a generally quiet child, a very stubborn and opinionated one. Once, for a few weeks, I refused to eat anything but Chips Ahoy!, and my parents, not wanting me to starve, complied. So, one New Year’s Day,
in an attempt to get me to eat the family meal with them, my parents told me that we were having pork and “sour spaghetti.” What kid doesn’t like spaghetti? I remember being open to their coercion, the possibility that calling something a different name might actually change the taste of it. But when I was served my big plate of sour spaghetti--they still couldn’t get me to the point of eating pork roast!--I took one bite, and the meal was over. I think back to other times my parents tried to convince me through language that what I was seeing was something other than what I was seeing: the time my mom tried to serve me the white-tail deer my father’d shot during hunting season, insisting it was the more usual “steak” that I loved cut into tiny cubes with a side of ketchup for dipping; or that pig souse, another pork product derived of Pennsylvania Dutch origins, was actually some type of JELL-O, another of my childhood favorites (if you’ve ever tried pig souse, you know that the gelatinous cube of meat and marrow is at far reach from cherry JELL-O). I suppose, though, I learned quite early this very important lesson: when ears and eyes might be fooled, good taste wins out in the end.
Talia Zimmerman's Cholent
1 ¼ cups dry mixed beans
2 Tbsp vegetable oil
200 g (8 oz or one large) onion, coarsely chopped
3 cloves garlic, minced
1 ½ Tbsp Hungarian paprika
1 ½ tsp salt
1 ½ tsp pepper
¾ cup barley
1 ½ lb (700 g) potatoes, peeled, cut into large chunks
1 chunk (about ½ kg or 1 lb) beef brisket
1 smoked beef bone or marrow bone
6 eggs in shell, washed
You may use one kind of beans or mix several kinds. For eye-appeal, I
like to mix small white navy beans and large red kidney beans or black
beans. Rinse beans then soak for 5 to 8 hours in enough water to have
three finger-deep water over top of beans. When soaked, drain.
Heat oil in a large heavy skillet over medium heat and sauté onion
until transparent. Add garlic, stir for several minutes over heat then
add paprika, salt and pepper, and continue to cook for a minute. Remove
from heat.
Combine beans, onion mixture, barley, potatoes, brisket and bone in a
large baking dish or dutch oven with a tightly-fitting lid. Carefully
slip in raw unshelled eggs and bury them under cholent mix. Add water
to cover.
Place tightly covered pot in oven (seal lid with aluminum foil if not
absolutely tight) and bake at 100 degrees C (200 degrees F) for at
least 6 hours and up to 18 hours. Check liquid level occasionally to
prevent cholent from drying out and replenish if needed.
When ready to serve, dig out eggs, shell them and serve in quarters as
first course with fresh raw vegetables or crackers. Remove brisket and
slice. Serve brisket and cholent family style on serving dish. The best
accompaniment with cholent is an assortment of good pickles and
sauerkraut. Yields 6 to 7 generous servings.
Cholent has been a food in my Jewish culture for hundreds
of years.
The main objective of cooking this fascinating
dish is to allow it to
cook over Friday night until Saturday
afternoon, the holy Sabbath.
Since turning on a flame on
the holy Sabbath is forbidden in my Jewish
culture, people
began to cook cholent, which can cook over night.
One
would prepare the cholent before sunrise on Friday, and
allow it to
cook until the next day. When it comes to eating lunch
on Saturday,
observant Jews can eat the cholent that had been
cooking for 18 hours.
Cooking cholent has made it easier for
Jews to observe the holy
Sabbath, since there is no need to
turn on or off the flame.
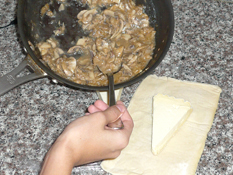
Maria Mendes's Stuffed Mushroom with Brie ( A Mushroom Delight)
Ingredients:
1 small onion
1/2 pound button mushrooms
4 tablespoons unsalted butter
3 tablespoons of soy sauce
1/2 teaspoon freshly grated nutmeg
1 package frozen puff pastry sheets
14- to 17-ounce wheel Brie or triangle
1 large egg
Instructions:
Preheat oven to 425°F.
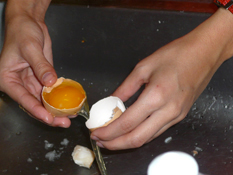
1- Mince the onion and finely chop the mushrooms. In a skillet cook the onion in butter over moderate heat, stirring, until softened. Add mushrooms, soy sauce, nutmeg, and salt and pepper to taste and sauté over moderately low heat, stirring,
until liquid mushrooms give off is evaporated. Cool mushroom mixture.
2- On a lightly floured surface roll out 1 sheet of pastry into a 13-inch rectangle and, using Brie as a guide,
cut out the size of the Brie.
3- Horizontally halve Brie. Roll out remaining sheet of pastry into a 13-inch square. Center bottom half of Brie, cut side up,
on pastry square and spread mushroom mixture on top. Cover mushroom mixture with remaining half of Brie, cut side down.
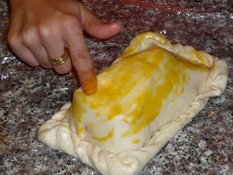
4- Wrap the pastry over the Brie. Top Brie with pastry square, pressing edges of dough together gently but firmly to seal.
Brush top of pastry with some egg yolk.
5- Bake the pastry in middle of oven until pastry is puffed and golden, about 20 minutes. Let the pastry stand for 5 minutes
and transfer with a spatula to a serving plate.
Serve The Mushroom Delight with bread or crackers.
Serves: 10
The first time I remember having mushrooms was at a Japanese restaurant, which soon became my favorite dish in the menu. The shimeji mushroom is made in an aluminum foil envelope with soy sauce, butter and a slice of pineapple. It is absolutely delicious, it is the perfect combination of salt and sweetness, not only the mushrooms are cooked to perfection, the pineapple that stays underneath is soaked in all the juice that stays deposited at the bottom. At this moment I realized that a new pallet door was opened before my eyes, that I had a new world to explore. Growing up in Brazil we had our challenge back in the days trying to find different ingredients, it was only in the mid nineties that we then had access almost every ingredient. Even though it is hard to remember the exact moment but, I think I can pin point this as the start of my culinary journey.
About nine years ago my interest in cooking became more and more a part of my life. Every weekend our family would get together to cook a Saturday lunch or a Sunday dinner. In one of these fabulous gastronomic weekends, I clearly remember my mom, my aunt and I cooking a starter dish for our mothers day lunch. We had dried fungi mushroom in our cabinet, patê and crème fraiche. I can’t clearly recall exactly who thought of it, but someone did. Instead of eating the patê as an appetizer, as we normally did, we decided to make it as a starter. In the fridge we had some left over puff pastry. We cut it into rectangles and made a little nest, with the hot, sautéed patê on top, finished with dried fungi, red wine creamy sauce. Just by writing this down, the taste buds in my tongue started to feel one of the most perfect combinations of flavor I have ever tried. The variety of textures in this dish is amazing; there is the crispiness of the puff pastry, the softness of the patê and the creamy sauce with sponge like mushroom finely chopped. As I tasted it, this recipe immediately sunk into my heart and brain. Ever since I had an opportunity to cook I would make this dish so I could impress my friends and family with this amazing food experience.
Having read a lot of cookbooks and watched many cooking TV shows, I became more creative and adventurous within my cooking. With all this knowledge and a pinch of courage, I started changing some recipes I had, to my own taste and started to feel like a chef! With this recipe it wasn’t any different. As I had made it many times I got bored repeating it, even though it is a masterpiece, it was loosing it’s special ness. The first variation I made was to place the patê inside the pastry and the sauce on top. The next variation was to add Brie inside the pastry (since I had no patê) and I made it bite size as an appetizer and dip it in the fungi sauce. This turned out very delicious because the cheese is all melted inside and the pastry is still crispy.
As time passed, I played a lot with all of these variations I got tired using the fungi, as its taste is very powerful, in the end all the variations ended up having a similar flavor, I decided to experiment with a different mushroom. It was when my mom went to the grocery store a bought me button mushroom; a white round mushroom. This time I decided to add more flavor to it so I chopped some onions and fried them with a lot of butter in a skillet, I then added the chopped mushrooms, the soy sauce (from the shimeji recipe) and a pinch of grated nutmeg. I opened the pastry, cut the brie in half and placed the mushroom on top and “closed” with the other half of the brie like a sandwich and wrapped the pastry as an envelope, placed in the oven until it was crispy golden. As soon as I tasted I realized I have created something wonderful, delectable, delicious and very simple to make recipe!
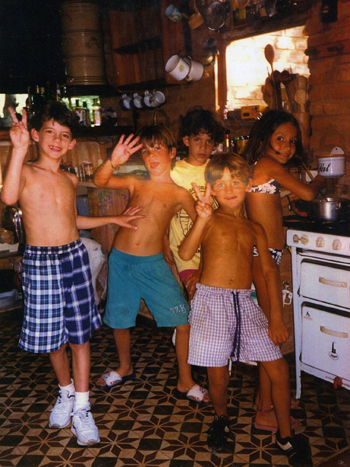
It was a matter of two lunches and it soon became one of my signature dishes. I’ve done it many times as an appetizer, my friends always requests me! Ever since all the lunches I cooked at home, my friends will always ask me if I can make it! The pictures I took of the recipe procedures, I was actually cooking it for one of my friends that were throwing a party this Saturday. Gladly again, it was a complete success!
Me and my cousins cooking at the age of 9
This is me cooking in NYC! Age: 22
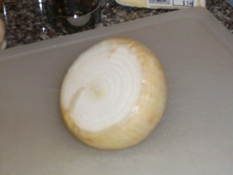
1. Wash the onion and divide it in half.
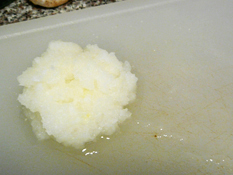
2. Mince the onions.
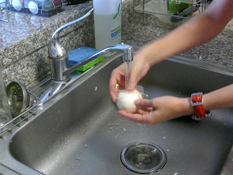
3. Wash the mushroom gently under warm water.
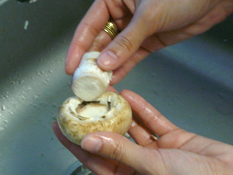
4. Remove the stalk from the mushroom.
5. Finelly chop the mushrooms.
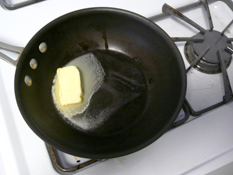
6. Melt the butter in a skillet at
medium heat.
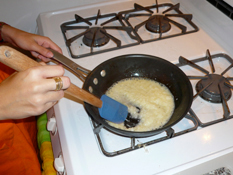
7. Add the onion and sautee it for a few minutes before it turns brown.
8. Add the chopped mushrooms.
9. After the mushroom has decreased in size, add the soy sauce.
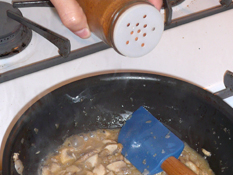
10. Add a pinch of nutmeg, salt and pepper. Mix it well and let it simmer in
low heat until most of the juice has reduced. Let it cool.
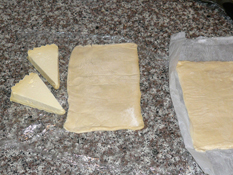
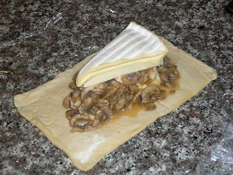
11. Open the pastry and divide the brie
in half.
12. Place the brie on top of the pastry
and then a few spoons of mushrooms. Be carefull not to over do it.
13. Place the other brie on top, closing it like a sandwich.
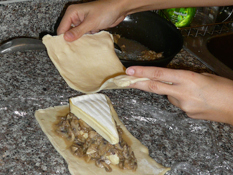
14. Close the mushroom delight with the other pastry sheet.
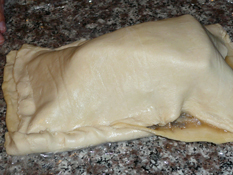
15. Gently close the pastry and twist it slightly so it closes tightly.
16. Separate the yolk.
17. Gently with your finger or with a brush, spread the yolk on top.
18. Place the mushroom delight inside the oven pre-heated at 400F for fifteen minutes or until gloden. Serve with crackers and enjoy!
Jennifer Chow's Fu-juk Tong
Ingredients:
• Whole Chicken (skinless)
• Sun-dried Shitake Mushrooms
• Japanese Ginkgo Nuts
• Water Chest Nuts
• Dried Soybean Sticks
• Salt
• Water
How to prepare:
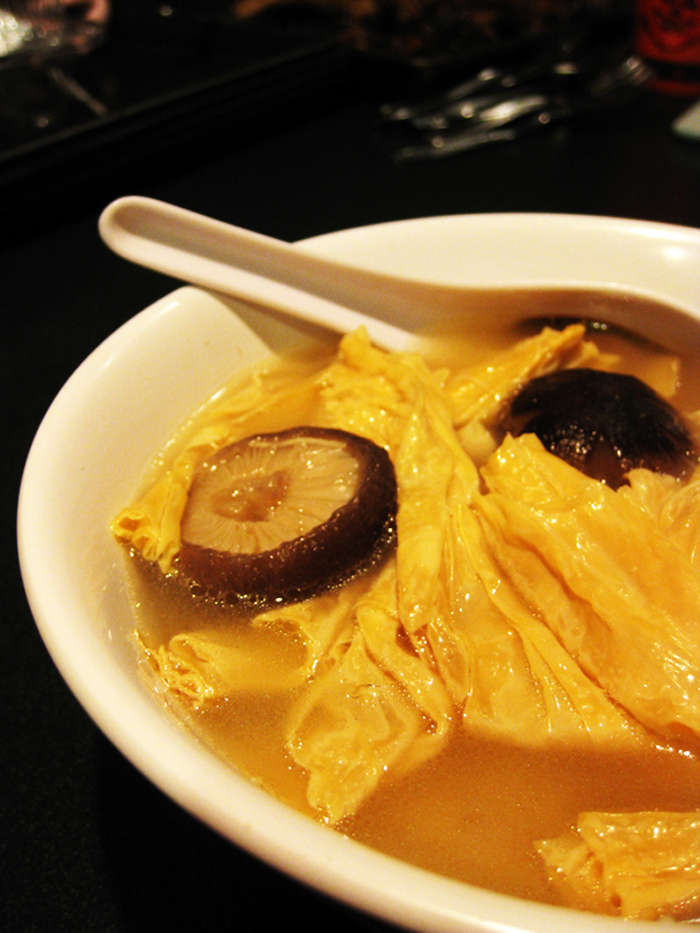
This recipe is very simple, but is somewhat time-consuming. First blanch the whole skinless chicken, and then place it in a pot of pre-boiled water. Add the sun-dried Shitake mushrooms in the pot as well, which should have been soaked in water beforehand to soften the mushrooms from its dry state. In addition to the mushrooms, peel and cut the Water Chest nuts in halves and add them into the mixture of ingredients. Then take a handful of Japanese Ginkgo nuts and mix them into the pot along with everything else. Close the lid of the pot, and let the soup boil slowly for 2 hours, while the chicken begins to tender in texture. In the meantime, allow the soybean sticks to be soaked in cold water until it begins to soften. Squeeze the liquid from the soybean sticks after they are done soaking and cut them into about 4 inch pieces each. Add the soybean stick pieces into the soup and let the soup simmer for another 10 minutes. After those minutes have elapsed, add a pinch or two of salt to flavor the soup some more and then feel free to serve and enjoy.
Reminiscing to a time when I was much younger, I can recall a memory of when I had entered my house without even realizing I had made my way up to the porch and through the front door, as my thoughts and nose were preoccupied by the scent that marked its territory throughout the house. As I made my way subconsciously into the cluttered kitchen, the scent grew stronger and my mouth began to water, wanting undeniably to just have a peak at the delicious smelling food my mother was preparing. Because I was much younger at the time, it was hard for me to get past my mother, as my height was comparable to the hard white counter tops of the kitchen. “Mui-Mui!” my mother would shout, “Get out of the way and go play in the living room while I finish cooking. The soup will be done by dinner time.” My eyes were fixated on the big silver pot in which my mother was cooking the soup in and began adding several condiments to without measuring, as she has made this soup countless of times, to enrich the delectable flavors.
I waited with anticipation in the other room, mindlessly watching random cartoons running around on the screen of the TV, wanting so badly to enjoy the delicious soup. As I waited impatiently, I heard my brothers running down the stairs for dinner, one in which who ran towards the kitchen to see what my mother was making. “Mammia, I want all the fu-juk there is in the pot!” said my brother in an anxious tone. Once I heard this, I began to exclaim, “No Mama! Don’t let him have it all. Save them for me too!” My mother began to laugh and assured us both that there was plenty for everyone who wanted extra after their first bowl.
The mouth watering soup in which my brother and I craved for is called, “Fu-juk Tong.” In English, the name of this home-made soup is simply translated to, “Soybean Stick Soup.” The main ingredient of the soup is not actually the broth, but the last incorporated ingredient, the soybean sticks.
Soybean sticks are basically made from soy milk. Once the milk is left to set for a while, a thin layer of the milk will form on top of the liquid. Afterwards, the skin-like layer would be lifted gently from the liquid and would be placed on a flat surface to dry. Because this is such a time consuming process, you can simply purchase a package of the dried soybean sticks at any Asian oriental food store.
This soup has always been something that my brother and I would fight over, to have the most fu-juk in our bowls than anyone else. Simply because the fu-juk, or soybean stick is the best part of the soup and the most important ingredient of all. To other Chinese people, this soup may not have much of a special importance because it is considered to be just another typical Chinese soup that everyone knows how to make. Though, this soup holds certain significance to my heart because I feel that only my mother could make it the best, and when I am ever to be sick, it is the comfort food I always suggest to be made.
As many times that my mother will make this, I can honestly admit that I will never get restless over this soup. It just tastes wonderful every time it is made. There’s just something about home-made soup or food that cannot be compared to anything else, especially if your own mother or loved one took the time to make it themselves.
After my small argument with my brother, I can proudly say that victory was mine. My mother smiled at me that night and slipped in a few extra pieces of fu-juk in my bowl discreetly, and as a child, it meant the world to be able to defeat my older brother in any way possible. I jumped for joy as my mother set the bowl in front of me, and with my soup spoon, I remember happily scooping a piece of fu-juk and soup into my mouth and chewed in delight and satisfaction.
Emily Pellerin's Sweet Cornbread
Golden, the color you would find inside the black pot at the end of the rainbow, and it glistens the same way, too: a little butter on top, melted, shining. Browned at the edges, but only slightly, as if someone had snuck in and used a thin leaded colored pencil to subtly, delicately, surround the bread. Heaping; seems it may burst through its center and explode onto the ceiling, maybe leaving a hole in the middle, and a tear on top where it had deflated after blowing up.
You can almost smell its warmth, encompassing you, warmth that can crawl its way around the house and carry with it the sweet freshness of the baked good, and it will find you and this is the signal that it has reached perfection and must be taken care of immediately before such perfection has passed.
You can taste it before it touches your lips, enters your mouth. You can’t quite taste it while you’re stirring the batter, you can’t quite taste it when it is in its first few minutes in the oven, but you can taste it, you can taste it so bad, when it hits that warm, perfect, heaping, golden browned stage. And then when it does touch your lips, enters your mouth, you can feel it, see it, smell it- taste it; experience it. Sweet, granular bites of thick meal baked with that extra half-cup of sugar, crispier on the bottom and soft, fluffy, warm everywhere else.
“Combine dry ingredients,” it instructs. “Stir in egg, milk, vegetable oil.”
“Bake.”
Na-Na knows the recipe by heart, and it’s one of those things that grandmothers teach you someday, so I’m sure I’ll know it soon. What I do know is that she can make it in what seems like five minutes, I swear, with her eyes closed and her hands behind her back. What I do know is that somehow she slyly throws in an extra half-cup or two of sugar. What I do know is that there is always a cast iron pan of it sitting on the counter, and always a fresh pan in the oven. And I know that none of it goes to waste, because there seems to be a convenient replacement every time the pan on the counter ends up as lonely golden breadcrumbs. Yep, Na-Na’s got it down. And I’ll be taught someday. I’m sure I’ll know it soon.
Eunsook Kim's Seaweed Soup
When I was very young, I used to say that my birthday was my favorite day in the year for receiving lots of presents from my parents and friends. However, presents were not the only reason for this preference. Another reason was the seaweed soup cooked by my mom on my birthday.
In my country, we have a special dish that represents birthdays. We eat seaweed soup called Mi Yock Kuk that is very good for our health and skin, especially for women. The way to cook this dish is easy to everybody except for me. Before cooking, prepare all materials : beef 80g, beef sauce (including one tablespoon soy sauce, sesame oil and one small tablespoon minced garlic), seaweed and four tablespoons soy sauce, salt, one tablespoon minced garlic, and one small spoon of perilla oil. First, put the beef in the water until the blood fades out. And then, cut it into bite-size pieces. Second, mix beef and seasoning sauce together and wait until the beef soaks in. Third, put the seaweed into the water for about one hour and squeeze the seaweed after rinsing it in running water three to four times. Fourth, roast the beef and seaweed for five to ten minutes. But roast the beef first and put the seaweed in later, just before the beef is totally roasted. You don’t have to add water or oil because seaweed already has water in it. But if it is necessary, a little water is fine in case. Sixth, boil the beef and seaweed together for one hour. Keep the lid covered. Seventh, add perilla oil, salt and soy sauce to your taste while the soup is boiling.
According to the recipe, this is not a difficult dish to cook. However, I didn’t know I was that poor at cooking when I was young. There is an unforgettable mistake I made in the past on my mother’s birthday. It was early morning of my mother’s birthday, and I prepared to cook this traditional seaweed soup for her breakfast. I bought seaweed and beef the day before and also had the recipe in my hands. I remember I was happy with the thrill of doing something for someone’s special day. I smiled in the kitchen like a silly girl and was excited to see my mom’s face in front of my present. I followed the directions of a famous cook who wrote the special recipe on this dish. I was fine until the third step before roasting the beef and seaweed. While I was washing a frying pan, I found something happened to the seaweed in the water. Although I put a very little amount of seaweed for three people’s breakfast in the beginning, the amount became three times bigger, like a sponge turns larger in the water. The pot was too small for the big amount of seaweed and actually, I could see it partialy come out of the pot. The frying pan was also not big enough for this so I stopped washing it and tried to cut the seaweed.
Cutting seaweed was not an easy thing for this amateur cook. I felt it was much more difficult than my midterm one week ago . It was too long because it was tangled up with each other. I spent lots of time trying to cut the seaweed. While trying to cut the seaweed into bite-size pieces, everything like plates, spoons, forks, and cups turned messy. I looked like a child playing house despite my age, seventeen. I didn’t recognize that I was making enough noise to wake up my parents. I was squeezing the seaweed when my mom entered the kitchen. Her quiet voice surprised me very much. “What are you doing there, daughter?” my mom said. I was frozen before her and just showed her the seaweed. My mom looked very shocked because she knew I didn’t like cooking and moreover, I hardly came into the kitchen except to drink juice. However, her next words were more shocking to me. “Is it your homework to cook? my mom asked. She didn’t presume I was cooking for her birthday although it was the traditional birthday dish. “I just wanted to eat the seaweed soup I made. But this mean seaweed never listens to me. Will you talk to this big seaweed? She will be gentle before you because you know how to cook it,” I complained with a joke. “Oh, daughter, I think the seaweed doesn’t want to be separated. Let’s just use a larger pot,” she also made a joke. She put the seaweed into a bigger pot and made the soup. Because of my mistake, my family had to have the same soup for four days. I also remember that my mom seemed pretty happy with my effort. And she said, “Daughter, I was a terrible cook before marriage. I can see you are really my daughter. Time will solve this problem. Don’t worry. And promise me not to cook without saying anything to me before cooking.” She teased me until the end by making a joke like this. Now I understand when someone cooks a dish for somebody, it will require a lot of effort and time. However, that was my first and last time to cook seriously. Since that time, I always thank my mom for cooking delicious food everyday.
Melissa Watson's Boogalowies (Biscotti baskets with eggs)
Hard boil and color up to 3 dozen eggs. Then put aside.
Pre-heat oven to 350 degrees
Dough Ingredients:
10 cups of flour
1 lb. butter
1 lb. sugar [2 ½ cups]
3 teaspoons of baking powder [heaping]
4 eggs
1 tablespoon of almond extract [can use vanilla]
1 to 2 cups of milk
Instructions:
Mix flour, sugar, and baking powder. Mix in butter. Add eggs, extract
and 1 cup of milk. Mix until soft like cookie dough. Add more milk if
too dry. You do not want sticky dough, add flower if needed.
Roll about 2 ounces of dough with your hands into the shape of a
sausage, about 2 inches in length. Place on a cookie sheet about 2
inches apart. Place one of your eggs in the center of each cookie.
Press gently. Take some dough in your hands and roll a rope about ¼ inches thick. Put a piece of rope across the egg and criss-cross it. +
Bake about 20 minutes. Let cool. Frost
{use leftover dough to make cut out cookies}
Frosting Ingredients:
1 cup of powder sugar. Add 1 teaspoon of desired extract. Add water a
teaspoon at a time till thin enough to spoon on cookie. You can also
use a clean small paint brush. Sprinkle on sugar sprinkles and enjoy.
The making of Boogalowies goes way back to my mother’s great
grandparents and has been passed down generation to generation. My
Grandmother learned the recipe from her mother who grew up in Palmerno,
Sicily and moved to the United States in her 20’s. She lived in New
York City and worked in a candy factory. This is where she met her
husband, also from Sicily and developed a love for sweets. She would
make Boogalowies every Easter for her family and friends. Keeping the
Italian tradition alive, my mother and I make Boogalowies every Easter!
This recipe is festive, colorful, and very delicious. Having a
nutritious colored egg surrounded by a cookie with sprinkles is
brilliant; I got away with eating it for breakfast!
Sue Watson (my mother) and Melissa Watson (me)
Sitting in the center of her two daughters is my mother’s
grandmother Carmella Nicolosi. From Left to right: Mary Nicolosi (my
mother’s mother) and Lucy Nicolosi
(my mother’s aunt).
Emily Kao's Chocolate Shrimp
It was on two days before Valentine’s Day in 2009, when my friends and I decided to make our own chocolate for our boyfriends. After class, I drove three of my friends with my tiny, cute, red Mini Cooper to a supermarket in order to buy the ingredients for making chocolate that we searched for online. We walked through all the aisles in the supermarket. However, it was not a professional snack ingredient store. There were so many ingredients we could not find in the supermarket such as brandy essence and 100% dark chocolate. With the four of us standing next to the chocolate section and looking at each other in silence, I bet that we were all pondering about the same question, “What should we do?” It turned out to be that we just melted the chocolate and mixed or decorated with various nuts and colorful fruit.
After we went back to one of my friends, Jenny’s apartment, where we decided to spend the night working on the chocolate creation, a mess was waiting for us. The sink was full of unwashed dishes and food and snacks were all over the kitchen counter. It took us a while to clean up. We actually started it when the night was darkened.
Before we embarked on melting, we thought it was going to be easy, just melted, shaped, and attached to some nuts. However, when we started to melt the chocolate, it was not easy as we thought it would be. We had to put chocolate in a bowl and put it in another bowl with warm water in order to melt it. There are two rules that we had to be really careful about. The first one is the temperature of the water. The chocolate remains the same hardness if it is not warm enough and chocolate burns if the water is too hot. The other is we cannot let the chocolate get any water on or the chocolate will not harden back after being melted. We did not know how clumsy we were until we smelled the burning. It was frustrating. However, we enjoyed doing it because we were struggling for the people we loved.
We cooperated. One girl was cutting the fruit in pieces, one girl was grinded the chocolate chunk, I was melting the chocolate, and the other girl was sitting there and watching because she said she was not good at it. I took an almond and covered it with a thick layer of dark chocolate. After the dark chocolate hardened, I covered it with another layer of regular chocolate and attached a thin layer of grinded white chocolate before hardened. My chocolates were pretty successful as the picture shows.
Afterwards, while my friends were still making their lovely chocolate, I started feeling bored because I was doing nothing. All of a sudden, an image bumped into my mind. Few weeks ago, I ordered a dish called coconut shrimp at the restaurant Red Lobster. The grinded white chocolate just reminded me of the dish because the appearance looked really similar. “Do you have any shrimp in your refrigerator?” I asked my friend. “I bet there is some, just check it out,” she answered. I opened the refrigerator, trying to find shrimps. It was tough to see because her refrigerator was way too full. It took me a while, but I still found it eventually. Then, without telling any of them what I was about to do, I just boiled the shrimp first. After the shrimps were cooked, I embarked on my new creation- Chocolate Shrimp. I covered the boiled shrimps with layers of chocolate, just like the same way I made the regular chocolate. My behavior shocked my friends at that time. However, I told them, “This is going to be really delicious!” I made seven chocolate shrimps in different looks just like the picture above. None of my girls was willing to try but I did not care. “It is fine!” I told myself. I was actually preparing for the next day on which I had invited my boyfriend and his friends to come over and have dinner. It did not matter how they tasted and how illogical people might think they were. My new creation looked pretty successful at least. I tried one the next day and I thought it was delicious.
I am fond of cooking but at the same time I do not like to just cook regular dishes that everybody can do. I am obsessed with trying something new and creating my own recipes. In my opinion, people should be more objective about discovering new things. Do not live it a box, about what you think must to be, for example, chocolate and shrimp do not go together, which they actually can!
Erick Paredes's Olluco con Charqui
Olluco con Charqui is a typical dish from the Peruvian Andes. Its main ingredients are, “olluco” a potato like vegetable, but with a crunchy texture when cooked; and “charqui” salty, dehydrated meat like jerky, but made of llama meat. The olluco have to be cut in small pieces like french fries shape and the charqui in stripes. The charqui has to be left in water from a day before to obtain tenderness. In a pan pour a tablespoon of olive oil, add half medium size onion cut in small square pieces; add salt, ground pepper, cumin, a clove of garlic cut in small pieces, and yellow pepper. When the onion start getting a brown clear color add the cut olloco and charqui. Let cook till the olloco become tender. There’s no need to add water because the olluco will release its own liquid. The final ingredient is chopped parsley, that will be add to the dish at the end when all the others ingredients are cooked. Usually, this dish is served with white rice as a side dish. Its flavor is very special because of its particular main ingredients. Unfortunately, these ingredients are not found in regular supermarkets in New York City.
Since my mother knows this is one of my favorite dishes, the last time she came to visit from Peru, she brought all the ingredients; actually she only tried. The day she was arriving I went to pick her up at the airport; her flight arrived at 9:30 in the morning and after two hours had passed I was still waiting for her. In the distance I saw my mother coming accompanied by two officers. I assumed they were US customs officers. The whole scene was amusing to me but at the same time I was curious to know what was the reason these officers were escorting my mother out. I saw my mother pointing at me at the same time they all kept walking. When they got close to me one of the officers asked me, “Are you her son?” I could see my mother’s clueless face expression trying to understand what was going on. I answer to the officer, “Yes, she is my mother.” “Is there something wrong?” After I said that, they explained to me that my mother was bringing potatoes in her luggage which I assumed was ‘olluco” and worst of all she didn’t declare that in the Customs Declaration Form, and for that reason she had to pay a fine of $175.00 at that moment or $250.00 if she send the payment by mail. Well, I didn’t have any choice than to pay at that moment, but still my mother was without understanding what was happening. She couldn’t hold on her questions any longer and she asked me, “Why are you paying them such amount of money?” I told her that these officers found potatoes in her luggage and she forgot to declare them; when all of a sudden my mother reacted saying, “I didn’t bring potatoes. I only brought olluco.” I could see the officers’ facial expression trying to understand what my mother was saying. I only replied, “She said, she didn’t bring potatoes” at that moment one of the officers interrupted me and said, “We know those are not potatoes, but for us they are the same” I learned afterward the reason they didn’t allow my mother bring in olluco was because plants can be grown out of it, the same way potatoes grow. They are seeds.
Now, my mother knows that there are certain things she cannot bring from Peru, not that this will stop her from trying. We may not have had “Olluco con Charqui” but for sure we had some other Peruvian dish made with some other ingredients my mother brought. The fact was customs’ officers didn’t find them all, just “the olluco.”
Daniel Silverstein's Shakshuka
Ingredients
1kg fresh tomatoes unpeeled and cut in quarters
1 sweet red pepper
1 big onion
6 cloves of garlic, diced
2 tsp of salt
One teaspoon of sweet paprika
2 tsp tomato paste
60 ml vegetable oil
6 large eggs
1 tbsp tablespoon chili paste and 1 tsp ground cumin (optional)
Feta cheese - according to your own taste.
And my secret: 2 spoons of Ketchup.
Method
Put in this order, one by one, the oil, garlic, onion, tomatoes, sweet red pepper, salt, paprika, tomato paste, cumin, and ketchup in a small saucepan and simmer for about half an hour uncovered on a low light and then stir until it has thickened
Ladle the sauce into a greased frying pan
Bring to a simmer and break the eggs over the tomato mixture
Gently break the yolks with a fork, spread chunks of feta cheese, cover and cook for about three minutes until the eggs are set
Serve the pan direct to the table
Oh! And don’t forget to serve it with a large chunk of hot bread to mop up the juice. Be’te’Avon!
The Italians have The Spaghetti and Pizza. The Austrians have The Schnitzel. India brought us The Thali, and no one goes to the USA without having a cheeseburger and Fries! Every country has its own famous dish for more or less, but when it comes to Israel there isn’t one clear opinion about what the Israeli dish is. You can find many Shawarma places in every city, but it’s not Israeli. There is a famous Hebrew song that talks about this issue. The lyrics describe how each country got her own national food and that Israelis are looking for their own traditional dish. The Chorus of the song mentions that “what we (the Israelis) got is the Falafel.” But from my quick research, Falafel is originally from Egypt. So I have been thinking. Could it be? My country doesn’t have a national dish? Not even something small?
When I moved to New York I wanted to cook something for my friends here, something that would represent who I am and where I came from. I was this close to giving up on the idea of making an Israeli dinner with special home-made Israeli dishes. Maybe there’s not such a thing as an Israeli dish. Maybe Israel is too a young country to have a special food of her own. Maybe because the Israeli population is based on people from every part of the world, like European, Middle-Eastern, African, South American and Asian, probably that’s why we have so many kinds of foods and dishes like the mixture of cultures and a variety of different traditions that have gotten together in one small country. So I just thought about what I would like to eat that would remind me of home. I spent a few hours thinking, traveling back to those days in Israel, when I was coming home, so hungry that I wanted to cook something quick without any complicated operations. I imagined myself getting into my house, opening the fridge door and trying to figure out what was left in it that I could cook something from. And Then I found it! That one dish, so simple, so homey, and most important – so tasty!
Shakshuka. It’s a famous dish, which almost every Israeli knows how to make. It’s so simple and obvious in the Israeli kitchen, I think that no one ever thought about calling it a national dish, but actually it’s made only in Israel. The Shakshuka is served most of the time for breakfast, but I like to cook it for dinner too, and actually it’s so tasty that I can eat it every hour of the day. The dish is based on tomatoes and eggs, which are the basic ingredients, but from there you can play with it and take it wherever you feel like, or your stomach feels like. Shakshuka, which means “all mixed up” in Hebrew, is healthy, nutritious, and reputedly a fine cure for a hangover and has become a firm staple of the Israeli diet. I believe that the Shakshuka really describes and contains in it all the Israeli’s characters: colorful, warm, spicy (but not too much), spluttering all over the place, a strong smell so there is no way you can miss it when its around you, and most of all – simple. Yet, Israel is so diverse that Israelis argue about the origin of Shakshuka but the one thing they all agree on is how much they love it. And what do my friends think about the Shakshuka? They love the funny name of it, and since that dinner I’m getting nonstop requests for another tasty Israeli evening!
You are going to be surprised how simple and easy it is to make it:
Wonki Lee's Okonomiyaki
I have been meeting many people who come from various countries after I
arrived in the United States. If I meet them first, foods are good
subjects for conversation to help understand each other since foods
reflect their cultures. For example, I have three roommates, two
Japanese, Kenzi and Takasi, and two Koreans including me. In spite of
the fact that the two countries, Korea and Japan, had a lot of
historical problems, we are very friendly and close right now. The
first time, we treated each other like strangers, but we got friendly
more and more by treating or introducing our own country food to each
other. A few months ago, I was taught from them about how to make a
food. This food is called the Okonomiyaki. Actually, I had tried it
several times before at restaurants, but it was first time for me to
learn about that. What they made was more delicious than I had expected
so that I promised that I would try to make it myself for them in the
future.
One day, my professor for an ESL class suggested us to submit a recipe
for a contest regarding cooking. I thought that it is a perfect
opportunity to make the Okonomiyaki for them. I would kill two birds
with one stone! I prepared ingredients; 1 cup flour, ¾ cup water, 4
eggs, bacon, shrimp, ½ cabbage, Okonomiyaki souce, and mayonnaise. The
way to make it is quite simple because the favor depends on the
Okonomiyaki sauce, that is, ready to eat. I think that the Okonomiyaki
is the best food for students studying abroad because this food is good
for our health as well as it does not take a long time to make. I will
give you the steps about making the Okonomiyaki. The first step is to
Mix one cup of flour with three third cup of water in a medium-size
bowl and stir it with four eggs and chopped cabbages. The second step
is to heat oil on a griddle and Pour enough batter to make a single
serving griddle cake (about 6" across and 1/2" thick) and then you can
put cheeses, bacons, etc. on the batter and then put more batter just a
little bit on the top. The final step is to transfer it to a serving
plate and immediately spread the Okonomiyaki sauce over the top.
I treated to my Japanese roommates the Okonomiyaki that I made for and
it was a good chance to promote our friendship.
Olga Santiago's Arroz con Gandules
Ever since I can remember, I’ve spent every Thanksgiving Day in my grandparent’s house in Ponce, Puerto Rico. My entire family would be there, and we would all have a great time. Most of my aunts, uncles and cousins live very far from me, so it was one of the few times we would all be in the same place at the same time every year. I treasure those moments with them more than anything else in the world.
Like every other culture, the Puerto Rican culture has many traditional dishes, and no holiday celebration would be complete without them. I cannot remember a single Thanksgiving or Christmas Day dinner in which my grandmother has not prepared a delicious pot of arroz con gandules. My grandmother’s cooking is absolutely exquisite, and every year I look forward to her arroz (rice), stuffed turkey and potato salad. She starts her preparation a few days in advance and we usually help her with the finishing touches and bring dessert. She says she loves cooking and having dinner with her family more than anything.
When I asked her when she first learned to make arroz con gandules, Abuela Olga told me it was fifty-two years ago, after she married my grandfather. The first time, she followed a recipe in a book called Cocina Criolla. That book is now sixty years old, and she doesn’t use it anymore because she proudly knows all the recipes by heart. She’s also tweaked the recipe to her liking, so she has her own way of making the dish.
For arroz con gandules, Abuela Olga-Style, the ingredients you’ll need are:
1 lb. raw medium or long grain rice
1 15 oz. can gandules (pigeon peas)
2 1/2 tbsp. sofrito
2 envelopes sazón seasoning with achiote
1/2 cup vegetable oil
1 cup chopped ham
½ tsp. salt
16 oz. water
2 whole peppers (optional)
Preparation:
Pour the vegetable oil on a big pot and stir frying the chopped ham in low heat. Then add the sofrito.
Sofrito is a condiment, or rather a mix of condiments that is used in many Puerto Rican dishes. You can buy it pre-made in a grocery store, or you could make it yourself. If you’d like some home-made sofrito, you just need to mix the following ingredients in a food processor:
10 garlic clovesa
1 medium-sized onion
2 green peppers
2 hot peppers
1 cup of culantro(a more flavorful substitute for Cilantro)
Mix in the sazón seasoning and gandules. Stir well.
Add the rice to the rest of the ingredients, and keep stirring.
Finally, pour the water and add the salt.
Boil on medium high until all the water is absorbed, and then reduce heat to low.
Cook for 35-40 minutes, depending on your stove. Stir occasionally.
After the rice is done, take a big spoon or a ladle and scoop the rice at the bottom of the pot to the top, so that it will all be cooked evenly.
Optional step: When you begin serving, slice the whole peppers and place them on top of the rice for decoration. Abuela Olga loves that extra touch of color it gives the dish.
As I’m sure you noticed, it’s a rather easy dish. After it’s done, the rice should have a bright golden color and a heavenly smell. It can be served with turkey, beefsteak, pork, or any kind of meat. For a truly Puerto Rican meal, also serve with tostones (flattened fried plantains) or amarillos (fried plantains) as side dishes or appetizers.
This will actually be the first time in my life that I will not be with my family for the Thanksgiving Day dinner, and I know it will be a very different experience. This recipe is special to me for many reasons, and now it will serve as a link to my family, my traditions and my culture on Thanksgiving Day.
Enjoying a delicious dinner with my family.
Abuela Olga, Abuelo Tatin and me.
Yoonkyung Ji's Tteobokki
A Tteobokki is one of the representative foods in Korea. It has a spicy, sweet and even sour taste. The taste can be changed depending on the person who makes it. For example, if you like spicy things, you can add the Gochujang, which is Korea’s traditional sauce similar to Chili sauce in the U.S.A. It is pepper paste made of thick soy paste mixed with red pepper. It is an important ingredient in Tteobokki. It makes Tteobokki turns red to color. You can buy Gochujang in a Korean supermarket.
Historically, only kings could eat Tteobokki. It was a special food. In those days average people who were not rich found it difficult to eat rice so that they could not imagine eating the Tteobokki which is composed of lots of ingredients and is a unique food. In addition, in those days, Tteobokki was a little bit different than today’s Tteobokki. It was made of another sauce, Ganjang, instead of Gochujang. Ganjang is also a kind of Korean’s traditional sauce, but the color is black and it is similar to soy sauce in America. The King’s Tteobokki was composed of 17 ingredients, such as mushrooms, meats and carrot. However, the Tteobokki we eat today is a reward. You do not need to buy many food ingredients.
Tteobokki is very popular food in Korea now. Everybody enjoys eating Tteobokki. It is my favorite food too. I used to make Tteobokki at home about three times a week. I usually served the Tteobokki to my friends when they came in my home. They liked my Tteobokki. If you go to Korea, you will see small restaurants that serve Tteobokki somewhere where you go, especially, in front of schools. Almost all Korean students enjoy eating the Tteobokki. If you are interested in making this food, follow these directions.
First of all, prepare some dish ingredients and cooking utensils to make Tteobokki, the most important material in this food is rice cake. It is made of rice that is steamed in a special machine. Koreans also do not make the rice cake in the home and some make pasta noodles. You can get the rice cake in the Korean or Asian supermarket. The rice cake is soft and good feeling to chew it. We also need other dish ingredients such a leek, seven big spoons of Gochujang, boiled fish paste, a spoon of curry, cabbages, two big spoons of sugar and three eggs. You can buy all of this for less than $ 10. The utensils are two cook-pots, knives or scissors and a long wooden spoon.
To prepare the dish ingredients, clean the food and cut the vegetables, rice cakes, leek and fish pastes to about a thumb size and it will be better if the rice cakes are in the water. Because, sometimes the rice cake is dry and turns hard. Now, we are ready to make the Tteobokki.
Place six middle sizes cup of water in the big pot and you put a tablespoon of curry and seven tablespoons of Gochujang into the boiling waters. Mix them well until the Gochujang and the curry are melted in the water. After a few minutes put two spoonful of sugar into the mixed soup. You can add more sugars if you want to eat sweet things. Meanwhile, take out the rice cakes from the water and put it with fish paste into the sauce soup we already made. Do not turn off the stove because the food will not be finished. After this, the time is perfect to boil eggs will in another cook-spot. The boiled eggs will be a good side menu when you eat the Tteobokki. They are in perfect harmony and also give you good nutrition. Afterward put the cabbages in the big pot and mix them with a long wooden spoon and you have to put the cabbages latest order so they will stay cruncy.
Boil bubbling and the sauce will cover the ingredients, have a little taste first and add more the ingredients if you want. Then put it on the dish. Formerly put out the food, do not forget to prepare the boiled eggs. Eat with smile. You will like this food.
The latest, Fusion Tteobokki is popular. For example, pepperonis Tteobokki , Cheese Tteobokki and mushrooms Tteobokki. Maybe Americans like the Peperonis Tteobokki and the Cheese Tteobokki. The cheese Tteobokki looks like pizza and tastes similar. If you want to eat the Tteobokki, how about you start with the cheese Tteobokki? In some part of Southeast Asia, Japanese and Chinese are also eating the Tteobokki. They are eager to eat the Tteobokki if they tried it one time. I hope Americans also eat this food and love this. Finally I will give you some tips to make Tteobokki better. You can also put the Ramen in the Tteobokki or with Kimpab, which is Korean food as Sushi. Side dishes make the taste better. How about making the Tteobokki? First try making is difficult to you, because you are not accustomed to making it will be Korean foods. But, if you try one more time, you will be happy to make Korean food because it is not a calculating food which uses measurements. If you notice some cautions and the direction, you can also make the Tteobokki. Try making the Tteobokki.
Busa Terim's Turkish Baklava
The Recipe:
Syrup:
1 1/4 cup water
1 3/4 cup sugar
1 tbsp lemon juice
Baklava:
454 gr (1 lb) Phyllo Pastry (~20-22 sheets)
1 cup + 3 tbsp unsalted butter, melted
1 1/2 cup pistachios, grounded (use a mixer but do not grind finely), the measurement is after grinding
6 tbsp cream 35%
3L (13x9x2") Pyrex casserole dish
• To prepare the Baklava syrup place the water and sugar in a medium sized pot. First bring it to a boil and continue boiling for 5 minutes. Then simmer for 15 minutes and turn the heat off. Add lemon juice and place the syrup in another bowl so that it cools down quickly.
• Place the block of Phyllo sheets on the counter. Cut the sheets in half (8x12 inches) (picture). Now there are two blocks of approximately 40 sheets. After cutting in half, the size of the sheets should be the same as the size of the Pyrex dish. Keep the blocks separate as half the sheets will go below the Baklava filling, and the rest above.
• Brush the inside of the Pyrex dish with the butter. Then lay down 2 sheets. Spread more butter on top and then place two more sheets on top and butter again. Continue until you finish the first block of the phyllo sheets. Then brush on the cream evenly on top.
• Spread the pistachios on the cream evenly. Then finish the second block of the sheets the same way. Don't forget to brush the very top with butter.
• Dip a big, sharp knife into hot water to cut the Baklava in rectangles. Cut 4 vertically and 6 horizontally to get 24 piece of Baklava. However, don't cut all the way down, only cut halfway until you reach the pistachio. This will ensure only the top parts will raise when you bake it.
• Preheat the oven to 375 F. Place the Pyrex dish on the middle rack. Bake for 25 minutes. At this point turn the heat down to 325 F while the dish is still in the oven. Bake for 30 more minutes and take the Baklava out. Leave it at room temperature for 10 minutes.
• Then using the same knife, re-cut the Baklava all the way down. This part may be a little bit hard but is worth it:)
• With a tablespoon pour the lukewarm syrup evenly along the cut lines. Make sure not to pour it all over, only between the lines, otherwise Baklava won't turn out well.
• Sprinkle some pistachios on top of each Baklava. Let it rest at least 4 hours before serving. The syrup should be completely absorbed. You don't need to refrigerate it. Cover Baklava loosely with aluminum foil.
The history of baklava, like that of many other foods, is not well documented. Though many ethnic groups have claimed it, the best evidence is that it is of Central Asian Turkish origin, but its current form was developed in the imperial kitchens (Ottoman Empire) of the Topkapi Palace (located in Istanbul). Indeed, the sultan presented trays of baklava to the Janissaires every 15th of Ramadan in a ceremonial procession called the “Baklava Alayi”. Within all Turkish families Baklava is a symbolic dessert that represents our culture very well. Any time we have guests in our home or when we’re in a Turkish restaurant the choice of dessert is always Baklava. I remember once my father ate 15 slides of baklavas which is not only bad for his health but also has too much sugar, but he enjoyed it without hesitating. Growing up I always had Baklava once every month. Since I have been living in New York, I thought it would be hard to find or cook Baklava but I was wrong. The best Turkish bakery was opened two locations both in Brooklyn and Manhattan, so last week a friend of mine who was visiting from Canada brought us Baklava from the bakery Gulluoglu, and I couldn’t stop eating it day and night even though I was on a diet. Also, in every Turkish restaurant in New York the best choice of dessert is the Baklava and it is so popular that I saw videos of how to make Turkish Baklava on You Tube.
Our little vintage kitchen is designed with neutral colors and stained glass windows. The lighting fixtures are clean and strong which makes everyone especially my mom cook more. When my mom married my dad, she didn’t know this talent of my dad about cooking. Natutrally he is not the chef of our house but when it comes to Baklava he is the best. Every year around Christmas time we gather as a family including my aunt, uncle and cousins to watch my dad prepare Baklava. Since one order is 24 slides it is more than enough for all of us. His own cooking style is so inspiring that everyone wants to learn something from him. So last year on New Year’s Eve, we gathered again as a family and played our favorite Turkish songs in the kitchen while watching my dad cooking Baklava. The best part that we enjoyed very much is where he cut the Baklava’s all the way down. He even names each slides for our names. Baklava is not only our traditional dessert in Turkey but it is also our family’s tradition for bringing us together.
Viktoria Voloshchuk's Kutya
Every culture has its own way to celebrate Christmas. In Ukrainian society we have our unique method of celebrating the birth of baby Jesus. We celebrate as a whole family members house. Food is the connector to everything that surrounds our culture. Each celebration includes a huge feast. We believe food tastes better when it is shared with family, relatives, and many other people.
When the first star appears in the sky the whole family gets together. We sit at the table that has 12 different dishes. They symbolize 12 apostles in the Bible. At the beginning we pray to God and nobody starts eating until it`s finished. Then it`s time for the first dish. The first dish is very important as it is a symbol of the evening. Nobody makes this dish at any other time except Christmas Eve. It is called Kutya. When I think about it, it reveals a vivid memory of those evening when we used to sit together, singing Christmas songs and remembering those who were not with us anymore.
Kutya was usually made by my mother and grandmother. When my brother and I were little we used to steal some of the ingredients and eat it before the dish was ready. And now you will understand why.
For this dish you need:
1 cup of poppy seeds
1 ½ cup shelled wheat berries
½ cup sliced almonds
¾ cup sugar
¾ cup golden raisin
¼ cup dark raisin
4 tablespoons of honey or to taste
½ cup of dried and sliced apricot
1. Fill a cup of raisins and a cup of poppy seeds with warm boiled water and leave it for the night, so the water can be absorbed.
2. Grind 1 cup of poppy seeds and sugar in a wooden pot with wooden stick (can use blender our days). Poppy has to be sweet.
3. Rinse the wheat berries in a sieve under hot running water for about 3 minutes or until water runs clear.
4. Fill a large saucepan with water (about 2/3) and bring it to boil. Add the wheat berries and bring it back to a boil.
5. Reduce heat, skim any form and simmer, uncover, for 35-40 minutes or until the water is absorbed and the grains are tender.
6. Rinse the berries in a sieve under cold running water for about 1 minute or until most of the starch is rinsed off.
1. Crunch almonds into small pieces and size you like, put than in the dish.
2. Transfer wheat berries and poppy into a large wooden bowl and blend them together.
3. Add raisins, almonds and pieces of sliced apricot.
10. Fill in with cold boiled water so it looks like soup.
11. Adjust honey and sugar so it is sweet.
The dish is ready, enjoy it since it`s only ones a year. Merry Christmas!!!
Hyemin Park's Japchae
Honestly, I do not usually cook. Because of this reason, I have few experience of cooking, if you define “the cooking” is “the boiling, chopping and something like marinating.” However, I technically cooked few times and mostly on my mother’s birthday. Since my mom loves the present which represents my love not money, I have to rack my brains almost every year. The most challenging food to make was the Korean typical noodles, called Japchae.
Japchae is a stir-fried dish that combines sweet vermicelli noodles made from the starch of a white sweet potato, thinly slices of beef, and various vegetables. It is usually prepared with carrots, green onion, spinach, shiitake mushrooms and green peppers. Beef may be added as an option but may be left out to be served as a vegetarian dish. The noodles are gray when raw and turn almost translucent when cooked. When cooked correctly, they retain a chewy texture.
Usually Korean dishes are composed of 3 kinds of categories. One is called ‘Bob’, which is rice in English, second is called ‘Banchan’, which means side dish, and the other one is “Gook”, which is soup. Each meal includes at least these three foods. Because Japchae is one of the Banchan, I needed to cook one gook and rice. It took a long time to prepare those three at one time. I had to get up early at 5am on mom’s birthday, and started to cook and finished before anyone would get up, because it was my surprise present for mom even though I cooked every year. (or at least pretend to surprise her.) First thing I had to do was boiling the water to make gook and steam the rice. While the gook was boiling and rice was steamed, I started to make Japchae following the recipe below it. As you can see the recipe, this food needs too much hand. I had to follow recipe one by one but I forgot doing one step when I was doing other step. As a result, I made this most-undelicious Japchae I have ever eaten in my life and so did my family. I couldn’t finish the food because it was so horrible. The noodle was not boiled enough, and carrots were burnt. There was too much soy sauce, which made you salty. I felt guilty that I felt like I ruined my mom’s birthday. But when I heard my mom said, “It’s so yummy! Thank you so much, daughter!” I was so happy and touched. Present has to make people not only who receives the present but also who gives the present happy both ways. In this case I was succeeded.
I would say this Japchae demonstrated my love for my mom even though It was messed. Since I am way far away from my family, in New York, whenever I see it, it reminds me of my mom.
Recipe Ingredients (Yield: 4 Servings)
* 12 oz noodle (Dang Myun)
* 4 oz beef
* 5 shitake mushrooms or Chinese black mushrooms
* 1 carrot
* 1 onion
* 1 egg
* 1/3 lbs spinach
* 5 tbs oil
* 1 tbs sesame seed oil
* 2 tbs soy sauce
* Salt & black pepper (pinch)
* Sesame seed (pinch)
* 1 tbs minced garlic
* 1 tbs chopped green onion
Cooking Directions
1. Soak mushrooms in water for 15 minutes. Cut off stems. Cut mushrooms into thin strips.
2. Cut beef into thin strips and marinate it with the mushrooms in a seasoning of: soy sauce, sugar, minced garlic, sesame seed oil, chopped green onions, and a pinch of ground pepper.
3. Cut carrots and onion into thin strips (julienne).
4. Cook spinach in boiling water for about two minutes. Cool spinach in running water. Squeeze the water out of the spinach. Season the spinach slightly with salt and sesame seed oil.
5. Batter and fry the egg in a pan with a pinch of salt. Once cooked and cooled, cut the egg into thin slices.
6. Cook the noodles in boiling water for about 2-4 minutes or until soft (You may want to cut the noodles in half before hand if they are too long). Rinse in cold water and drain.
7. Start cooking the beef and mushrooms with a bit of oil.
8. When beef is cooked add carrot, onion, spinach, and noodles and stir-fry.
9. When vegetables are cooked, add the sliced egg and use salt and soy sauce to season the dish to your taste.
10. Put it all in a dish and sprinkle some sesame seeds for the final touch.
11. Can be served hot or cold.
Seula Lee's Gannip Jun
Gannip jun is a traditional Korean cuisine which is a very popular appetizer or snack. Gannip” means sesame leaf in Korean. The basic type of this dish consists of just sesame along with meat, flour, and eggs but endless variation of this dish can exists by simply adding other ingredients such as seafood, kimchi, which is Korean traditional preserved dish like pickle in America, or vegetables. There's also something called "jun", a subset of side dishes for which you take veggies (squash works well), meat, fish, etc., and coat it with flour, egg wash, and then fry up it like potato latkes.
We have it especially on family holiday to warship toward our ancestor. Gannip jun, however, is somewhat different because even though it is a traditional cuisine, it is not used in the traditional way which means it has evolved from the traditional food. But nowadays many families cook and eat this food, for this is really easy to make and tasty.
When you think about sesame you might come up with the seed at first because it’s rare to eat sesame leaves. However, to Koreans, we love the leaves. Even though they are somewhat of an acquired taste because of the very distinct flavor. If you don’t care about the awkward taste at first you will be addicted to this special mint flavor and eventually you will love it.
On family holidays, all family and relatives get together and make all kinds of food for the traditional ceremony, sitting around on the floor, telling about our life stories that we haven’t heard for a long time due to busy city life.
When all my families get together, they look very different, for we meet only twice or three times a year. My little two cousins have become a strong guy and a gorgeous woman and my antes and uncles look like old grandfathers and grandmothers because they have more white hair than before. Even though they look different, they are still my little cousins and nice uncles and antes who make me feel warm and likewise to them I look still like a little girl.
When I got into my twenties I didn’t like that feeling when they treated me like a little girl because I always thought I ‘was an adult and my personality and style and character had changed a lot. I was mature. However, when I met my relatives they always made food that l liked when I was super young and Gannip Jun was one of the foods. They always made Gannip jun on family holidays, even though it was not really for the ceremony nor did nobody like it. The food was just for me.
“Seula we made this because you love it.”
“No, I don’t like it anymore and you don’t have to make it every holiday for me,” I said tones of times but the next holiday they just forgot what I said and made it again and again. Finally I gave up saying that, but I insisted in my mind “ I changed a lot!! I’m not the little girl who loves Gannip jun.”
Now, I’m 25 and I do love Gannip jun maybe, my palate has changed again. Also I no more care how they treat me as a little girl or not because the important thing is they love me and we are still family.
To cook, the batter is poured into an oiled pan and fried to a golden crisp on a frying pan just like a pancake. And one of the key to this dish is the egg which contributed to the crispness in texture.
Recipe Ingredients: sesame leaf fritters
Ingredients
• 1-2 lbs. ground beef
• chopped onion
• chopped garlic
• pinch of salt
• pinch of black pepper
• 1 egg
• sesame leafs
• flour
• egg
• olive oil or any oil for cooking
Recipe Ingredients: Dipping sauce
• 1/4 cup soy sauce
• 1/2 tbsp vinegar (distilled white)
• 1 stalk scallion, minced
• 1 clove garlic, minced
• 1/2 tsp Korean dried hot chili pepper flakes (optional)
• 1/2 tsp sugar
• 1 tsp sesame oil
For its dipping sauce, mix the sauce ingredients together.
Serve this warm.
Step 1:
In a bowl, mix all the ingredients; ground beef, chopped onion, garlic, salt, black pepper, and 1 egg.
Step 2:
Cut the stems off the sesame leaf and clean them. Grab a plate and layer it with flour. Now shake the wet sesame leaf to the point there's no water dripping. It doesn't matter if it's completely dry or a little bit wet. The flour will still stick on the leaf. ;) Coat both sides of the leaf with flour.
Grab one coated leaf and put the mixed beef you did in step 1 on it. Top it of with the other coated leaf. It should look like a leaf sandwich with beef in the middle.
Grab a bowl, crack an egg, and mix the egg. Now coat the leaf sandwich with egg on both sides.
Step 3:
Grab a frying pan, and add olive oil or any oil for cooking. Put the leaf sandwich and fry both sides.
Now you can eat it with rice and kim-ch You can eat it alone or with the soy sauce mixture. In the soy sauce mixture, add soy sauce. If the soy sauce is strong, you can dilute it with water. Then add chopped green onions, sesame seeds, and red pepper powder.
Catherine Garrison's Petella
This is a fried bread that my family makes together every year at Christmas. Honestly, I think the word “petella” was a word my grandmother or her mother made up because I can’t find any information on it. My grandma has the kind of authority to make up her own words anyway, so I see no problem really. She is fully Albanian, and her ancestors passed down this Italian Christmas tradition because the Italians ruled Albania at one time along the line. We eat petella with our fish on Christmas Eve, our Christmas Egg Casserole on Christmas morning, and our Wedding Soup at dinner. If we can’t wait that long, we usually have it with a glass of wine or with some hot peppers in oil. It can be eaten as a snack or as a substitute for a dinner roll. I’ve cut this recipe in half, and it will still make a lot…
Ingredients
5 lb flour
1 ½ tbl salt
1 ½ packages of yeast
¼ cup olive oil
Oil for frying
Directions
Combine all of the ingredients in a bread mixer. When dough is sticky, place it on a floured countertop and knead for about 10 minutes. Place dough in an oiled bowl, cover, and let it rise until it doubles in volume. With well oiled hands (have a small bowl of oil to dip your fingers in as you work), tear off 1 oz pieces of dough, punch a hole in the middle with thumbs, and stretch out the ring just a bit before placing it on an oiled pan to relax for 10 minutes. Heat oil in a deep pan to 350°. Stretch dough ring out and place it in the fryer until golden brown on the bottom, Flip the dough using tongs and cook until golden brown. Remove from fryer and place on a stack of paper towels (my family likes to use paper bags). Let cool and enjoy!
Grandma’s Children
My grandma was the head chef of the kitchen at Christmas, and we, her children and grandchildren were her cooks. She’d tie the straps of her floral blue apron early in the morning and lean on the counter, watching us squish meat eggs, and bread together and roll the mixture into little meatballs for the homemade Italian Wedding Soup we would eat on Christmas Day. Every now and then she’d toss a few oddly-shaped clumps onto the tray after adding some salt and pepper. We’d laugh because only a moment before we were arguing over whose meatballs were the roundest and most consistent in size. What can I say? We are proud of our Christmas traditions.
Though, at the same time, we went with the flow and had fun together, and the soup is never the same from year to year. My brother and sister claim that the soup tasted best the year that my mother accidently burned it. Our croutons never seem to come out the same either, most likely because my grandma was in charge and she dictated the execution of the recipe from memory. One year, my brother wrote down the crouton recipe, and every year after that, we’ve managed to deviate from it in one way or another. Sometimes we would feel like adding extra parmesan, and sometimes the mixture would need more egg or cracker meal (depending on how wet or dry it is). Always remember –it may look like a lot of pepper, but its not, so add extra anyway…
After rolling out the dough into long rods (we always see who can make the longest one), we’d fry them and chop them up, but not before we had a chance to steal crouton rod for ourselves. They make great snacks. I usually replace my lunch that day with meatballs and crouton rods. “Needs some more pepper,” my grandma would say holding the grinder.
Christmas Eve is festive for my family and we all share in the preparation of frying fish and petella (fried dough rings eaten at dinner on Christmas Eve and Christmas Day), making spaghetti with garlic and butter, tossing salad, and having a good time. We’d informally rotate and take turns; as someone took a break and sat down with their beer, someone else would get up, put on their apron, and step up to the stove.
This past Christmas was the first Christmas without my grandma, and I missed taking her plate of cheese, olives, and crackers to pick at as she watched her children and grandchildren cook the dinner that she had cooked and eaten every Christmas, just like her mother before her. The thought drifted over the kitchen, but did not leave us downhearted. Each of us knew that she had taught us well. No matter how many of us are there each year, we’d be able to carry on the tradition that she had left us. What mattered most was being together as family: cooking together, eating together, loving together, and even stinking like grease and fried fish at midnight mass together.
Tattfoo,
Here are my Family's portrait and a picture of me with my parents and petella. I went looking through my Christmas photos and had such a great time. I usually look past the candids of us cooking, but I really was able to look at them and appreciate them for what they were and what they meant to me. I thank you for that. I can't wait to go home and see my family for Christmas.
My grandmother says she isn’t good at cooking at all. In retrospect, she always used to cook
food for me, something simple and easy but delicious when I said I’m hungry in my childhood.
She said she isn’t good at cooking because she didn’t need to cook when she was young so that
my grand-grandfather hired a housekeeper before the war broke out. She loves sewing
so she was working in a furnishing factory. I still remember the story of her adulthood
how a sight of Tokyo was different, a place where she used to love walking. When she starts
talking about her youth, I always see her eyes brighten with memories. So, my father has never
told me what was his favorite food my grandmother cooked. Even if once I asked what was his
favorite dish of my grandmother, he said “mmm…your mother’s food is the best,” I have never
asked when she had joined cooking class, but she said she had learned cooking
sometimes in cooking class, and she had gotten this recipe called “foil wrapped jumble dish
(Ginshi-yaki)”.
As I already explained about a story of this dish, personally, there is a lot to say about it. That is
because this is not Japanese traditional food at all except adding a bit of soy sauce before it’s
eaten, this is rather called an arranged simple dish which doesn’t really belong to any other
tradition. But the funny thing for me is that entire relatives know how to cook this dish so that
my grandmother who thinks she isn’t good at cooking had taught everyone including my
mother. So, when my relatives gather together to celebrate New year, there is always someone
who prepares this dish called “Ginshi-yaki”. To explain the meaning of “Ginshi-yaki”, there are
two separate words on this name.
A word “Ginshi” which means silver paper, and “yaki” is a part of the cooking method as roast
or broil. English name as “foil wrapped jumble dish” which I named instantly is simply related to
how it looks.
There are ingredients and procedure of this recipe for four people. Prepare aluminum foil which
is crucial, salad oil or olive oil can be a substitute, a bunch of spinach, four eggs, a half pounds
of spearfish, 12 ounces of mayonnaise, pepper and salt, and soy sauce. The first procedure is
that a bunch of spinach should be boiled, then strained off the water from the boiled spinach.
Second, a chopping of a half pound of spearfish into a big dice shape. Third, heating a pan with
salad oil to make scrambled eggs. When three ingredients such as boiled spinach, scrambled
eggs, and diced spearfish are prepared, put them into a somewhat big bowl together, add 12
ounce of mayonnaise, salt, and pepper, then stir them up gently until mayonnaise can be
spread over. As a next step, almost 8 x 10 inches of foil have to be cut into four pieces. Put foil
on a flat surface, add mixed ingredients which are already in a bowl equally, wrap them not to
make them fall over from the foil. Finally, this is the most fun part of this dish. That is to put foil
wrapped ingredients into a heated pan, and broil them about 15 minutes by low heat until foil
wraps become like balloons! While you are waiting for a jumble dish is ready to eat, there is a
suggestion to make cooked white rice because this dish is really good friends with white rice.
Also, you might smell appetizing steam from a pan that will give you an imagination when you
enjoy “Ginshi-yaki” with a little bit of soy sauce.
In my childhood, I used to be so excited when I noticed that my mother was cooking “Ginshi-yaki” in the kitchen, it wasn’t only me, every my sibling always got excited because this is our
favorite dish. We even used to scramble which one was biggest “Ginshi-yaki”. I’d say that the
time for eating is always pleasure especially when it comes with a people we love, or it might
be a daily event of our family. When I started thinking of food, there are a lot of culture and
tradition, also history, and it could be a description of our background. Thus, in my case as I
picked “Ginshi-yaki”, it has funny roots how it became our typical family dish that is always
taught to new generation. Even if it doesn’t show any Japanese tradition, there is always my
own family’s tradition since my grand mother who thinks not good at cooking had learned.
Julia Movchan's Kulich
I think every family has a recipe that goes from mother to daughter and from the daughter to her daughter and so on. In my family it is a recipe for the traditional Russian Easter bread called Kulich. There is many different ways to make it although in my opinion there is nothing better my grandma’s recipe. My grandmother got it from my grand-grandmother and gave it to my mother and so to me.
(my grandma is first on the right)
And even though I can make myself a scrambled eggs and I guess in that case can be considered a person who can cook that bread needs a special treatment in order to be prepared a right way. Most of the Russian people are very religious and Easter (Paskha) is a very special holiday when all the family gets together and having a special Easter dinner. Even though the dinner comes on Sunday a Kulich is supposed to be prepared on Thursday night of this week, as well as the house should be cleaned and that’s a reason why this Thursday before Paskha called a “Clean Thursday”. Kulich should be prepared with special care and even more than that my grandma always used to say that you should talk to it all the way during the preparation, which is a qu ite a process. First, you have to prepare what Russian called Opara, its mix of flour, milk and yeast and leave it overnight. Then you mix in the rest of the yeast , add some flour, 700gr of sugar, soup spoon of butter, 10 eggs, raisins, vanillin and salt. Another very important thing is that you really have to feel how much of what you should add, to make a good Kulich is like a work of art, and so my grandmother was the best at it. The dough then will raise , which will take about an hour, after it does you have to knead it and then let it raise again and then knead it; repeat it twice. It is a really hard work to do so and my grandma never hesitated to ask my grandfather to do it for us. After a dough raises the last time you can bake it. We use the forms that are really close in shape with a can for preserved vegetables. You have to put some oil in the forms and and only fill it with dough on one third since when you bake it, it’s going to raise a three times or even more. After Kulich is baked you top it with the sugar+ white egg frosting (equal parts of sugar and white egg) and garnish it with rainbow sprinkles. And let me tell you “still hot from the oven” Kulich is something to die for.
Christiane Basagoiti's Basque Pintxos
From the western end of the Pyrenees, along the Bay of Biscay, and among the border towns of south western France and north eastern Spain, the people of The Basque Country enjoy a culture rich in historical, familial, and gastronomical tradition. On any given night, this region comes alive as locals roam from one bar to the next, indulging in alcohol and small portions of food, called Pintxos. This ritual is the heart and soul of the small towns and fishing villages of The Basque Country, where the bars crowd with people enjoying good conversation, delicious food, and the company of friends and family.
The wide scope of food found at these Basque bars and restaurants, from the traditional and simple, to the modern and gastronomically complex, embody the cultural and historical identity of the Basques. Dating back to the 16th century, the Basques were the regions first fishermen, and their historical reliance on the sea for nourishment translates to a modern gastronomic culture heavy in seafood. The everyday lives of the modern Basque people revolve around their food, a constant reminder of the ancient culture of that region. One of the only cultures to use the black ink of the squid in its cuisine,
Txiperones en su tinta, or, squid in its own ink, is a dish unique to the region and gastronomic culture of the Basques. It can be found everywhere, from the local Pintxos bar, to the family’s dinner table. But regardless of where you’re eating, this dish is best enjoyed the way of the Basques, with good friends, family, and lively conversation.
Serves 4
These squid are also called Tripiroiak and Jibiones in various parts of the Basque Country. In the rest of Spain, they are referred to as calamares.
1 kg squid
3 medium onions
2 large green peppers
3 tomatoes (or tomato sauce - not ketchup!)
3 garlic cloves
olive oil
bread crumbs
1. Take apart and clean the fresh squid, taking care to remove the ink sacs without breaking them. Set the ink sacs aside. Cut the tentacles into one-inch chunks.
2. On a low heat, cook the onions and garlic. After 5 minutes add the peppers and the tomatoes. After 15 minutes add the cleaned and prepared squid. Let it cook slowly for about 1 hour
3. Remove the squid and pass the rest through a ‘chino’ or a fine sieve.
4. Return the sauce and squid to the pan, adding ink (if the squid came cleaned you can use 2 sachets of squid ink available in some good delicatessens or fishmongers).
5. Add a little water to dissolve the ink and stir, serve warm. May also be served with rice.
6. If the sauce is a too thin stir in breadcrumbs to thicken it.
Txipirones En Su Tinta (Squid in Their Own Ink)
Julia SineInikova's Kasha
Real Food
With its first appearance in folklore dating back almost a millennium in Russia, one main ingredient has served as the essence of the country’s hearty classic cuisine: kasha (“???????”). Pervading the kitchens of nobles and peasants alike in the olden days, this savory and versatile grain still remains an unwavering “symbol of good housekeeping” in any Russian home (Timokhina). The word kasha refers specifically to buckwheat groats, a cereal grain which contains no gluten, but a Russian may use it to refer to any variety of porridge (Allen). In a land where only foods that can survive harsh, dark winters grow, kasha has been revered for its richness in nutrients, versatility, and resilience.
A little girl almost completely swallowed up by her poofy winter coat and bundled scarf can scarcely be made out through the heavy snowfall, reaching high to meet a grandmother’s gloved hand. She follows behind as quickly as she can, stumbling in the deep layers of snow already covering the ground as early as November. They move slowly together, first on the side path of Park Pobedy, then crossing the busy Moscovsky Prospekt to the side of shops and apartment buildings. Succumbing to the tugs and naggings of her little “vnuchka” (granddaughter), the grandmother turns into a small grocery store to satisfy a simple desire for a Kinder chocolate egg. These colorfully wrapped confections, which contain an assemblable toy inside the milk and white chocolate layers, were a favorite of the girl’s during her St. Petersburg childhood, and she would feel a pang of nostalgia years later whenever catching sight of them by the register at any European-style grocery. Muttering some admonishment about keeping a healthy diet to the girl (which of course she had no capacity to comprehend), the grandmother led her back out into the street for the teeth-chattering walk home. She’ll have some real food when she gets home, something with sustenance, the girl’s babushka thought as they shuffled through the snow.
Later, they sat down in respectively high and low chairs to a steaming dinner of kasha.
The origins of buckwheat are believed to lie somewhere in the northern regions of India, where it is referred to as “black rice,” though some sources point to the Himalayan mountain region as the origin because of its high concentration of wild buckwheat strains. From there, the plant traveled throughout China, Korea, and Japan, where it was widely cultivated by the 10th century A.D. It finally made its way to the European part of Russia during the Mongolian invasions in the 13th century, and for this reason it still is sometimes referred to as the “Tatar grain.” Thereafter, buckwheat became a staple crop throughout the region, later spreading further into southern Europe (“???????”). Indeed, since not long after its first appearance in Russia buckwheat has been much revered for providing such a nourishing meal in a land where only certain foods can grow. This is especially evident in the fact that from the 11th through the 13th centuries the word “kasha” was equivalent to the word for “feast” (“History of Kasha. Authentic Recipes.”)
As adults busy themselves with preparing the New Year’s feast in a cramped duplex kitchen, three children and a toy poodle take advantage of unsupervised time on the living room floor. The oldest of the group at age seven, a fire-eyed girl with an unmanageable mess of blonde hair, races around the room with the youngest girl’s stuffed animal in a game, laughing, skipping along too quick to be caught. At the sound of her two year old’s cry, a concerned mother emerges from the kitchen and calmly retrieves the toy from the older girl. Dinner is ready now, the mother announces, and thus summons the children to come to the dining room. Disappointed that the games are over, the older girl (an only child who secretly revels in the rare company of her parents’ friends’ children) comes over to the festively decorated table and plops down on a chair between a small holiday fur and her own mother.
The girl’s family has traveled from Austin to Dallas to be with some of their only Russian friends on New Year’s Eve, which in Russian culture is the equivalent of Christmas Eve. As she peers out over the feast that’s been set out, the girl picks out foods she’ll take second helpings of and those she’ll avoid. She knows her mother will inevitably fix her plate for her, though, and as it is taken from her small hands and loaded up with an assortment of pickled cabbage, potatoes, and grains she sighs and fiddles with a long stemmed glass before her.
“Don’t do that! You’ll break the thing,” her mother warns as she spoons an unadorned side of the “grechka” the girl then despised onto her plate. “Here’s your dinner, and make sure to eat it all. Especially the kasha.”
Kasha has survived as a central aspect of Eastern European cooking throughout the centuries primarily because of its healthy composition and the vast variety of ingredients it can be paired with. For example, it can be prepared as a soft breakfast grain with warm milk, a hearty lunch with vegetables and cottage cheese (“tvorog”), or a simple side dish cooked only with oil and water. It can also be paired with butter, meat, fish, juice, broth, and because of its adaptable aspect it is still found on the table of holiday feasts and celebrations (Timokhina). The importance of kasha in Russian culture is embodied in an old proverb: “?? ?? ???? — ???? ????." Translated literally, this means “cabbage soup and kasha are our food,” and implies that these are the only foods one needs to survive (“Kasha”).
The girl is not so little anymore; in fact, she hovers a good few inches over her mother as she helps her load her suitcase into the trunk of the car. As they make the long drive home from Bush International Airport, the girl goes on about her trials and travails in New York City, where she’s now spent six miserable (or beautiful?) months. Her mother nods and asks questions in bullet-fire mode, overwhelming her exhausted daughter.
“You have to sustain yourself in this crazy city! What have you been eating to get all your vitamins?” her mother demands.
The girl sighs as she gazed out the window, watching the monotonous rural landscape zoom past. “You know, mom… food. Rice, vegetables, pasta, quinoa. I know how to manage my diet by now, seriously.”
“I can really tell you’re not getting enough food, otherwise you wouldn’t be so fatigued now. You have to take care of yourself!” the girl’s mother says in a huff. “Don’t worry, I’ve already got some of your favorites cooked up…”
Later, at the house, the girl reclines in the breakfast room with the big open window that she’d missed so much in her windowless New York loft. As she stares out at the manicured lawns and the blooming trees, her mother heats up lunch in the adjacent kitchen. She brings out their meal quickly, for she has prepared it in advance, and they sit down together to steaming mushroom barley soup with a bowl of unseasoned kasha.
“Don’t forget this is a real meal, Yulia. And be sure to eat all of the kasha.”
I found this recipe that represents the kind of kasha I am accustomed to eating with my family; we do not have an "heirloom" one per se.
Perfect addition to side dishes recipes
Ingredients:
Buckwheat (8oz)
Salt (0.5tsp)
Water (16oz)
Serves 2
Cooking Instructions:
1. Place cookware with buckwheat over medium heat
2. Mix buckwheat with egg; stir well – not vegetarian option (optional)
3. Stir for 5-10 minutes
4. Add boiling water and salt, cover tightly, reduce heat to low, and simmer for about fifteen to twenty minutes or until buckwheat is ready (grains are tender). Drain the excess water (if not all absorbed)
5. Preheat the oven (350F), cover and cook in the oven for another 10 minutes. Use oven-safe cookware
6. Turn off the heat and leave kasha in the oven until ready to serve
Comments:
You can try instead of step 6: put the lid on tight, wrap the cookware with kasha in a blanket and leave for 1 hour. You can serve kasha with warm milk. Put kasha in soup bowls, pour milk in just to cover kasha, add sugar.
Jennifer Vasquez's Vegan Blueberry Pancakes
Fresh blueberries hiss and crackle on the hot pan releasing a sourly smell. The window screen shakes as the relentless wind presses against it. Cold grey clouds let out tears of rain making the air chillier than previously forecasted.
“Mom! Where is the flour?” I ask feeling completely lost in my own kitchen.
“Under the cabinet where the cereal is like always Jen.” Mom replies almost annoyed.
Days like these just drain your energy. All you want to do is snuggle in a mountain of warm blankets surrounded by the aroma of hot green tea made with roasted tea leaves and a long movie to keep you company. The absolute last thing you want to do on a day like this is cook. This applied especially to my Mother.
With little to no enthusiasm, Mom takes out a big clear bowl for mixing purposes. In go the flour, sugar, salt and baking powder. I am handed a spoon to take over the task of combining and sifting the ingredients together.
“Mom go to sleep, I’ll finish the cooking.”
“I don’t want to wake up to a burning house.” Mom said in a serious tone.
“So do you want to help me then?”
“No, I’ll take up on your offer. Just wake me up if you need help with anything.” Dreary eyed, she walks to the living room and throws herself onto the couch to drift into dreamland.
In goes the soymilk and oil. I mix for a smooth batter until my arm muscles burn. The pan crackles even louder telling me that it is hot enough and ready to cook. I take my ladle and slowly scoop the batter trying not to spill some on the counter. The oil on the pan flies as I pour the batter in a perfect circle. I dodge the bullets of hot oil so I won’t get burned. More blueberries are added on top of the raw batter making the kitchen’s aroma even sourer. After a mere two minutes it is time to flip the pancakes. Golden brown with dark purple dots of melted blueberries; one pancake is done.
In between the sounds of the cooking pancakes and rattling utensils is the sound of Mom’s snoring. As the rest of the pancakes near their completion I think about all the times Mom has cooked for me. Those sick days where I could not fend for myself was when Mom would cook a healthy meal for me so my body would heal faster. Thanksgiving and Christmas meals Mom would kill herself cooking all day since morning with little to no help. I get a nostalgic feeling scooping the pancakes onto the plate. I take a tray out and set up the eating utensils, a napkin and a tall glass of Very Vanilla Soymilk; Mom’s favorite drink. I inch my way into the living room placing the tray right in front of the couch. The pleasing scent of cooked batter and blueberries wakes up my mom immediately. It is my first attempt at making Vegan Blueberry Pancakes and I’m worried about the outcome. Mom cuts the corner of one pancake and slowly places the piece into her mouth. She chews with the pace of a food critic making sure her taste buds receive every molecule of flavor. At last she looks up to me with happy eyes and warmly says “They are delicious, Thank you.”
Vegan Blueberry Pancakes
2 cups of white flour
3 Tbsp. sugar
3 Tbsp. baking powder
1 tsp. salt
2 cups. vanilla soy milk
3 Tbsp. canola or safflower oil (optional)
1/2 cup frozen blueberries
1/2 fresh blueberries
Combine the dry ingredients in a bowl and sift together. Add the soy milk and oil and mix until the batter is smooth. Ladle the batter onto a hot pancake griddle. Add the frozen blueberries. Cook for 2 to 3 minutes on each side. Serve with the fresh blueberries.
Makes 4 servings
Alissa Alvino's Blue-Clawed Crabs
- giant pot filled with water
- 4 crab bodies
- 8 crab legs
- oil
- garlic
- butter
- parsley
- Italian bread
1. After cleaning the crabs thoroughly, put them in the boiling pot with about 3 cups of water to simmer.
2. Put in about a half cup of oil.
3. Cut up the garlic, as much as you want, then throw it into the pot.
4. Slice up the parsley and throw that in as well.
5. Put the Italian bread into the toaster oven until it is perfectly toasted.
6. Make sure the crab meet is cooked but not chewy.
7. Place crab pot on table.
8. Cut bread.
9. Enjoy
Being Italian has a huge influence on what I eat. Every summer, my family on my dad’s side and I catch crabs in Hampton Bays. I never forget being younger and helping my Poppy, Daddy, and Aunt break and clean the huge blue clawed-crabs. I can still see myself and cousins, all around the ages of 5 to 9, huddled around the open bucket or freshly caught crabs. We would poke at them with the metal tongs to see if one would claw and grab on. I remember one time dropping a crab onto the wooden filet table and watching it scurry off and fall into the grass. I cried and I recall my Poppy laughing because I was so upset. I remember feeling bad about breaking apart the bodies and claws at first, but eventually that feeling went away. The recipe for crabs is not written down anywhere, it is just known.
My Aunt Terry makes them the best. The sight of the huge pot of boiling water on the stove sends off an alarm in all of our minds. We know that in forty-five minutes we are going to be consuming the best meal on earth. I still do not know how my family measures the amount of garlic, parsley, oil, and butter to put in. When it is all mixed together with the juice of the crabs, the end result could be sold in jars. The Italian bread that is perfectly toasted in our 1980’s toaster oven always has to be sliced by my older sister Andrea. I remember one day she was in the shower, so I thought I would take the liberty of cutting the bread, that was a mistake. My sister has a strange connection with cutting the bread, maybe because she would help Poppy do it before he passed away.
We have bags and bags of frozen crabs that are used every single holiday when we are all together. The smell is heavenly and the taste, well let me just say there is never any left over. My other Aunt, actually, has been taking the same picture of my sister, two cousins, and myself since we were very young. We are sitting around the table, each holding a crab leg or body and smiling at the camera. The recipe of our blue-clawed crabs has never been changed, simply because, you cannot improve perfection.
Sarah Cappy's Chocolate Chip Cookies
2 1/4 cups all-purpose flour
1 teaspoon baking soda
1 teaspoon salt
1 cup (2 sticks) butter, softened
3/4 cup granulated sugar
3/4 cup packed brown sugar
1 teaspoon vanilla extract
2 large eggs
2 cups chocolate chips
PREHEAT oven to 375° F.
COMBINE flour, baking soda and salt in small bowl. Beat butter, granulated sugar, brown sugar and vanilla extract in large mixer bowl until creamy. Add eggs, one at a time, beating well after each addition. Gradually beat in flour mixture. Stir in chocolate chips. Drop by rounded tablespoon onto ungreased baking sheets.
BAKE for 9 to 11 minutes or until golden brown. Cool on baking sheets for 2 minutes; remove to wire racks to cool completely.
Walking into the kitchen that is filled with the smell of home baked goods has always been the best feeling. It is heavenly and it is what I have grown up with. I have continuously been taught how to bake ever since I was a child. Maybe I wasn’t the best baker when I was five, but I certainly always loved helping my mother in the kitchen.
One significant dessert that not only my mom would make, but also my aunts was chocolate chip cookies. It has a been a regular at our family party dessert table. I now know the recipe by heart and it brings back many memories I have. I can just imagine the warm, home-baked smell of the cookies. I love eating them right when they come out of the oven with the chocolate chips melting right in your hands. They are the best fresh out of the oven. These cookies aren’t any special recipe, just the one right off the back of the semi-sweet Nestlé’s chocolate chip cookie bag, but they are things you need to pay attention to that they don’t tell you on the bag. I’ve been taught these special things like the butter.
The butter. The butter is the most important part to the cookies and also to many other baking recipes. It has to be softened to the perfect point. It cannot be too soupy and it cannot be too hard or else it could make your cookies come out a completely different way than you wanted them. I have a method now when I make the cookies that I make sure each side of the butter has 12-14 seconds in the microwave and it comes out just right.
The sugar takes me back to when I was young and helping my mother. I was helping her put the sugar in, but instead of using a ¾ as the directions say I decided to take a scooper, like one you get in powered iced teas, and put several scoops into the mixture. My mom went nuts on me because now she had no idea how much sugar was in there and now instead of helping her I made her life more difficult. I almost seemed like I ruined her and it was the end of the world. I was so young and I felt really bad about it. I just wasn’t thinking and I was just learning how to make cookies. Ever since I have developed my own way of making these cookies and have made certain little changes. Now instead of using ¾ cup of sugar I use a full cup because how could you not want more sugar? More sugar can make anything better and everyone loves sugar.
Another particular thing my mother did with the chocolate chip cookies was with the chocolate chips. When the batter was all mixed she told me to never use the mixer for the chocolate chips. I was only allowed to mix them in by hang (by which I mean with a spoon, not an actual hand.) I was unsure why you could not just use the mixer, but I knew to always mix them by hand and to always listen to my mother.
Another small, but important detail that I was taught to pay attention to was the baking soda because it could easily be mixed up with baking powder if you were not paying attention. It could mess up your whole batter completely if you use the wrong thing.
Baking requires you to remember small details like how soft to make the butter or a certain order you need to mix things. Not everyone can do it, but with my mother’s guidance I am on my way on becoming the next family baker and following in the footsteps of my mother and aunts. It was always important to me to bake as well as them. It was like a goal I had to fulfill. It was a requirement of the woman of the family. I was only making this up in my head, but it was a pressure I put on myself. I guess it was a way of feeling accomplished and appreciated because now I love making cookies for anybody. I love getting feedback from anything I bake. Baking is a good way to make both the baker and the person who eats the food satisfied.
My thing chocolate chip cookies
Picture of when I was little and around the time I started to learn how to make cookies. (I’m holding the umbrella)
Dawoon Yun's Japanese Cold Soba
_bottle of Kaeshi soup base
_Japanese soba noodles
_scallions
_white radish
1/ Pour soup base into the serving dish and put it in the freezer
2/ Bring a pot of water to a boil (about 3cups)
3/ Put noodles in the boiling water and cook
4/ Drain cooked noodles and run them through cold water
5/ Grate white radish and chop scallions for accommodations
6/ Serve noodles on a plate that can drain preferably
7/ Take a whiff of smell and finish eating it!
One of the dishes that is praised in my house during the summer is Japanese Cold Soba. It is a unique type of noodle soup dish because the noodle and the soup are served separately. It started with my sister getting into her Japanese muse phase.
When she was in elementary school, under many different diverse influences of this generation, she found the Japanese culture amusing. Especially, food among all other muse such as music, politics, language and fashion. Japanese Cold Soba is one of the dishes that she just fell in love with and so she decided to launch it in our house. She especially loved that dish because we had it when we were in Japan for about three hours when were moving to the states ten years ago in the airport. I guess it tasted amazing there and left a lasting impression on her.
All it takes a bottle of Kaeshi—the soup base, soba noodles and accommodations as grated white radish and finely chopped scallions. This dish is extra good when it is served extra cold in the summer. First, my sister pours about a cup of Kaeshi on a small bowl with little water depending on the darkness of the soup base. It has to look dark brown. Voila! That’s the soup part. However, in order to have them extra cold, she puts the whole bowl in the freezer and then she starts to cook the noodles and everything else.
I didn’t like the Japanese Cold Soba as much as she did which is the reason I was neither passionate about making them nor eating them although my mind, body and soul would dehydrate on a sizzling summer day. My sister and I get up late in the morning, greet each other with indifference but with silent acknowledgement that we both exist and live in the same house. I think that she is a really hot-blooded- dinosaur because she turns the air conditioner high. In addition, she wants to constantly eat cold food. To be honest, I’ve had Japanese Cold Soba enough since she always urges me to eat with her. It is to her philosophy that it tastes best when it is consumed with another person, how sweet. In her compassion, she asks me day after next if I want to join her in eating of her wonderful Japanese Cold Soba, I refuse. However, she grew up with me all my life, so she knows that she needs to make extra because I am known for indecisiveness and I change my mind quick under influence such as the wonderful uncovered smell of Kaeshi soup base.
Without resistance, I prove to her hypothesis helplessly that I decide to have it as well. It smells so good. It looks like soy sauce to me except it tastes much better and softer! The noodles are just cooked like any other noodles. Boil about 3 cups of water and let the noodles join in it. After the noodles are done cooking, it gets run through cold water to make it cool to serve it cool since it is a cold dish. I forgot to mention, when she is doing all these amazingly hard steps—she calls out to me to help her make the dish which I find ridiculous at my immature mind set since I didn’t want to eat it in the beginning anyway. She makes me take out a huge and heavy piece of white radish and grate it—about 5-table spoon full amount to accommodate the soup base.
Then the frozen Kaeshi soup base in a bowl is ready to come out and ready to be enjoyed. The cooled soba noodles are served on a plate arranged nicely into a roll of noodles about the size of half a fist if preferred. Rolls of noodles look so cute in the middle of the plate looking calm and gray—literally. It is made of 30% buckwheat; which is very healthy for the physical body and mind possibly in my opinion. Next to it sits the dish of frozen soup base and the radish I grated and my arm almost fall off. A delicious dish overcomes all the processes and the thoughts that go through our minds.
Jasmyne Christie's Seafood Salad
SERVES 7 PREP TIME 2O MINUTES TOTAL TIME – 45 MINUTES
Ingredients
1) 1 box of 14.5 oz multigrain elbow macaroni
2) 6 oz of canned or fresh crabmeat
3) Fresh cooked shrimp, as desired
4) 6 oz can of solid white tuna
5) ½ cup each of green and red Pepper
6) 5 tablespoons of mayonnaise
7) Salt and Pepper to taste
8) 1 mined scallion
* Directions:
- Bring water to a boil, add a pinch of salt, stir in macaroni and cook until tender.
- Drain macaroni in colander and rinse with cool water.
- Add ingredients and stir well
- Refrigerate until cold and enjoy
Seafood salad holds a special place in my heart. It reminds me of my old babysitter Mary Bell. I loved her like a grandmother. She took special care of me. Ms. Bell loved to cook, and was very good at it. My favorite dish was her seafood salad and she would make it just for me. Ms. Bell held this recipe near and dear. If I had to describe the way it looks I would say it resembles potato salad. The only difference is that you may see bits of seafood instead or potatoes. It. It has a whitish/yellow color and it smells like peppers and tuna, since they both have a prominent smell.
Although I have listed my grandma’s ingredients above, I highly recommend that you add additional seafood to it. Since I’ am a big seafood lover, I always say “the more the merrier”. Whenever I eat seafood salad it brings me back to my childhood, and it always gives me that feeling of comfort.
Ms. Bell died from breast cancer at the age of 74. Before she died she passed on the recipe to my grandmother, Essie just for me. Whenever grandma makes the salad she says, “There’s something missing,” We think Ms. Bell held back on her secret ingredient because it just does not taste like hers.
Over the years my grandmother has tried to figure out what was missing to no avail. But that secret died with Ms. Bell. Grandma’s salad is good and keeps getting better each time, in addition to the ingredients above she has added mustard and parsley. For me it’s not about the ingredients but the love that’s put into it. The memories go beyond enjoying the dish, but the warm feelings of knowing that they truly care for me.
Danielle Moody's Grandma's Apple Pie
My grandmother's apple pie recipe has to be, perhaps, the best apple pie that has ever had the please to enter my mouth. I have so many memories in the kitchen with my mother and younger sister while making the sentimental pie. Almost every Thanksgiving and Christmas we bake an apple pie for either a family get together or just for ourselves. The apple pie is
probably my favorite dessert of everything i've had to date, and I doubt that'll ever change.
The recipe is fairly simple with a few extra caring details that make the pie a family memory. The pie is 9" in diameter, which may not sound too big but trust me- it's enough to feed quite a few families with its thick and rich taste. We normally buy generic pie crusts from the local King Kullen or Stop and Shop, but that doesn't make it any less good. We buy the pie crust because it just helps quicken the process of making the pie.
Before we get the pie crust all ready, we slice up Granny Smith green apples, six to eight of them in order to be be perfectly precise. My sister and I would stand next to each other hovering over the kitchen counter with a huge bowl of shiny, green apples on the left and another empty one on the right. We would each have our peelers at the ready and once queued by Mom we would start picking apples from the bowl and peeling off all the skins onto a napkin in the middle of the bowls. Often while we're making the apple pie for Christmas we would listen to my Mom's favorite Christmas CD's. My favorite songs on the CD are "Oh Holy Night" and "Silent Night". My sister and I would sing to the CD at the top of our lungs while continuing to peel all the apples until the bowl on the left appeared full of skinless apples.
Next, we call Mom over to show her and she cuts the apples into 1/8th's while we eat the left over skins of the apples. That is one of my favorite parts of the entire ordeal. Next the slices are all thrown back into the bowl, along with one cup of sugar, two tablespoons of flour, and two teaspoons of cinnamon. We would mix this all together so that every apple slice would be covered in the delicious mixture. At this point while Mom and Sam are finishing up with the apples, I am on the other side of the kitchen preheating the oven to 350 degrees and putting the pie crust into the plate. The trick is to butter the crust on the inside with sprits of lemon juice while we pour all of the sugar and cinnamon coated apple slices into the thick pie crust.
Once all the apples are inside my sister and I watch as my mom put the second pie crust atop the apples. She butters it a bit more on top and sprits' about one more tablespoon of lemon juice as well. With the top of a butter knife my mother puts 3 or 4 slits into the top of the pie crust, she says it helps the steam to escape. Again, we sprinkle some cinnamon and sugar atop the pie to add more great sweet flavors.
My mom puts on her holiday oven gloves and puts the pie into the oven to bake at 350 degrees for about 50-60 minutes. While baking it, the entire house smells of crisp and warm apples. My mouth waters as I wait for the pie to be done. When we take it out and it's all baked, depending on what holiday it is- if it's a holiday, we sprinkle some colors on top. If it's Halloween we do orange and darker colored sprinkles or sugar and if it's Christmas we sprinkle red and green sugar or sprinkles on top. I love the holidays and apple pie just makes them even better.
Ashley Singer's Nutella Sandwich
It is nearly three in the morning, and my friend, Kelly is twirling her hair incessantly with one hand and holding a cold mug-full of coffee in the other. “Seriously Ash…what can we make for Joey’s Fourth of July party?” she asks me softly while letting out a yawn. I look at her with an arched brow and pursed lips. “Kells, are you legitimately asking me this nine hours before we have to be there?” I respond. She looks at me with her signature pouty face. “Ash, you know how busy I’ve been…and I know I can count on my best girl to concoct something fabulous in the nick of time.” I let out a sigh and walk from her living room sofa into the kitchen. I sluggishly open her cabinet closest to the refrigerator. The one item that stands out the most is a large, unopened container of Nutella.
I start reminiscing about my mother’s famous dessert and comfort food, her unbelievably delicious Nutella sandwiches. I realize this recipe is easy, appetizing, and a sure-fire way to please a crowd at a Fourth of July shindig. “I have an idea!” I shout to Kelly from the kitchen. “Oh how I love you Ashy,” she responds lethargically. I walk back into the living room and plop onto her sofa. We chit-chat for approximately fifteen minutes longer before I set my phone alarm to wake us up a mere five hours later, and we both nod off to the sounds of Fox news in the background. The sound of my alarm chirps loudly at the un-godly hour of eight in the morning, and we both mosey into the kitchen for an imperative round of coffee. “Where are my keys?” I ask knowing I need to run to the grocery store. “Your bag…duh!..”she responds half-asleep. After I chug down my coffee, I head to the local grocery store for the remaining ingredients Kelly did not have at home: fresh strawberries, pre-made poundcake and chocolate syrup.
When I return with the items twenty minutes later, we get to work in Kelly’s debacle of a kitchen. “Alright, let’s do this!” she says enthusiastically. Kelly tends to perk up after coffee and a cigarette. I tell her to start dicing the strawberries while I slice the two loaves of poundcake into sixteen, half-inch slices of buttery goodness. When I finish, I look over towards my lovable, partial annoyance of a buddy and notice that she’s cutting the berries with a butter knife (of all things). “Kelly dear, what in God’s name are you doing?” I ask holding my tongue. “Dicing the strawberries like you asked!” she states. I let out a big huff and simply stare at the girl for a good five to ten seconds before saying, “Kells…you do not…DO NOT…cut things like fruit with a butter knife.”
After realizing Joey’s party was a meager few hours away, I shoo Kelly away for the time being and spoon a layer of her “strawberry mash” onto eight of the sixteen slices. I spread fresh, nutty Nutella spread on the remaining pieces of cake. “Kelly girl, do you think you can handle taking out a pan, spraying it with some Pam, and putting it on a medium-low –NOT HIGH – heat?” I ask. She waddles over with a half-smile and kisses me on the cheek. “Of course, chef Ashley,” she jokes. I let out a chuckle and finish up my end of the work while Kelly attempts to perform her given task.
After a minute or two, I realize she actually accomplished a domestic undertaking without setting her house on fire. I place half the sandwiches in the pan and proceed to make the first batch for Joey and his crew. “This may somehow turn out alright!” I say surprised. “Oh don’t act like I’m a curse to the kitchen!” she says laughing. We both poke fun at each other until the sandwiches are finished cooking. We go upstairs to get dressed and “girl-prep” before it’s time to head back downstairs for a last-minute chocolate drizzle on the goodies. After all, everything looks better with a garnish. Kelly manages to find a large enough Tupperware to store them in, and I grab my keys. As we are on our way to the party, Kelly looks at me from the passenger seat with the Nutella treats on her lap and says, “You know Ash…you’re not a bad character to play house with. Thanks for helping me out today.” I give her a smile and respond jokingly, “And you, my friend, are a hot mess when it comes to being domestic, but I still love you to pieces.”
Recipe:
(Makes 4 sandwiches)
Ingredients:
8 slices of poundcake (half inch thick)
Jar of Nutella
Roughly 2 cups of diced strawberries
Chocolate syrup for drizzle
Directions:
Spread thick layer of Nutella on 4 slices
Add hefty spoonfulls of strawberries on top of Nutella
Cover with leftover slices
Spray a pan with cooking spray and place on medium-low heat
Cook each sandwich until golden brown
Allow time to cool and drizzle with chocolate syrup
Patrick McGrath's Peanut Butter Cookies
If there’s one food that I always have a taste for, it’s peanut
butter. That combined with my gigantic sweet tooth can be a deadly
combination, specifically when it comes to buckling my belt afterwards.
My two loves, peanut butter and dessert has led me to many trials and
tribulations involving peanut butter cookies, the best of both worlds.
I have tried a plethora of different recipes, but ultimately it was one
of my best friends, Erin, who introduced me to a recipe that has since
been my absolute favorite.
America’s Test Kitchen did a great thing for the baking world when
they compiled a cookbook; the premise behind it is the contributing
bakers test hundreds of recipes for a given type of desert. Out of all
those tests they only feature the very best in the final cookbook. This
is where Erin found the recipe.
The recipe begins by creaming butter, brown and granulated sugar
together, a standard of most desserts. My many adventures in the
kitchen have all began in a similar way. I remember one time when I
was throwing together another cookie recipe, Erin’s sister, Carly,
another one of my best friends came into the kitchen to test the work
in progress, she stuck her finger in the bowl for a sample and
exclaimed, “ Mmm… What is that?” “Butter and sugar.” I replied. To mask
her embarrassment and to defend herself against my laughing she
rebutted, “Perfect, my Favorite.”
After creaming the butter and sugar you really kick it up a notch a la
Emeril and add in a cup of extra creamy peanut butter, I however prefer
smooth, I find it helps make the batter more manageable and ultimately
the cookies softer. Then add the eggs, one at a time. To my mother’s
fear, the sampling of the batter does not take a break, not even out of
fear of salmonella poisoning, in fact, right around the eggs is my
favorite point of the batter.
After the eggs are incorporated and the batter is basically a peanut
buttery goop you add in the dry ingredients. One mistake I’ve made
with this recipe one of the first times I made these particular
cookies, I forgot the flour. It wasn’t my fault though. It was because
of the way I printed out the recipe, the flour measurement somehow got
stuck up next to the approximate amount of cookies the recipe should
make, something I always ignore. Evidently mine always turn out with
less because either when it comes time to bake them I’ve already eaten
half the batter, or because of my love for giant portion sizes, my
cookies are always bigger than the recipe intended.
My favorite part of the recipe and the reason why I think these
cookies are far more peanut buttery and delicious above all other
recipes is the final ingredient that you add, a cup of roasted salted
peanuts that have been put through a food processor and have the
consistency of bread crumbs. When Erin first told me about that step
in the baking process it was like someone finally turned the light on
for me, it all made sense. That was the reason no peanut butter cookie
recipe was ever peanut buttery enough for me. This ingredient also adds
to the final cookie texture after it’s done baking, the less flour, the
softer the cookie will be.
When it’s finally time to bake the cookies, I don’t use the
traditional tablespoon measurement. Actually, I break out the ice cream
scoop and plop down a quarter of a cup of batter that will bake into
the perfect, large crispy on the edge, soft in the middle peanut butter
cookie. One final trick I have when baking these cookies, again a
little out of the norm of what The Joy of Cooking may necessarily
approve of is, don’t let the cookies bake for the full time; in fact,
under baking them slightly will insure them to be soft, moist and
delicious.
As much as I enjoy eating these ultimate peanut butter cookies, every
time I bake them I am reminded of more than just my hunger. I reminisce
about past times I’ve baked especially with my two best friends, Erin
and Carly. As much as I love eating them, the memories are something I
find much more comforting and precious.
Alex Sosner's Magnolia Cupcake
On Saturday morning, the day before my graduation party, I knew I had a full day of baking ahead. My mom and I were going to make the delicious magnolia cupcakes everyone knows us for. Even though we had many other priorities before the party these cupcakes were a must! Bringing out all the eggs, flour, butter, milk, sugar and my favorite vanilla extract I knew it was time to get cooking! I was starting to catch on to the process after watching my mom bake the cupcakes multiple times before. Pouring in all the ingredients and smell the very distinct vanilla extract got me very excited. After putting the cupcakes into the oven it was time for my favorite part, the frosting! The delicious vanilla buttercream frosting was irresistible. With the very healthy two sticks of butter, six- eight cups of confectioner's sugar, milk and yet again the finishing touch of vanilla extract I couldn't control my senses. After putting together all of the ingredients we separate the frosting into three bowls. we put a few dots of red in one bowl to make a light pink, a few dots of orange to make a light yellow and a few dots of green to make a light green. The pastel color frosting is the best addition to the cupcakes. After the cupcakes cool we put each bowl of frosting into a ziplock bag and snip the end. I watch my mom carefully swirl the light pink frosting on to the vanilla cupcake, I was drooling. After we finish frosting all the cupcakes we arrange them beautifully on a try and they look like a piece of art. The day of my party comes and the caterers are there but of course for dessert the first to go are our cupcakes!
This recipe reflects a of of personal history between my mom and I because growing up my mom and I always baked and once I started getting older and learned to help these cupcakes became tradition for us. This dish is very important to me because when I lived in Florida I was always so anxious to move to New York City for college. When my mom and I made these cupcakes I was reminded of New York. Now that I'm here in New York if i treat myself to a Magnolia Cupcake I instantly think of my mom and the fun times we had baking together.
Ingredients
Cupcakes:
1 1/2 cups self-rising flour
1 1/4 cups all-purpose flour
1 cup (2 sticks) unsalted butter, softened
2 cups sugar
4 large eggs, at room temperature
1 cup milk
1 teaspoon vanilla extract
Icing:
Vanilla Buttercream, recipe follows
Directions
Preheat oven to 350 degrees F.
Line 2 (1/2 cup-12 capacity) muffin tins with cupcake papers.
In a small bowl, combine the flours. Set aside.
In a large bowl, on the medium speed of an electric mixer, cream the butter until smooth. Add the sugar gradually and beat until fluffy, about 3 minutes. Add the eggs, 1 at a time, beating well after each addition. Add the dry ingredients in 3 parts, alternating with the milk and vanilla. With each addition, beat until the ingredients are incorporated but do not over beat. Using a rubber spatula, scrape down the batter in the bowl to make sure the ingredients are well blended. Carefully spoon the batter into the cupcake liners, filling them about 3/4 full. Bake for 20 to 25 minutes, or until a cake tester inserted into the center of the cupcake comes out clean.
Cool the cupcakes in tins for 15 minutes. Remove from the tins and cool completely on a wire rack before icing.
Vanilla Buttercream:
The vanilla buttercream we use at the bakery is technically not a buttercream but actually an old-fashioned confectioners' sugar and butter frosting. Be sure to beat the icing for the amount of time called for in the recipe to achieve the desired creamy texture.
1 cup (2 sticks) unsalted butter, softened
6 to 8 cups confectioners' sugar
1/2 cup milk
2 teaspoons vanilla extract
Place the butter in a large mixing bowl. Add 4 cups of the sugar and then the milk and vanilla. On the medium speed of an electric mixer, beat until smooth and creamy, about 3 to 5 minutes. Gradually add the remaining sugar, 1 cup at a time, beating well after each addition (about 2 minutes), until the icing is thick enough to be of good spreading consistency. You may not need to add all of the sugar. If desired, add a few drops of food coloring and mix thoroughly. (Use and store the icing at room temperature because icing will set if chilled.) Icing can be stored in an airtight container for up to 3 days.
Yield: enough for 2 dozen cupcakes or 1 (9-inch) layer cake
Lior Vexler's Hummus
Eating hummus brings back memories of when I was young and my mother used to make me sandwiches to take to my school. I used to eat them during the breaks while or the other kids had chocolate or cheese. I used to eat hummus so much and so often that my uncle used to laugh at me and say, “If you don’t have hummus at home you’ve got nothing to eat.” Maybe this is the reason why I got so skinny since I arrived in NYC. I can’t really find a good hummus in NYC.
The roots of hummus are in the Middle East, probably from Lebanon, which is the same country that brought us falafel. Even though hummus originates in Israel’s neighbor, it already has become the country’s national food. You can find hummus everywhere in Israel in different styles and different flavors and it will always stay popular.
In summer of 2007 I was about to move to NYC. I decided to have good hummus for the last time before I leave. I called my best friend Tomer and we went to “Nehalt Binyamin” Street in Tel Aviv. This street has very unique architecture. It’s build like a “Dutch” street, which means it has a very long sidewalk and in both sides you can find stores that selling special boutique cloths and art galleries, above them there small houses build in old fashioned way which was preserve till this day so you get the feeling of the real feel of the this young old city . No cars are allowed to enter the street, so mostly you can find people walking or riding their bike. Because the sidewalk is so wide usually there is a art market where all kind of artist selling their goods from their carts in the street. Stuff like painting to cool and modern statues and any other art work you can imagine. This Street had just the right vibe for my “last hummus.”
We sat down in a restaurant , “they have very good hummus,” my friend said. I looked at the menu and saw there were unique dishes, like hummus beef and onions, hummus with chicken, I choose hummus with lamb and mushrooms. We waited like 20 minutes when and I so hungry so I imagine how good it’s going to be. Finally the food arrived in deep “soup plate, in the middle there were the lamb and the mushroom and from the side the delicious hummus. I finished everything using the hot, fresh pita bread while dipping every bite in olive oil .
Every time I’m eating good hummus In NYC it gives me back memories or my country. The great food , the weather and my family and how much I missed it . It also reminds me my best friend and how much fun we had together so whenever who talk on the phone I’m always telling him “next time I’m coming you would pick me up from the airport and first thing we do is get a good hummus.”
Prep Time: 10 minutes
Ingredients:
1 16 oz can of chickpeas or garbanzo beans
1/4 cup liquid from can of chickpeas
3-5 tablespoons lemon juice (depending on taste)
1 1/2 tablespoons tahini
2 cloves garlic, crushed
1/2 teaspoon salt
2 tablespoons olive oil
Preparation:
Drain chickpeas and set aside liquid from can. Combine remaining ingredients in blender or food processor. Add 1/4 cup of liquid from chickpeas. Blend for 3-5 minutes on low until thoroughly mixed and smooth.
Place in serving bowl, and create a shallow well in the center of the hummus.
Add a small amount (1-2 tablespoons) of olive oil in the well. Garnish with parsley (optional).
Serve immediately with fresh, warm or toasted pita bread, or cover and refrigerate.
YieSung Lee's Korean's Special Vegetable Pizza
Ingredients:
Korean leek, spring onion, 1 onion, 5 hot peppers, 2 eggs, pork 300g, a green young pumpkin
In Korea, we usually have our traditional vegetable pizza when it is raining and cloudy. I do not
know where it originated from; people tend to have this food with their family on gloomy days. My
mom made this pizza and me and my sister always helped her. It is not hard to cook. You can put all the
ingredients that are indicated above into a big bowl. After you mix it well, it is ready
to put in the pan. If
you want to have a little crispy one, you can just pour out a little bit in the pan. Personally, I like the
crispy
one better. After you put a certain amount in the pan, wait for about 3-4 minutes and make sure
it is cooked. Then, you can flip
it upside down to cook the other side. Give it another 3-4 minutes; you
are ready to put it on the dish. How simple is that! I remember it was a day it rained so hard. Outside it was dark and nobody was on the street.
Our family live on the 39th floor. I could see the view of Seoul at one time. Although it was raining hard,
the view of Seoul was still beautiful. We just slept in until 1pm and relaxed at home watching television
and reading a book. My mom said, “We are going to have a vegetable pizza for dinner today!”
My sister and I got really excited to get all the ingredients from the supermarket and cook pizza
ourselves. In the basement of our apartment, there is a big supermarket. Three of the girls went down
and got all the ingredients that we needed. While my mom chose what we actually needed, my sister
and I just picked pies and ice cream. Of course, my mom did not like our choices. After we purchased all
of them, we started to prepare it. We washed all the vegetables with the water and chopped them into small pieces. My sister tried to cut it, and the shape was not pretty. When my mom cut the vegetables
the shapes were exactly the same and uniformed. My mom and I made fun of her, and my sister let me
do it. I took a deep breath and took a knife. I do not usually cook, so I was not sure how it would turn
out. I started to cut it and they were looking at my hand. It was really slow and my mom was frustrated.
Mom said, “It will take a month to cut it girl.” Shame on me. I should not make fun of my sister. Actually
she did a much better job than I did. After we had the little cutting contest, we mixed the vegetables together with the flour. It was really fun to do it. We tasted our dough, and it didn’t taste good. Of
course, it was just mixed with flour and vegetables, not chocolates and vanilla! However, Our pizza
turned out so good. We were ready to eat it. When three of us tried it at the same time, we were like “um~yammy”. We made five thin slices of pizza and finished in 10minutes. Because it is made out of
healthy ingredients, we still felt not too heavy. Now, I live in New York and my family lives in South
Korea which is 11 hours from here. Therefore we don’t get a chance to cook together. Whenever it is
raining outside like these days and I am alone, I think of past days. Not only making delicious food, but
spending time with family is the most precious time in my life. I tried to make that pizza one day by
myself, and it turned out pretty good. However, the taste was not as good as my mom’s pizza.
Also, eating it alone was not fun at all. Again, I realized how much family means to me. As soon as I visit
my family, I will suggest cooking that pizza again even if it is not raining.
Yeong Kim's Seaweed Soup
In Korea, a woman in childbed has brown seaweed soup right after giving birth. Brown seaweed soup is known as good for a woman in childbed, because it contains a lot of calcium. Also, there is interesting belief related to brown seaweed soup that you are going to fail in an exam if you have brown seaweed soup on an exam day. That is why students preparing for an exam tend to avoid having brown seaweed soup in the morning.
On my every birthday, my mom makes brown seaweed soup without exception to celebrate my birth. When my mom’s 40th birthday was coming, my sister and I realized that we hadn’t made brown seaweed soup for our mom. We made a small plan to prepare for brown seaweed soup. It had to be done without my mom’s notice. We gathered information from our aunt who is well known to a good cook. She gave a list what we should buy and how we prepare the dish. At the end, we didn’t forget to remind her not to tell our mom about this surprising present.
Because of the reasons that I was too young to cook and I am not good at cooking as well, my sister took on a cooking job. Instead I bought all ingredients to be needed with our pocket money. First of all, we needed brown seaweed, beef, chopped garlic, sesame oil, salt and soy sauce. Fortunately, it doesn’t need many ingredients compared to other Korean traditional food. The thing my aunt emphasized was that we had to start with soaking brown seaweed in water. And the next step was combining together with brown seaweed and soy sauce. Since these two steps take some time, it had to be done before my mom’s birthday morning. My sister and I sneaked into the kitchen and prepared to trim brown seaweed. Usually, brown seaweed is sold in a large quantity in a big bag so we didn’t need it all. However, we had a hard time to decide how much we had to put for my aunt didn’t tell us exactly. I put the responsibility on my sister as an assistant. After we made sure whether brown seaweed mixed well with soy sauce, we went to bed expecting the next day.
The long-awaited day came. My sister cut beef and then roasted it with sesame oil and chopped garlic. After the beef seemed to be boiled, she put the brown seaweed that we prepared before the day and roasted together. During she was making the brown seaweed soup, I got breakfast ready. I couldn’t wait to see my mom in surprise. The last step to finish the soup was that put some water into roasted beef and brown seaweed and boiled up for a long time. Also we had to put some salt and soy sauce. My aunt said if we didn’t boil it enough, it wouldn’t be well seasoned with salt. The sweet smell of sesame oil gave out all the air. This smell woke my puppy up and she sniffed in the kitchen. It was time to wake my mom up. I covered my mom’s face with my hands and had her sit at the table. My dad seemed like he didn’t know what was going on half asleep. My sister and I sat and waited until my mom opened her mouth to speak how much she liked the soup. “This is the sweetest soup I’ve ever had,” she said. I know that she didn’t mean it was well-made soup but she was touched by our sincerity since the soup tasted a little too salty. We boiled it too long. Although the soup was not perfect, my all family was as happy as happy can be according to my memory. Brown seaweed soup is not only a health food, but also reminder of warm love of my family.
FoodIT
Arroz con Gandules: A traditional Puerto Rican Dish
By Olga Santiago
December 2009
Thanksgiving Day has always been a very special holiday for me for many reasons. For one, I got to take a much deserved break from school and the stress of projects and tests, even if just for a few days. Also, it meant that Christmas time was near, and that’s undoubtedly my favorite time of the year. The most important reason, however, is that it’s one of the few times in the year in which most of my family would be together in the same place and at the same time. We’re very close, but sadly we all live very far away from one another, so we loved to make big celebration out of every holiday. Ever since I can remember, we’ve celebrated Thanksgiving Day in my grandparent’s house in Ponce, Puerto Rico. Besides spending time with my family, I always looked forward to what I was sure would be a delicious Thanksgiving Day dinner, courtesy of my amazing grandmother.
Like every other culture, the Puerto Rican culture has many traditional dishes, and no holiday celebration would be complete without them. I cannot remember a single Thanksgiving or Christmas Day dinner in which my grandmother has not prepared a delicious pot of arroz con gandules. Her cooking is absolutely exquisite, and every year I look forward to her arroz (rice), stuffed turkey and potato salad. She starts her preparation a few days in advance and we usually help her with the finishing touches and bring dessert. She says she loves cooking and having dinner with her family more than anything.
When I asked her when she first learned to make arroz con gandules, Abuela Olga told me it was fifty-two years ago, after she married my grandfather. The first time, she followed a recipe in a book called Cocina Criolla. That book is now sixty years old, and she doesn’t use it anymore because she proudly knows all the recipes by heart. She’s also tweaked the recipe to her liking, so she has her own way of making the dish. We usually serve arroz con gandules with side dishes like tostones (flattened fried plantains) or amarillos (fried plantains). But my favorite side dish is my grandmother’s potato salad.
This year, however, I was not with my family on Thanksgiving Day. I only had two days off of school and the weekend, so the trip would have been too much of a hassle for only four days. I was a bit sad that I was not going to be spending my break with them, but for the most part I was excited that I was going to be in New York City for Thanksgiving Day for the first time ever. Plus, I was going to be with my uncle Danny, who lives in Jersey. And as a last minute arrangement, a friend from back home was going to come visit me, and stay for the break.
My original plan was to go to the Macy’s Thanksgiving Day Parade in the morning with my friends, and then spend the rest of the day with my uncle. But since my friend was arriving on the twenty-sixth at noon, I had to go stay with my uncle Wednesday night so we could go pick her up at the airport the following day. So my uncle and I decided to make an event of the whole thing and actually attempt to cook a Thanksgiving dinner, grandma-style. We told my grandmother about it, and she wrote us a list of the ingredients we were going to need and her own recipe for the rice and the turkey, and e-mailed it to us. After he picked me up on Wednesday, we went to a supermarket nearby and bought all of the ingredients we needed to make arroz con gandules and to roast a turkey. We also bought some brownie mix for dessert.
If you ever saw my uncle’s fully-stocked kitchen, you would think that he knows how to cook, and that he uses his kitchen frequently. But you would be wrong. And probably as shocked as I was when he confessed that he rarely used it and that he does not really know how to cook. This all happened the night before Thanksgiving Day, which was also the night before my friend would arrive, and I was a little worried that this little adventure of ours would turn into a complete fiasco. For my part, I knew a few cooking basics, but I had never cooked arroz con gandules or roasted a turkey in my life. Nevertheless, we set out to do our best. (We could always go out to a restaurant, after all.)
So, armed with our grandmother’s recipe, we started to prepare everything we would need. We began with the turkey first, and as I read through the recipe I started to see that, although I am sure she tried her best to be as specific as possible, my grandmother’s recipe was not completely suited for kitchen novices like us. My uncle decided to take the reins and was the one who did most of the cooking, mostly because if I was unsure of what I was doing I would simply not do it. And completely opposite to me, he would do whatever, even if he had no clue at all. Although I was wary of the actual outcome, we had lots of fun trying to decipher what to do next and attempting to follow the instructions step by step. We had the turkey stuffed and ready to be roasted in no time, and then we left everything prepared and organized to cook the rice in the morning as well. I baked the brownies that night to save us some time the following day.
The moment of truth came around three o’clock on Thanksgiving Day. When I woke up, my uncle had already put the turkey in the oven, so I helped him mix the ingredients for the rice. We left at noon to go pick up my friend at the airport, and it took us about three hours to finally get back to his place. We were all extremely hungry and we dug in as soon as we got back. Everything looked amazing, and we hoped it tasted as great as it looked. I first took a bite of the turkey, and we all agreed that it came out just perfect. Sadly, the arroz con gandules was another story. My uncle left the heat on for too long, and it got a bit burnt at the bottom. The rice looked great, but it had a weird aftertaste of smoke when you ate it. We were kind of disappointed about that, but we decided that it wasn’t that bad for our first try ever, and that next time we did it would come out perfect. The brownies were absolutely delicious.
Even though our dinner didn’t go exactly as we planned, we were very happy. We spent the rest of the day being tourists in New York City, and we were in great company. I was happy about that having that experience with my uncle, and now I can actually say I roasted a turkey and made arroz con gandules. It will be a fun story to tell everyone when I go back home for Christmas Break. Plus, I know that I’ll have a dish of a truly perfect arroz, potato salad and turkey waiting for me when I go to my grandparent’s house on Christmas for our traditional dinner.
Baking Memories
By Sarah Cappy
December 2009
The smell of cinnamon, apples and sugar, the first taste of a fresh chocolate chip cookie, soft and with the chocolate still warm, the loveliness of a fresh out of the oven torte are all of my favorite experiences from baking whether its at home with my family or just with a friend. It is exactly why I love baking. The smells, tastes, and beauty are only part of baking. Many of my happiest childhood memories come from the kitchen. Walking into the kitchen that is filled with the smell of home baked goods has always been the best feeling. It is heavenly aroma and it is what I have grown up with. Ever since I was a child around 5 years old I have been observing my mother make baked good after baked good. Maybe I wasn’t the best baker when I was five, but I certainly always loved helping my mother in the kitchen. Now as I get older I keep making more and more memories in the kitchen, which are the funniest and best memories to have.
Baking and frosting Christmas sugar cookies with my brother and sister and eating just as much frosting as ever ended up on the cookies. I can still remember it as if it were yesterday. All of us sitting around the kitchen table with bowls of different colored frosting, sprinkles, chocolate chips, and anything else we thought might taste good on a cookie spread out everywhere. Angels, wreaths, reindeer, and Santa cookies were spread out on our plates next to all the different colors of frostings and toppings that would make our cookies look and taste just right. My sister was the artistic one, always creating wonderfully detailed designs with the frosting. My brother would be shoving as many cookies in his mouth as possible whenever mom wasn’t looking. We’d be covered in cookie crumbs, frosting, and sprinkles by the end of the night. It was the best feeling making these delicious cookies right before Santa came.
Another time while I was helping my mom make chocolate chip cookies and we were both standing over the batter together. I was only about five and I was helping her put the sugar in, but instead of using a three-quarters of a cup of sugar as the directions say I decided to take a scooper, like one you get in powered iced teas, and put several scoops into the mixture. My mom went ballistic. Now she had no idea how much sugar was in the batter and now instead of helping her I made her task more difficult. It almost seemed like I ruined her life and it was the end of the world because I remember her being so mad that ruined her batter. I was so young and I my heart dropped to my stomach. I only wanted to help her make the tastiest cookies ever. I just wasn’t thinking and I was just learning how to make cookies. That has taught me ever since to pay attention while I bake and to this day I always think about this story.
One morning my sister and I thought it would be a great idea to make pancakes for my parents so they can breakfast in bed. My sister took charge and had my brother and I measure the ingredients out perfectly. The batter only consisted of eggs and milk mixed in with the pancake powder. How hard could that be? But, oh yes, we did miss something very important. We forget to check to date on the milk carton. So after my sister cooked the pancakes to the perfect size and the perfect golden brown, we put these flawless pancakes on a pretty tray with a small flower on the side to serve to our parents. We were so proud of ourselves until our parents started to spit out the pancakes, surprising us completely. The told us the pancakes tasted completely sour. It was a fun experience making breakfast for my parents with my siblings and taught us a simple thing as to check to date on a carton.
On one Sunday morning my mom and I decided it was time to thoroughly clean our kitchen. We scrubbed the kitchen floors until they were spotless. Then we tackled the oven, which we scraped and scrubbed. This took up our whole Sunday morning. We then decided that, as a reward for all of our efforts and hard work, we would bake a batch of chocolate chip cookies. Now looking back it wasn’t such a good idea. So we measured and mixed all the ingredients, then put our perfect cookie dough onto our cookie sheets, and went to put them into our recently cleaned oven. Then it happened. My feet slipped just a little bit, but enough for me to drop cookie sheet full of dough as I was leaning into the oven. The sheet flipped over making all of the cookie dough to land onto the hot oven door. As I was panicking I thought that the cookies would begin baking and burning and my mom took a dishtowel to try to scoop the dough off from oven door. While scooping the dough from the oven, my mother began accidentally dropping the hot dough on our just cleaned floor. Just as we were cleaning the last of the mess out of the oven, my knee hit the oven door knocking my arm into the oven. I pulled my arm out quickly which only burned slightly. We both just looked at the mess we created in our kitchen. We sat in the mess and laughed while I held an ice pack to my arm. Even though it was a complete kitchen disaster, it is one of my mother’s and my favorite memories of being together in the kitchen.
The phone rang while my mom was baking her famous blueberry torte, so she called me over and said something. I heard, “Turn this down,” so I saw that the kitchen television was on so I turned the volume on low and went back to what I was doing. Twenty minutes later, she walks in the kitchen and starts yelling. So I ran over quickly to see what she’s talking about and the plastic spatula that had just been in her batter had melted all over the flat electric strove. I realized she had told me to turn off the stove and not just the television. To this day we still keep leaving things on our stovetop not realizing our mistake until we smell the plastic burning.
Recently, my friend Lindsay and I wanted to make cupcakes for our class and we decided to go all our and we bought red velvet cake mix along with fresh fruit and we panned on making our own icing. In the grocery store we checked over and over to make sure we had everything that we needed like the oil and eggs. When we got to Lindsay’s kitchen, we went right to work. I poured the cake mix into the bowl along with the water and the oil. Lindsay started to stir it together so I moved onto making the icing. After we put our cupcakes into the oven I had a sudden realization and asked Lindsay if she put eggs into the mixture. We both just look at each other shocked, but we decided maybe the eggs weren’t that important. So after the cupcakes were finished we chose to try the cupcakes to see what they were like. They looked fine but as soon as you put it into your mouth, they turned into complete mush and goop and were completely inedible. But we were determined to make mouth-watering cupcakes so I went out to buy more cake mix. This time we made sure everything was correct. As the cupcakes were in the oven I made my homemade icing while Lindsay cut up strawberries, kiwis and blackberries. Our red velvet cupcakes were going to have sweet, white homemade icing layered with a thin slices kiwi, strawberry and blackberry. Even though we messed up in the beginning and forgot an ingredient we wound up making the most scrumptious looking and tasting cupcakes. We were very proud of ourselves and it was funny experience.
Baking requires you to remember small details like how soft to make the butter or a certain ingredients that are essential to a batter or to measure correctly. Not everyone can do it, but with my experiences from at home with my mother or my siblings or friends, I have the best experiences and memories. Baking in the kitchen is one of most rewarding and fun things to do. Just thinking of the warm, delicious aroma of cookies and the taste of fresh out of the oven sugar cookies makes me remember why I love being in the kitchen. With some guidance I am on my way on to becoming the next family baker and following in the footsteps of my mother I am going to make other enjoyable experiences and memories with more friends and eventually my own family.
Banana Pancakes
By Sherissa Fleming,
December 2009
BANANA PANCAKES
2 c. Bisquick
2 1/4 c. milk
2 eggs
1 c. mashed bananas
1/2 tsp. cinnamon
1 tsp. vanilla
1 tsp. sugar
Beat ingredients with hand beater until well blended; for thinner pancakes add milk as needed.
Pour 1/4 cupfuls onto hot pan (grease if necessary). Cook until edges are dry. Turn and cook until golden. Makes about 12-13 pancakes.
Food can sometimes be a factor that pulls cultures closer together. It can start conversations and friendships and have emotional attachments on people’s lives.
When I was younger my sister would always make pancakes. Every Saturday morning I would wake up to the smell of a Pancake breakfast. I would sometimes sit in the kitchen by the table and watch her as she prepared the batter.
For a long time since I could remember, we only used Bisquick Pancake Mix. It was a taste that I have grown to love and a brand that I have become accustomed to. My sister would have me gather all the ingredients for her and mix it into the bowl. One by one I would grab whatever she asked. The eggs and milk were in the refrigerator. The pancake mix was in the high cupboard which I had to climb on top of a chair to get. She would sometimes add different spices and extracts to make the pancakes taste different. She always tried new thing such as chocolate chip pancakes, pineapple pancakes and blueberry pancakes. The most significant one to me is Banana Pancakes.
Banana pancakes have been my favorite type of pancakes because of the rich banana flavor. Making them was easy for me because I watched my sister make them for so many years. When I was old enough to use the stove I started to make them for my family. It took me a while to get them to taste the way my sister made them. Sometimes I would make them and there would be big lumps of banana in each bite. Other times I would make them and have the stove too high so the pancakes burned. Each time I made them it was one less mistake for the next time. Finally when I got the hang of things cooking became easier. Everybody loved my pancakes.
When my friends would come over I would make it for them. One day I was staying over my Best Friend’s house and her father made us a big breakfast. He made pancakes, sausage, eggs, bacon, and hash browns. We sat at the table and as my friend and I proceeded to eat, she blurted aloud “These pancakes don’t taste like Sherissa’s” and made a disgusted face. I was mortified by her outburst and quickly tried to lighten up the situation by expressing my gratitude for the breakfast he prepared. Her father made the pancakes from scratch that is why they did not taste like my pancakes. The Bisquick gives the pancakes a biscuit like flavor. It was funny because she did not mean it in a harsh way but the way she said it could have easily been interpreted as an insult. Food is a delicate subject to most because sometimes how a person cooks or if a person can cook can affect relationships.
Breakfast was a feast that brought my family and me together. It was also a time for memories and funny stories be shared. We would all sit at the table and discuss or week passed or coming. My banana pancakes are special in that there are many stories meaningful and heart filled to be shared.
Belizean food
By Jasmyne Christie
December 2009
Growing up in a Southern American/Belizean family I have experienced the best of both worlds. Although I love both styles of cooking, I just can’t get enough of Belizean food. Maybe it’s the aroma of the food cooking, the spices pulled together that create a mouth watering meal or maybe it’s the traditional fresh baked bread and bun that keep me coming back for more. I don’t know what else to say except that the food simply keeps my mouth longing for more. Belize is located in Central America; its closest neighbor is Mexico. They share some of the same specialty dishes prepared just a little differently such as tamales and enchiladas. Belize is definitely a place that you should visit. It’s beautiful, and I’m not just saying that because my family is from there. I am saying it because it is. Belize is a mix of many different influences, Caribbean, Mexican, African, Spanish, and Mayan. Most Belizean people speak Spanish.
Belize is widely known for its seafood; fresh fish, lobster, shrimp, and conch. Belize has historically been a major exporter of lobster. Lobster season, is from February 14th thru June 15th. Many families go home in the month of June for the well-known “Lobster Fest.” June is a very popular time for family gatherings.
The typical breakfast in Belize is simple; scrambled eggs, refried red or black beans. This is usually served with a choice of tortillas, johnnycakes, or fry jacks. Johnnycake is a semidry, baked, round flour biscuit, served with butter or stuffed with ham and/or cheese. Fry jacks are a similar batter and shape, but deep-fried, and either served as is or dusted with confectioner’s sugar. The most common tortillas served in Belize are corn tortillas.
Rice and beans is a major staple, often served as an accompaniment to almost any main dish. Belizeans tend to use small red beans, although black beans are also popular. Aside from rice and beans, the national dish is stew chicken followed closely by stew beef and stew fish. Another stew commonly found around Belize is called chi mole also known as black gumbo. A main course dinner would be rice and beans, baked chicken, sweet plantain, potato salad with sweet peas and carrots and sometimes stuffing. For desert most Belizean families eat homemade coconut pie, chocolate pie, or bread pudding. Flan, egg-and-condensed-milk custards are imported from Mexico, are also popular.
For holidays such as Easter and Christmas specialty dinners are made. One specialty is Tamales; it requires a special red spice called Recado, which is very hard to find in the United States. You simply cannot make Tamales without it. Grandma usually brings it back with her when she goes down to Belize for lobster fest. Making tamales is fun because it involves the whole family. We make an assembly line to prepare this dish. One person cuts the aluminum foil into pieces big enough to hold the fresh cornhusks. The other person mixes the Masa Harina and places it on top of the cornhusks. Grandma fills it with either chicken or pork that has been cooked using special spices. The Tamales are rolled up and twisted at the ends and steamed for 1-2 hours. The end result is delicious. Another dish that is made around the holidays is called black dinner, it is chicken cooked in a special black sauce.
At home eating together is a traditional meeting that helps brings the entire family together. It’s a time for the family to talk, relax and laugh about anything. My family and I always eat together at the table. Despite our busy and hectic lives we always manage to share this time together. Besides spending quality time with my family I mostly enjoy the food. There is always more than enough. During the holidays each family member brings in his or her favorite dish. Many of these dishes were recipes passed down from generation to generation. In my family everyone helps to cook. My grandmother is a firm believer that everyone should learn how to cook a Belizean meal just in case something ever happened to her; we would all be able to pass down the recipes from generation to generation.
Since the majority of these foods require a lot of oil and frying my family has found ways to prepare them with healthy substitutes. Although we don’t eat these foods on a daily basis we enjoy them whenever we can. My mother gives us the best of both worlds and throws in her own love for diversified food and cooking.
The typical Belizean diet does not offer dark green vegetables and mom is a stickler about veggies. Some of things we do to maximize healthy cooking are; choosing a low fat, reduced fat or non-fat version of a recipe. For instance instead of whole milk we buy either fat free or 1% milk, we remove or reduce salt from recipes. Instead we add fresh herbs, lemons, limejuice and natural spices. We always use fresh fruit, fresh vegetables and meats in recipes, because canned products are high in sodium. If you use canned products choose the healthier reduced sodium or sodium free versions and always rinse them off in water because they are packed with salt and preservatives. Baked, broiled, roasted or grilled meats are a much healthier alternative to pan and deep fried foods that contain too much fat and cholesterol. We use lean cuts of meat and remove any visible fat before cooking. Also, by removing the skin from poultry before cooking you can eliminate fat and cholesterol. If you must fry your meat and vegetables, avoid cooking in lard and oils high in saturated fat. Substitute with a vegetable oil that’s low in saturated fats and high in healthy fats. We always use Olive Oil.
Cut back on the amount of meat in your recipes and add more vegetable and whole grain products. Use ground turkey when the recipe calls for ground beef. These are just some of the ways you can prepare any meal whether it is Belizean or any other nationality. The healthy way is the right way.
When I get a family of my own, I plan to keep the traditions and teach my children all the recipes passed down over the years. In the mean time I’ am experimental with cooking. I feel that everyone has a unique style of cooking. I like to play around with a lot of herbs such as parsley, cilantro, rosemary and oregano. I’ am known for mixing unusual ingredients together, and I must say most of the time it comes out okay. The kitchen is the heart of the home. It is where the cooking is done and memories of good meals and conversation.
Blue-Claw Crabs
By Alissa Alvino
December 2009
Being Italian has a huge influence on what I eat. Every summer, my family on my dad’s side and I catch crabs in Hampton Bays. I never forget being younger and helping my Poppy, Daddy, and Aunt break and clean the huge blue clawed-crabs. I can still see myself and cousins, all around the ages of 5 to 9, huddled around the open bucket or freshly caught crabs. We would poke at them with the metal tongs to see if one would claw and grab on. I remember one time dropping a crab onto the wooden filet table and watching it scurry off and fall into the grass. I cried and I recall my Poppy laughing because I was so upset. I remember feeling bad about breaking apart the bodies and claws at first, but eventually that feeling went away. The recipe for crabs is not written down anywhere, it is just known.
My Aunt Terry makes them the best. The sight of the huge pot of boiling water on the stove sends off an alarm in all of our minds. We know that in forty-five minutes we are going to be consuming the best meal on earth. I still do not know how my family measures the amount of garlic, parsley, oil, and butter to put in. When it is all mixed together with the juice of the crabs, the end result could be sold in jars. The Italian bread that is perfectly toasted in our 1980’s toaster oven always has to be sliced by my older sister Andrea. I remember one day she was in the shower, so I thought I would take the liberty of cutting the bread, that was a mistake. My sister has a strange connection with cutting the bread, maybe because she would help Poppy do it before he passed away.
We have bags and bags of frozen crabs that are used every single holiday when we are all together. The smell is heavenly and the taste, well let me just say there is never any left over. My other Aunt, actually, has been taking the same picture of my sister, two cousins, and myself since we were very young. We are sitting around the table, each holding a crab leg or body and smiling at the camera. The recipe of our blue-clawed crabs has never been changed, simply because, you cannot improve perfection.
This thanksgiving, I yet again had another crab feast. Unfortunately my sister was not in attendance. She was in North Carolina visiting her boyfriend and his family. My cousins and I were in the living room and slowly but surely we began to smell that sweet aroma of the meal I love so much. We come bounding into the kitchen and took our places around the table. Because there was an empty seat where my sister’s body usually would be, my aunt held up a stuffed turkey in her place! We lunged to begin our quest to finish off the last body and leg. Just then, my Nanny came into the kitchen and told us that my Poppy used to throw in the whole crabs, still alive, into steaming water. Then my Aunt Terry broke in with saying how she could never eat them because she felt so bad that the crabs were suffering alive! I laughed at the thought of a young Aunt Terry running around crying, but I definitely feel that I would have been doing the same thing!
The Hampton Bays Cottage where my family and I catch the crabs is a little slice of heaven in itself. The seagulls flying above, the small fishing boats lined up on the worn dock, and seeing the familiar smiling faces welcome me to my relaxing getaway. I adore the scent of the salt water and the fresh air. It instantly releases all the tension in my body. It is a small house that holds millions of memories represented in photographs, sounds, scents, and comfort. Barbeques, family dinners, getaways with friends, and just relaxing vacations are spent here. Summers of fun and happiness have filled up my life. Every summer is loaded with fishing, swimming, tubing, skiing, tanning, eating, laughing, cooking, driving, smiling, Beatles listening, playing, volleyball-ing, Frisbee-ing, dog chasing, star gazing, cloud watching, game playing, and so much more.
Fishing is a huge part of the Hampton Bay’s experience. My Grandpa taught his children who then taught their children, and eventually I will teach my children. In the beginning, like learning how to break up the crabs, I hated seeing the fish being caught on the hooks as well as hated having to bait the hooks with the tiny fish. But after a while, the thrill of reeling in a 23-inch fluke made hooking that tiny fish, completely worth it. My father and Poppy taught me how to filet fish. On the filet table that my Poppy made, that my dad later fixed up, every family in the cottages filets their fluke, striped bass, and blue fish. It makes me so warm thinking about the impact that my Grandfather has had on everyone in our tiny community.
My Grandfather was one of the most amazing men. I still can hear his voice even though I was only six when he passed away. He was so involved in my life that I can still remember him, although I cannot even remember elementary or middle school. He was so warm and patient and had the most amazing sense of humor. I do not remember going to the funeral, or being allowed to go. I vaguely remember going to my aunt’s, on my mom’s side, house. I think a limo picked up my sister and me up. That was the first time I was ever in a limo. My family took the death of my grandfather relatively hard. My Aunt Terry refused to go to the Hampton house for about a year because it made her too sad.
It is weird to think about, but I have always said that when I passed away I would like my ashes to be spread all over the property and the bay. Hampton Bays is the closest thing to heaven I feel. Something that shows my family’s devotion to our little cottage and the surrounding area is the fact that we name the wild animals that roam there. Since I was about five, there has been a black and white cat that we named Molly and a giant seagull, Gonzales. Even until today if ever we see a black and white cat or a huge seagull we still call them Molly or Gonzales.
Being surrounded by loved ones in a place that holds so many a memory never ceases to keep me happy. Any bad day, any rough time, any stressful event, can be calmed and healed by one weekend spent in the Hamptons. Growing up with so many warm experiences such as fishing, cooking, playing, and just relaxing, has made me the person I am today. I would not change any memory or experience of any amount of money in the world.
My family means the world to me. Even just having one recipe that I know I can and will pass down to my children brings me such joy. I will be able to share with them the love and deliciousness that I was able to encounter throughout my life.
Chocolate Chip Cookies
Tradition is something that is passed down from generation to generation. Some traditions are started, some are kept, and some unfortunately fall to be forgotten. They hold a certain importance to you. A tradition’s importance is not held in the objects alone but what it represents. A tradition should start a train of thoughts at the sight, taste, sound, or touch of it. Its something that people hold onto, and have forever. It is one of the few things that can last the test of time.
A big tradition in my family is making Toll House Chocolate Chip Cookies together. It wasn’t a passed down tradition to my mother, it was just something she started on her own. The whole family making this treat together became a random family event for us, that we kept up. The chocolate chip cookies is not extravagant or out of the ordinary, its just simple and fun. I feel the cookies alone relate to our family, we’re not flashy or over the top, we all just enjoy eachothers company no matter how small of an event it may be. Even if its just us six sitting around my kitchen table. Here’s how chocolate chip cookie nights usually go.
It’s 8pm on a Wednesday and all of the children have finished their homework, dreading school the next day. My mother would spontaneously say “Lets make some cookies.” This would instantly cheer everyone up. My sister and I run into the kitchen to help my mother. My brothers will usually be popping in and out putting their disgusting fingers in the mix. We start by putting on either Frank Sinatra’s greatest hits, or My Best Friend’s Wedding soundtrack. Both of these two CDs are my favorites, and remind me of my family. Then we take out the bowels and all the ingredients and place them on the kitchen table. We take out flour, baking soda, salt, butter, sugar, brown sugar, vanilla, eggs, and the chocolate chips. We add all the ingredients into one bowel, then we freak out because we forgot to pre-heat the oven as usual. Then we melt the butter in the microwave which smells so good. I usually try to drink it until my mother catches me. We then crack the eggs. I attempt to do each of them with one hand. This usually creates a mess. As we stir it all together I am eating chunks of brown sugar. After it is all mixed everyone in my family digs into the bowel, until eventually my mother yell at us all to stop. Now that half of the batter is gone we all began to spoon out little blobs on the baking pans. I try to space them out as perfectly as I can. We then place the sheet of cookies into the oven and all go into the living room. We then typically forget about the cookies and my mom ruins into the kitchen in panic. The cookies are always slightly burnt. We laugh and eat the ones that are decent. Even though the cookies never seem to taste that good my family always enjoys the time we have making them.
When I went home for thanksgiving I asked each one of my family members their thought on the chocolate chip cookies our family makes. Most of them were a little confused by the question and they almost all said “Its just something we’ve always done.” I explained to them, especially my little brothers, that we are creating out own family tradition by doing it. They agreed with me. I decided to ask each member what memory they have connected to the process of making the cookies.
I first aske the backbone of my family, my mother. She said that making the cookies reminded her of “When the boys were younger and they’d stand on the chairs and help us make them, becuase the counter was too high for them to reach.” She also said “I’d never be able to make them for any future events becuase everyone would secretly eat them the night before, they would be completely gone.” I then asked my father and he said “I remember when we play music and all joke around, the kitchen is always a huge mess during and afterwards, but its okay as long as all my children are happy.” Next I asked my sister, she was straight and to the point “We get to eat the batter!” I asked my brother Ronnie after I asked my sister, he through some use of humor gave me his answer, “I like to eat the dough obviously, and maybe if were lucky one out of four batches actually turns out to be edible, but it doesnt matter because we all put a little T.L.C. into it and enjoy cooking them.” I then had one last family member to ask, my brother Danny, he was not in the best of moods, but I did manager to squeeze this out of him “It’s just good.” I enjoyed asking my family members this question, because its something you just do not think about sometimes. I feel like each of their responses reflects their personalities, which are all the different characteristics that make up my family.
Something else I wanted to know was if my brothers and sister would pass down this tradition to their families. Both of my brothers said they would because it was always so much fun for us all to do together. My sister said probably not because she thought they always turned out horrible, but she does want to bake with her children like our mother does. I decided I would like to continue make these cookies with my family. It is something that will always remind me of my mother and I appreciate her for everything she has done to keep our family together and happy. Toll House Chocolate Chip Cookies will forever remain a bonding experience between me and each one of my family members and I would not want it any other way.
By Alex Sosner
December 2009
Powder pink, mint green, and golden yellow cover the tops of the fluffy vanilla base. The sugary sweet vanilla smell pours out like warm steam into the air. Cupcakes, Cupcakes, are in the air. Recently cupcakes have become a very trendy thing. Who ever knew a type of food could be “in style” or “trendy”? Cupcakes have been blowing up throughout the past year: in stores, for dessert, and the most shocking, for decoration. These $6 beautiful, desirable, yet tasty treats are what every person is talking about. From cupcake parties, to gifts, to baking for the family, the cupcake is the treat that everyone is excited about. There are books, recipes, and more flavors then one could make in a year. Cupcakes are not only targeted towards the adult audience. Stores like Urban Outfitters that is said to sell “hip, kitschy, and ironic merchandise” have books targeted towards all age groups. Urban Outfitters has a book with many different cupcake recipes that tell you step by step directions to create the adorable cupcakes for every holiday, occasion and type of person. Targeting towards a younger audience makes this trend even more popular because it is easy for everyone to make. Reaching this teenage market makes it fun for kids to learn to bake and create these adorable, eatable treats.
To test this new hype on cupcakes I went to Bleeker street in Greenwich Village near the famous Magnolia Bakery to interview people. Siobhan Baggot an eighteen year old who is not only obsessed with cupcakes but eats one everyday says, “I love cupcakes, I love eating cupcakes so much, I have a cupcake book, a cupcake body wash, cupcake ornament, cupcake chap stick and if they made a cupcake perfume I would wear it”. After this statement I realized people are not only enjoying the taste of a delicious cupcake but there is an obsession appeal that comes along with the tasty cupcake. This girly, cuteness of a cupcake makes people want to go out and purchase anything that is related to or looks like a cupcake even if it is not eatable like an ornament. Even though the majority of people who put the time in to make the cupcakes are woman, men enjoy the tasty treats as well. Chad Miller a twenty-one year old is a living example that males like cupcakes too he says, “I love it when my girlfriend brings me a cupcake. They are the perfect treat after dinner.” This trend of a cupcake all leads to the story of my graduation party and why cupcakes are so significant to me.
As many people await on Bleeker Street in New York City wrapped around the Magnolia Bakery I do not blame them. I was once them. The Magnolia Bakery is known for their vanilla butter cream cupcakes that I have waited for on multiple occasions in the twenty degree weather for fifteen minutes. Living in Florida at the time I was not capable of retrieving my craving on a regular basis so my mom and I bought the Magnolia Bakery recipe book. Ever since we bought the hundred of pages thick book my mom and I always stuck to the tradition of making the cupcakes together and rarely being more adventurous to try something new. Whenever I baked the cupcakes in Florida I was always so anxious to move to New York City for college. When my mom and I made these cupcakes I was reminded of New York. Now that I’m living in New York City and attending The Fashion Institute of Technology I pass by the bakery all the time. If I treat myself to a cupcake I instantly think of my mom and the fun times we had baking together. For my graduation party this past May, even though we had it catered, my mom and I made the Magnolia cupcakes together because in honor of moving to New York for college it only seemed right.
On Saturday morning, the day before my graduation party, I knew I had a full day of baking ahead. My mom and I were going to make the delicious magnolia cupcakes all of our friends and family know us for . Even though we had many other priorities before the party these cupcakes were a must! Bringing out all the eggs, flour, butter, milk, sugar and my favorite vanilla extract I knew it was time to get cooking! As my mom was in her usual frantic state and burning up all of her nervous energy I had to take away some ingredients before they were done without any of my help. Pouring in all the ingredients into a large bowl and finally getting whiffs of the very distinct vanilla extract got me very excited. After putting all the ingredients together and pouring the thick liquid into the cupcake tins it was time for my favorite part, the frosting! The delicious vanilla butter cream frosting was irresistible and gives the cupcakes their uniqueness that everyone craves. With the very healthy two sticks of butter, six- eight cups of confectioner’s sugar, milk and yet again the finishing touch of vanilla extract I couldn’t control my senses. After putting together all of the ingredients we separate the frosting into three bowls. My mom and I always have to make the cupcakes as pretty as possible and make sure we use different pastel colors for the batch. We put a few dots of red in one bowl to make a powder pink color, a few dots of orange to make a golden yellow in the second bowl and a few dots of green to make a mint green in the third bowel. The pastel color frosting is the best addition to the cupcakes and make them that much more enjoyable and look even more like the original Magnolia cupcakes. After the cupcakes cool we put each bowl of frosting into a ziploc bag and snip the end of the bag to be able to control exactly how much frosting comes out. I watch my mom carefully swirl the powder pink frosting on to the vanilla cupcake, I was drooling, and again with the green and yellow. After we finished frosting all the cupcakes we arranged them beautifully on a tray and stepped away to look at the finished product, they were a piece of art. The only thing to do was smile and wait for the looks on everyone’s face as they were going to devour them the following day. The day of my party came and the caterers were there but of course for dessert the first to go were our cupcakes! My mom and I felt accomplished yet again and our tradition of the cupcakes will stay for many other parties to come in the future.
Many families, including mine, have recipes passed down from generation to generation but this cupcake one is special and will always be one of the most special recipes to me. I have always loved New York and have many amazing memories here spent with my family. Thanks to the Magnolia Bakery Cookbook I have memories from back at home in Florida with my family as well . These cupcakes my mom and I make have turned many rainy days into baking days, holiday parties finished off with some New York spirit and added great treats to movie nights. I am sure grandma’s chicken noodle soup is great but nothing can beat these cupcakes!
Food and Emotions/Emotional Eating
By Audrey Bocchini
December 2009
With all the constant and continuing daily activities in people’s lives these days, there are bound to be on going stresses along with it. Each person has their own way of dealing with those stresses, one being by eating. But, although eating can help de-stress, it also has other affects to a person’s well being rather than making them feel better; some food causes drastic changes mood and can alter everyday habits and routines. The food we eat not only affects our emotions, but our emotions also determine what we choose to eat.
For me, after being at FIT for about four moths, my eating habits have drastically changed (well maybe just a little) and I noticed I eat a lot of unhealthy things and I always get so tired and fatigued often. I’ve always known that by eating certain foods it affects your health and well being in many different ways. Honestly, from being here for a while, my preferred diet makes it no surprise that I am always tired and what not. But I do also agree that our emotions affect our food choices dramatically.
Although food is a good way to reduce stress and to unwind after a long hard day, it does affect our moods; changing the levels of chemical components in your brain (yourtotalhealth.com), depending on what we eat. An article from Jurgita.com says that certain types of foods we ingest produce different outcomes regarding the way we feel; even going on diets can make us feel “under the weather”. It states that foods like turkey and chicken enhances your mood in a good way because it contains Tryptophan, but foods with caffeine in them –which is a stimulant, can make you from sleepy and tired to awake and energized, the only downside is getting a “caffeine hangover.” This can cause insomnia, mood swings and anxiety. The popular belief that chocolate makes you feel happy is actually quite true. Chocolate increases the amount of endorphins in the brain and can act as an antidepressant. IT can also increase a person’s Libido or sex drive. On the other hand, even going on diets can have bad affects on your mood as well. Since Fats elevate your mood and make you feel good, going on a Low Fat Diet would in fact make you feel depressed and down all the time.(jurgita.com) In the world today there are many scientific studies going about how the foods we eat influence different chemical levels in the brain, along with them, there are a number of studies that Dr. Richard Wurtman has been affiliated with and he says “…The nutrients in foods are precursors to neurotransmitters, and depending on the amount of precursors present in the food you eat, the more or less of a certain neurotransmitter is produced. Although this process may seem fairly straightforward, it is complicated by the fact that foods most often are made up of more than one nutrient, and how those different nutrients interact will also impact the production and release of neurotransmitters.” So, although the study of the mind/brain communication is rather difficult to pin point why these chemical reactions occur from the food we eat, there are some pieces of information that that proves it further. We know that some foods make you energized and awake; this is because they consist of high protein, like foods such as, “fish, poultry, meat, and eggs. If you can’t eat those, try high protein foods that also contain significant amount of carbohydrates, such as legumes, cheese, milk, or tofu.” Says Dr.Wurtman. Proteins have different amino acids that are in charge of different chemical balances. One amino acid, Tyrosine, increase the amounts of “dopamine, norepinephrine and epinephrine“, which is why we feel alert and energized when eating foods that contain them.
Furthermore, when it comes to relaxation and de-stressing, it would be best to eat carbohydrates. These foods include “whole grain breads and crackers, whole grain pasta, rice, cereal, and fruits.” They trigger the release of insulin into the blood stream which in turn, clears away all the amino acids from the blood, except for one, Tryptophan. Tryptophan is usually taken over by all the other amino acids in the body when it gets to the Brain Barrier” but when there are none amino acids left, it enters the brain and is converted to Serotonin. Serotonin is in charge of pain reduction, loss of appetite and makes a person feel a calm sensation but it can also induce sleep, which in the reason that dieters tend to feel depressed about two weeks of starting their diets; there serotonin levels drop from lack of carbohydrate intake. Moreover, we forget about the good and bad foods and just look at the plain Comforting Foods. An article posted on the blog “Lola’s Vibe”, from Telegraph.co.uk by Harry Wallop talks about the top 5 comfort foods and why they appeal and comfort the people who ingest them. Many times we always choose to have that plate of Bangers and mashed potatoes, but we never stop to think why we like them so much. An experiment performed by Neuropsychologists of the University of Sussex tested not only contents of various foods but also the reactions of the people who consumed them. He measured their reactions to the smell, taste and color of the foods by attaching electrodes to their scalps. Then they measured “how warming and filling dishes were, as well as how certain foods triggered happy childhood memories.” It’s funny how these exspewrriments actually exist and its even better that it’s actually proven true. It makes sense- if I eat a certain kind of oce cream, ill most likely think of the times when me and my dad and my siblings used to go down the road to the local deli and get ice cream from time to time. It makes me feel happy when I think about those times. To continue, those exspereiments also showed that the top 5 comfort foods were 1. Bean’s on toast, 2.sausage and mash, 3.tomato soup, 4.chicken and mushroom pie and then 5.macaroni cheese. “Dishes with simple ingredients and uniform colour are more “comforting” than complex dishes such as curry or spaghetti, according to Dr David Lewis, who conducted the research.” Dr. Lewis says “The simpler the aroma the more easily it can be interpreted and memorized, consequently the response and emotion towards it is more powerful and immediate. We can see this clearly in the findings that the types of smells people find comforting are simple ones associated with home cooking.”
Aside from foods adjusting our moods, our emotions also can change how we eat. How we feel causes us to choose to eat different types of food. This is called “Emotional Eating.” Emotional eating is described in itself: eating when your moods change; when you feel sad, happy, angry etc. Heather Hatfield, from WebMD Weight loss Clinic, posted on Medicine.net, writes that when you feel happy, you might eat steak or pizza and when you’re sad, you’ll eat ice cream or cookies, and when your bored you might potato chips. Some people may get confused about when they eat because they’re hungry compared to eating when they are moody. Here are some distinctions between the two: (medicine.net)
1. Emotional hunger comes on suddenly; physical hunger occurs gradually.
2. When you are eating to fill a void that isn’t related to an empty stomach, you crave a specific food, such as pizza or ice cream, and only that food will meet your need. When you eat because you are actually hungry, you’re open to options.
3. Emotional hunger feels like it needs to be satisfied instantly with the food you crave; physical hunger can wait.
4. Even when you are full, if you’re eating to satisfy an emotional need, you’re more likely to keep eating. When you’re eating because you’re hungry, you’re more likely to stop when you’re full.
5. Emotional eating can leave behind feelings of guilt; eating when you are physically hungry does not.
Moving on, since being at Fit I’ve found that many times I Emotionally Eat rather than eat because of hunger. As was stated before, it is hard to differentiate between the two but I know when I’m eating because I am emotional. Most times at FIT I eat pizza, fries, and a bunch of really unhealthy things. When I’m upset and stressed, which seemed to be quite often, I would go get some ice cream and I would feel all better afterwards. It makes sense, in my opinion that people such as myself, would eat bad stuff, especially since we are all as freshman, going through a lot of different changes at once. Emotional eating, as I have noticed can be a bad thing because you eat out of stress or pressures in your life instead of eating because your body needs it, which in turn causes weight gain. That’s why I believe that so many people are obese these days. I have not gained a substantial amount of weight while at school, but I will say that eating does affect other parts of your body. For weeks now, I have not been sleeping properly or at regular sleeping hours. My sleep schedule is all distorted and I blame food as a partial adversary. Also, my ability to function during the day becomes limited, especially when I eat the wrong food and don’t get adequate rest. I do not what I am supposed to so, in turn; I suffer for it In other ways. Thankfully, my school work had not been affected much because of it, but for next semester, I’m going to have to make some changes.
Furthermore, food and our emotions play a role against one another and both have an impact on our bodies as well as our lives. They cause mood change, sleep loss, and change of daily routines. They affect our body rhythms, our work ethic in some cases and our brain functions. The food we eat not only affects our emotions, but our emotions also determine what we choose to eat.
Friends and baking
By Patrick McGrath
December 2009
If there’s one food that I always have a taste for, it’s peanut butter. That combined with my gigantic sweet tooth can be a deadly combination, specifically when it comes to buckling my belt afterwards. My two loves, peanut butter and dessert has led me to many trials and tribulations involving peanut butter cookies, the best of both worlds. I have tried a plethora of different recipes, but ultimately it was one of my best friends, Erin, who introduced me to a recipe that has since been my absolute favorite.
America’s Test Kitchen did a great thing for the baking world when they compiled a cookbook; the premise behind it is the contributing bakers test hundreds of recipes for a given type of desert. Out of all those tests they only feature the very best in the final cookbook. This is where Erin found the recipe.
The recipe begins by creaming butter, brown and granulated sugar together, a standard of most desserts. My many adventures in the kitchen have all began in a similar way. I remember one time when I was throwing together another cookie recipe, Erin’s sister, Carly, another one of my best friends came into the kitchen to test the work in progress, she stuck her finger in the bowl for a sample and exclaimed, “ Mmm… What is that?” “Butter and sugar.” I replied. To mask her embarrassment and to defend herself against my laughing she rebutted, “Perfect, my Favorite.”
After creaming the butter and sugar you really kick it up a notch a la Emeril and add in a cup of extra creamy peanut butter, I however prefer smooth, I find it helps make the batter more manageable and ultimately the cookies softer. Then add the eggs, one at a time. To my mother’s fear, the sampling of the batter does not take a break, not even out of fear of salmonella poisoning, in fact, right around the eggs is my favorite point of the batter.
After the eggs are incorporated and the batter is basically a peanut buttery goop you add in the dry ingredients. One mistake I’ve made with this recipe one of the first times I made these particular cookies, I forgot the flour. It wasn’t my fault though. It was because of the way I printed out the recipe, the flour measurement somehow got stuck up next to the approximate amount of cookies the recipe should make, something I always ignore. Evidently mine always turn out with less because either when it comes time to bake them I’ve already eaten half the batter, or because of my love for giant portion sizes, my cookies are always bigger than the recipe intended.
My favorite part of the recipe and the reason why I think these cookies are far more peanut buttery and delicious above all other recipes is the final ingredient that you add, a cup of roasted salted peanuts that have been put through a food processor and have the consistency of bread crumbs. When Erin first told me about that step in the baking process it was like someone finally turned the light on for me, it all made sense. That was the reason no peanut butter cookie recipe was ever peanut buttery enough for me. This ingredient also adds to the final cookie texture after it’s done baking, the less flour, the softer the cookie will be.
When it’s finally time to bake the cookies, I don’t use the traditional tablespoon measurement. Actually, I break out the ice cream scoop and plop down a quarter of a cup of batter that will bake into the perfect, large crispy on the edge, soft in the middle peanut butter cookie. One final trick I have when baking these cookies, again a little out of the norm of what The Joy of Cooking may necessarily approve of is, don’t let the cookies bake for the full time; in fact, under baking them slightly will insure them to be soft, moist and delicious.
Similarly to the way that all the right ingredients are necessary to bake something and have it come out perfectly. Equal care, consideration and the right ingredients are necessary for friendship. Through the years my friendship with Erin and Carly has grown significantly, even top the point where now I consider them part of my family. Likewise, over the years I have grown considerably into a better baker. Realizing the relationship of having the right ingredients and following a recipe with care not to over look vital steps. Friendships, like baking have a important steps to follow: care and compassion, selflessness and lenience, understanding and forgiveness, and finally, fun and enjoyment. I have found that when I incorporate all of these ingredients to my everyday life, and especially in my friendships I feel happier and have a more enriched feeling in my life. When I incorporate them in my baking, I find everything always comes out perfectly.
As much as I enjoy eating these ultimate peanut butter cookies, every time I bake them I am reminded of more than just my hunger. I reminisce about past times I’ve baked especially with my two best friends, Erin and Carly. As much as I love eating them, the memories are something I find much more comforting and precious.
Grandma’s Apple Pie
By Danielle Moody's
December 2009
My grandmother’s apple pie recipe has to be the best apple pie that has ever had the please to enter my mouth. There are so many memories in the kitchen with my mother and younger sister while making the sentimental pie. As I think back I can almost smell the baking apples in the oven; making me wish I had some to eat right now. Almost every Thanksgiving and Christmas we bake an apple pie for either a family get together or just for ourselves. The treat is probably my favorite dessert of everything I’ve had to date, and I doubt that’ll ever change.
The recipe is fairly simple with a few extra caring details that make the pie a family memory. The pie is nine inches in diameter, which may not sound too big but trust me- it’s enough to feed quite a few families with its thick and rich taste. We normally buy a generic pie crust from our local grocery store, but that does not make it any less delicious. We buy the pie crust because it just helps quicken the process of making the pie. We need as much time as we can get to perfect the ‘inner tastes’ of the pie; most of the time we’re cooking a day before the holidays or on the day itself, we have no time to waste.
Before we get the pie crust all ready we slice up ‘Granny Smith’ green apples, six to eight of them in order to be perfectly precise. My sister and I stand next to each other hovering over the kitchen counter with a huge bowl of shiny, newly washed green apples on the left and another empty one on the right. The green apples on the left have water droplets still sitting atop their green-yellow colored skin. They get quite slippery while trying to peel, sometimes they even slip out of our hands and onto the floor! We each have our peelers at the ready and once queued by Mom we start picking apples from the bowl and peeling off all the skins onto a napkin placed on the counter between the bowls. Often while we make the apple pie for Christmas we listen to my Mom’s favorite Christmas CD’s. My favorite songs on the CD’s are “Oh Holy Night” and “Silent Night”. My sister and I sing at the top of our lungs while continuing to peel all the apples until the bowl on the right appeared full of skinless apples. Sometimes my sister and I peel so fast I don’t even realize we’ve finished and go to grab another apple from the bowl on the left, only to find empty air and a small laugh at myself. By the time this step comes around I am dying to start biting into the pie.
Next, we call for Mom to come over to show her and she cuts the apples into eighth’s while we eat the left over skins of the apples. That is one of my favorite parts of the entire ordeal. The skins of the apples are starting to brown by this point, my sister and I hurry to eat them before they are ruined by the cold, crisp air. I love the apple peelings, I eat them as fast as a tasty potato chip but I know they are much more healthier. My sister and I nibble our those for awhile and continue to sing while mom finishes up her slices. After she is done they are all thrown back into the bowl, along with one cup of sugar, two tablespoons of flour, and two teaspoons of cinnamon. We would mix this all together so that every apple slice would be covered in the delicious mixture, making sure not to injure the apple slices in the mixing. At this point while Mom and Sam are finishing up with the apples, I am on the other side of the kitchen preheating the oven to three hundred and fifty degrees.
Now, it is finally time for the making of the pie. Our special trick is to butter the crust on the inside with sprits of lemon juice while we pour all of the sugar and cinnamon coated apple slices into the thick pie crust. Once all the apples are inside my sister and I watch as my mom put the second pie crust atop the apples. She butters it a bit more on top and sprits’ about one more tablespoon of lemon juice as well. With the top of a butter knife my mother puts three or four slits into the top of the pie crust, she says it helps the steam to escape. Again, we sprinkle some cinnamon and sugar atop the pie to add more great sweet flavors. One year, when my little sister was very young, we let her attempt to sprinkle the colored sugar atop the pie when the canister top fell off and the entire bottle of sugar fell onto the middle of the pie. I started laughing and mom held back her upset emotions because it was only a mistake and it was ‘the holidays’.
My mom puts on her holiday oven gloves and puts the pie into the oven to bake at three hundred and fifty degrees for about fifty to sixty minutes. While baking it, the entire house smells of crisp and warm apples. My mouth waters as I wait for the pie to be done. When we take it out and it’s all baked, depending on what holiday it is, we sprinkle some colors on top. If it’s Halloween we do orange and darker colored sprinkles or sugar and if it’s Christmas we sprinkle red and green sugar or sprinkles on top. I love the holidays and apple pie just makes them even better. It is the best when my mother is on her Christmas baking spree and the entire house smells of shortbread cookies, cherry cheese tarts, and apple pie with a cinnamon and caramel filler. I breath in the scents of warm family memories as I watch the snow fall outside. I hope to myself that we will get more than a few inches of snow ‘this year’ and that my sister and I can go outside, make a huge hill, and go sledding.
I would love to be able to continue making my Grandma’s apple pie for my family one day. I’ve had a fair share of apples pies and different variations and details but my Grandma’s is my absolute favorite. If I could spice up the recipe with something a little more for myself I would like to try a bit of caramel drizzle on the top or maybe the inside of the pie. I think that ice cold ice cream goes great with a hot slice of apple pie. To even out the caramel drizzle of the apple pie I would add a scoop of vanilla ice cream with a chocolate drizzle to add all of the best sweet treats together. I would would love to see my grandchildren, even, eating my grandmother’s apple pie one day. That would be a perfect Christmas miracle many years from now, I hope it happens.
My Challah
By Lior Vexler
December 2009
Every Friday evening our family was getting ready for Shabbat dinner. My mother and my aunt charge on the cooking, they cooked all day from the morning until the sun set. The house was filled all kind of delicious smells, from grilled chicken, beef with mushrooms, and mash potatoes with fried onion. I couldn’t wait to have my chance to taste from all this delicious food. Everyone who entered the house, my father, my brothers and any other guests was asking my mother what is she making, and why is smells so good hoping she will let them taste just little from the amazing food, but flattering never helped, it was hopeless we had to wait until dinner time . This was our special time as a family, the only time in the week where we stop our busy and hectic life for few hours, and we sat down the entire family to enjoy unforgettable moments. My Grandparents used to join us until they got sick. My grandmother passed away in April this year, and my grandfather passed away 3 years ago; I was very close to them and those family dinners is some of the strongest memories I shared with them.
While the cooking were in the oven, me and my father went for some shopping , the most memorable place was the local bakery . As I entered the place the smell was all over ,it swap me of my feet and I felt like a kid in a candy store . The smells of all different kind bread and special Mediterranean muffins mixed together to sweet smell, I felt I could stand there all day and imagine how good it would taste. But then the big moment arrived , the baker handed my father the the Challah bread just came out from the oven .it was hot , and smelled amazing , I couldn’t wait for the family dinner to eat the Challah ,I thought to myself that I could finish all of it my father would give it to me but I know we saving it for much more special dinner , our Shabbat dinner . After we came back from the bakery I use to wonder in the kitchen and glancing at the Challah, and all the other pieces of bread seems Boring and tasteless I could only think about the Challah.
We all were getting ready for the big dinner , putting our best cloths waiting for my mother call ” Dinner is ready everyone come join us at the table” . After the long anticipation the moment finally arrived .Next to the table there were 2 candles which my mother light every week after saying the pray especially for Shabbat,I felt it add to the spiritual feeling to the house and this dinner .The table was covered with the white table cloth which gave me a feeling of pureness , and on the table there was so much food , I always thought to myself that we can have ten more people and we will still have enough food for everyone . The table was full with all kind of goods: Potato salads, Israeli salad which was my favorite containing tomatoes, cucumbers, onion , and olive oil it always complete any good dish .Many kind of meat : Beef with mushroom , grilled chicken with special sauce , meatballs with tomato sauce. And on the side , cover by a white napkin was the Challah, It always felt special to me. We all had our usual seats ,my father sat in the head of the table , my mother set to his right and my ant next to her . In front of my mother was older my brother and I sat next him. In front of my father sat my younger brother and whenever we had more guests use to make the table bigger to make more room but we always keep the order of our seats.
We all sat quietly waited for my father to start, my father took the old prayer book and we all began to sing the song welcoming the ministering angels to join us in this magical evening .The words were simple but so powerful that I used to feel my spirit rising above the room. Then my father blessed the wine and pass the glass so everyone could drink, it usually goes by age so my younger brother used to drink last ,so he always finished all the wine . Then came blessing for the Challah, my father uncovered it and took a big piece and split it to smaller pieces gave each one of us a piece .I felt a moment of victory , after the long wait I got the first piece of food ,my favorite food , and it was so delicious .It was the last blessing so it was time to enjoy the food .I took a big piece of the Challah and had hummus , two of my favorite food.
The atmosphere around the table was always great and the conversation around the table was always fun. We had some arguments , but most of the time it there were good vibes and it was really funny , we used to talk about sports but then my mother got bored , so we tried to talk politics but my father always stopped us , he know it’s going to lead to arguments . So me and my brothers usually end up teasing each other , most of the time we and my older brother used to laugh at my younger brother , he was the youngest so he had no choice. One of the most funny moments I remember was my older brother brought his new girl friend , my parents were excited and of course my brother girl friend too and probably want to make good impression It’s always a little of awkward situation even that my family is very warm and welcoming , especially my mother is very friendly and talkative .So my brother’s girl friend sat close the Challah , and I couldn’t reach it so I asked her to pass me the Challah . She started to laugh and said I pronounce it in the funny way , I explained her that this the way we use to say it in our family and she can’t change it , we all laughed at had a great time .
Today I live in NY, and I missed our family dinner. Whenever I get the chance I’m going to the Jewish bakery and ordering Challah, it always give me back memories of our Friday family dinner .It reminds all the great moments we shared together and also it reminds me how much I miss my family .Bread is very important in many cultures and religions, but for me the Challah bread will always remind me feeling of family and what an important role it serve in my life .I hope I could share the same moments with my kids .
My First Meal
By Samantha Elysee
December 2009
Macaroni and cheese is a classic dish in the American culture. For me it is one of my preferred dishes to eat and make today. When I was younger, my mom or dad would quickly slap some pasta and cheese together for me to eat. They made it very quickly and extremely cheesy. Although, they probably did not put much labor into it, to me it was a five star meal. I have always wanted to learn how to cook but did not have enough courage to do so because in elementary school I was truly shy. Cooking to me seemed like it took confidence to make a meal, serve it, and know the people that eat it will like it. I knew that it takes time and practice to learn how to cook and create unique recipes like my parents did. I was only eight years old, and impatient I wanted to be like my parents, but I was not brave enough to ask my parents and even my grandmother to teach me. My mother decided to take it upon herself one day to help me gain the courage to cook and because of my mother’s push, little did I know that someday I would be a master chef in creating my very own specialized macaroni and cheese.
When I was eight years old, my mom thought it was time for me to learn how to cook. One day she came home with a trunk load of groceries. She had asked me to help her unload the car. I made my way out of the front door and to the car to see loads of bags. After about five minutes, we began to unload everything from the plastic bag to the refrigerator, cabinets and shelves. I noticed in one of the plastic “Waldbaums” bags were about 10 boxes of “Easy Mac” by Kraft. I was kind of in shock, because normally my parents made the macaroni and cheese with store brand pasta, and Velveeta cheese along with other ingredients I never paid much attention to. I gave her one of my “I’m confused” looks, and then she explained to me her reasoning of why there so many of the same macaroni and cheese boxes in one bag. She of course thought macaroni and cheese was a great way for me to learn how to cook. I was still in shock as I examined the “Easy Mac” by Kraft. The box contained; the instructions, cheese mix and elbow macaroni. I thought to myself “How hard could this be? If my parents can do it, why can’t I? I am now in fourth grade. I am ready for this!”
My mom began to instruct me on the tools I will need. She told me to get the medium sized pot with a lid and a stirring spoon. I was beginning to get excited because I have always watched and tasted while my parents cooked. I was never “the cook.” It was my time to shine I thought. Then she told me to read off of the Kraft box to find out exactly what ingredients I will need. I said “milk, salt, cheese mix, extra cheese if needed, and butter.” While I read them out loud I organized all my ingredients on the table according to how I read them. My mom told me she would supervise me if something went wrong, but she was not going to guide me throughout this cooking process. That is when I became unbelievably nervous; I began to shake a bit. The words that wanted to come out my mouth and ask “Why won’t you help me?” did not come out. It was so quiet in the kitchen falling pine needles could have rattled the dead silence. I finally relaxed a bit after those grueling three minutes. Then I gathered my thoughts together and in silence I mentally prepared for my task ahead of me. Finally, I figured I am just going to follow the instructions on the box. My task slowly seemed simple to me.
I began to follow the steps in numerical order. Everything seemed easy towards the beginning; pour the water into the pot. Then wait for the water to boil for about ten minutes. I did everything “Easy Mac” told me to do. When the water came to a boil and it was time for me to pour in the elbow macaroni, I gained that self-assurance and thought “this is too easy for me. I can handle this. I’m mature now.” The “Easy Mac” box said “boil macaroni for 9 minutes.” My mom gave me this “sad” look, it was as if I did something wrong. I could not figure out what because the instructions were too simple to slip-up. Then all of a sudden I realized I forgot to keep track of the time. I left the macaroni in the boiling water for about twenty minutes instead of nine like the box instructed. When I strained the macaroni, it started to lose its elbow like structure. My heart began to pound a little harder than its normal rate. I told myself “It is going to be ok.” I resumed following the rest of the instructions, even though I continued to make additional mistakes. I said to myself “The food will taste, just fine.” I thought I did not make that many mistakes. I just dropped the cheese mix on the floor, there’s still some left in the package” During those ten minutes, I placed the macaroni in the pot and added; salt, butter, milk and what was left in the cheese mix package just like the instructions directed me too. After my food was made, I set a plate for my mom to taste and critique my macaroni and cheese capabilities.
As she was just about to put the metal fork in her mouth I thought “She is going to love what I made, this was my first time cooking and I think I did a great job, she will too” After she put the food in her mouth and made a disgusted look on her face I thought “Oh no! She’s supposed to like my cheesy macaroni and cheese.” My mom began to open her mouth and let her words flow, I just hoped she would not be too harsh. In a very polite tone my mother basically said I added too much salt, I dropped the cheese mix on the floor and used what was left in the package which was unsanitary, there was not much left in the package. I did not put enough milk to create that cheese sauce. I should have used regular sliced cheese to make it cheesy. Essentially, I made elbow pasta with no flavor. I was depressed about my failed attempt to cook, but my mom told me I tried my best and throughout this process I gained this confidence she had never seen before. She also told me she will help me learn and I have plenty of years ahead of me to master cooking and macaroni and cheese.
Today I still consider macaroni and cheese my favorite, but I have inherited the way my parents originally made it. Now, I use store brand pasta with the Velveeta cheese. I also add many different flavors such as chopped peppers, onions, red kidney beans or black beans, tuna fish, and plenty of seasonings to give it a rich flavor. My favorite part about macaroni and cheese is there are several different ways to prepare this dish, and it can still be scrumptious. What I learned over the years is recipes are guidelines, but it is up to the cook to give whatever dish they are making their own creative flavor. Recipes are not set in stone because cooking is about creativity and mixing numerous flavors with one another. Confidence is vital in cooking as well. I have kept that trait as I grew older, and now I make macaroni and cheese with assurance, I enter the kitchen and I know what I would like to add in my dish and I do not second guess myself.
Noodle Pudding
By Shauna Rosenely
December 2009
Every year during the Jewish holidays my mom makes this noodle pudding that is out of this world. We don’t get to eat it that often so when she does make it the taste just melts away in your mouth. The recipe that my mom makes with the noodle pudding is not only delicious, but has special meaning to our family. This is because my mom got this recipe from her mother, and my grandmother got the recipe from her mother. In a way this noodle pudding has become a tradition in our family. I hope when I have a daughter that I will be able to pass the recipe down to her as well and continue the tradition.
I remember the first time I watched my mom make the noodle pudding like it was yesterday. It was just my mom and I sitting at the kitchen table I was only five at the time. As a little girl I always looked up to my mom, so I use to follow her around every where especially when she was preparing dinner during the holiday season. I watched sitting at the kitchen table as I was playing with my favorite Barbie doll that is when I noticed her pour the wide egg noodles into the pot, I can still here the water bubbling as she poured the noodles out of the bag. I was immediately fascinated with this because it wasn’t regular pasta it was this weird shape that I never saw before. I asked her with a puzzled look “mom what is that?” She laughed and explained to me “This is not regular pasta like spaghetti; this is a special noodle that is made especially for this dish”. Being a young child the simplest things just become the most fascinating things to you. That is when I slid my body down from the chair and walked over to mom as she was pouring the noodles into the pot.
I stood there at the counter watching my mom walk back and forth from the refrigerator gathering together the ingredients to prepare the noodle pudding. As she was doing this I noticed she was reading off a piece of paper. Every night I watched my prepare dinner, but I never saw her read off a piece of paper before. I asked her “What are you looking at the paper for?” Again she let out a little chuckle as she started to take out a pan and said “This is a recipe that my mom used to make when we were kids during the Jewish holidays, and she gave it to me when I got older”. That is when I realized that this was a special dish.
I continued to watch every step she made then it came time to crack the eggs into the bowl she even let me try one. I got upset when I saw the yolk broke it looked like, the sun with yellow stuff dripping out. My mom reassured me and said it was ok. After she mixed the noodles together with the filling she made, she then poured everything into the pan. It looked so good that I even tried to take a piece until she slapped my hand away. “Shauna what are you doing it’s not cooked yet?” I laughed with a little sly grin. After what seemed like for ever she took the pan out of the oven and there it was. The top looked a gold brown from the cinnamon she sprinkled on. My mom then finally allowed me to take a piece of noodles from the top it was crunchy and delicious.
Now during the Jewish holidays I help my mom prepare the noodle pudding. Ever since the first time I watched her prepare the dish it has become something we do together. The main reason I enjoy this dish is not only because it taste good, but also because it is something that my mom and I get to do together. No matter how old I get this is something that my mom and I will continue to do until the recipe gets passed down to me.
Saint Marks Style Party
by Ashley Singer
December 2009
I am a student at the Fashion Institute which means I have no choice but to spend four days out of each week in Chelsea. When I’m scurrying around the busy streets that surround my campus, there’s one place I love to go to for mental sanity and relaxation. That place would be the one and only Saint Marks Place in the lower east side of Manhattan, more specifically between 3rd Avenue all the way down to Avenue A by Thompkins Square Park. It’s my sanctuary. Feeling like Sushi? Go to Saint Marks. Feeling like a tattoo? Go to Saint Marks. Feeling like paying way too much money for ripped pants? Go to Saint Marks.
I think that it would be absolutely fabulous to conjure up a party with a lower east side vibe. It’s totally chic without being over-the-top. The host will be seen as fun, funky, and down-to-earth. Throughout this post, you’ll find great tips for throwing a Saint Marks style party with a classic east village aura and wonderful little goodies like an amazing fruity cocktail and a scrumptious dessert. Aside from outrageously awesome recipes, you’ll also find helpful hints for decorating, choosing music, and playing the role of host. Now let’s start out with the basics…
Why throw a party like this in the first place? Well, there doesn’t necessarily have to be a special occasion. Perhaps you’re just looking to get a group of friends together for an evening of chit-chat, gossip, and a couple laughs. I think the best number of invites to be extended would be just about a dozen or so. For this type of shindig, anything less than a dozen would be too few; anything more would be too chaotic. Now, what you’ll need to do is choose a special night to invite your guests over. I suggest giving them at least a week’s notice to alter plans or just fill you into their day-planner.
The decorating should be done at least a day in advance, and that’s the fun part! To achieve a trendy-yet-“rock and roll” feel, one might want to purchase sheer black fabric to drape over the couch and maybe a few little, white votive candles to set a minimalistic and laid back vibe. It would also be wise to have a big coffee table on hand or a large folding table to hold all of your “snack-atizers” and cocktails. As far as music, I know this probably sounds very stereotypical, but nothing sets a New York City mood quite like the classic rock anthems of the Ramones, Joan Jett, Billy Idol, and even Cheap Trick. The focus of this party is not the décor nor the music, although it is a nice touch. The main focus is friend-time, and that’s why it’s so important to be subtle.
Now for those recipes…the “can’t-go-wrong” cocktail is light and fruity without being overly sweet like dessert in a glass. The drink is to be served in a basic highball glass filled with ice. Fill the glass a third of the way with Malibu coconut rum and generously pour in cran-raspberry juice until the glass is ALMOST full. Then throw in a couple chunks of pineapple to top off the drinks, and your friends will be more than happy – whether they’re whiskey, beer, or even cosmo drinkers. And for your information, it’s always wise to set apart some space in your humble abode just in case you wind up with a few late night crashers. If friends are drinking, chances are that there’s always a small handful that will take it way too far and end up drunk. For these “special” buddies, have some blankets, pillows, and Advil handy!
I’d be sure to have snacks around like a nice, fresh vegetable plate with dip and maybe even a variety of fruit and different cheeses. These items are items that can be purchased in advance with zero-prep work so you can focus on what’s really important. I’ll never forget the time I wanted to throw a dinner party and spent more than seventy percent of my night in the kitchen. Your guests want to spend time with you, so the less work you have to do the better. Now let’s discuss this dessert I had mentioned earlier…a semi-home-made, sweet, and savory cupcake…a peanut butter and jelly cupcake at that!
To begin, you can use a basic yellow cake mix to start. I would aim to make two dozen or so, therefore, purchase two boxes of cake mix just to be safe. Follow the instructions on the box of whatever brand you choose and leave them out to cool once they’ve finished baking. When the cupcakes have cooled, get a pastry bag and fill it with your jelly/jam of your choice. My personal favorite is classic grape, but my friends have grown a fondness of strawberry. Insert the tip of your pastry bag halfway down the center of your cupcake and aim to “inject” with about two tablespoons. When the jelly is in, evenly coat the top with creamy peanut butter.
When your guests arrive at your place, greet them warmly and get everyone’s updates before you get in a huff to play host. Let them know that the night is about them – not about your culinary/domestic skills. Sure, New York City is known for being the city that never sleeps. There are nightclubs, lounges, and bars galore. I mean, Manhattan is truly “the” place for exciting nightlife. However, there comes a point where you get sick of the glitz, glam, over-priced drinks, sleazy men, and superficial conversation. When you need to escape the hustle and bustle and unwind, do it at home with the people you care about.
You may decide that a little background movie might be enjoyable too. I’m sure your group of friends would slowly grow to dislike you if you blasted Billy Idol all night, so why not set aside a few movie choices? Personally, I love putting in a dvd, even if the crowd’s eyes are shifting to-and-fro. It’s comforting to have a television on, and it makes you feel at home. Even as I’m typing this post in my bedroom, “Sex and the City” is on in my living room. I can hear Samantha’s rant to Carrie about Botox, and in all honesty…it’s quite comforting. It’s like familiar sounds and voices make you feel at peace.
I think that the best possible night to have this type of get-together would be a Saturday. If, by chance, you’re a student then Saturday would be positively perfect because very few students have class late on Saturday. If you have a career, typically the bulk of your work will be done during the week (unless you have an unusually cruel boss). Ooh! And don’t forget the camera. On occasions like this, as trivial as it may seem, you’ll want to remember it always. In all honesty, I hate (or shall I say loathe?) taking pictures. I have a tendency to get so self-conscious when a picture of me is developed, and that’s mainly because I fear camera bloat. You know what they say…the camera adds ten pounds. However, in all honesty, I’d sacrifice a little insecurity over additional camera weight for the sake of remembering nights with buddies.
To conclude, your guests will love the idea of a laid back, Saint Marks style shindig. With subtle details like loose fabrics, intimate candles, classic tunes, and fruity-but-still-potent drinks, your guests will be right at home. However, as mentioned before, don’t lose sight of why you’re arranging a night together in the first place. Don’t waste the bulk of your night prepping snacks or putting napkins under everyone’s drink. Treat yourself like your favorite guest. Until next time…
Yummy
By Dawoon Yun
December 2009
One of the dishes that is praised in my house during the summer is Japanese Cold Soba. It is a unique type of noodle soup dish because the noodle and the soup are served separately. It started with my sister getting into her Japanese muse phase.
When she was in elementary school, under many different diverse influences of this generation, she found the Japanese culture amusing. Especially, food among all other muse such as music, politics, language and fashion. Me, of course, living under the same roof as she does, can’t simply ignore that. As a younger sister, I’m always up on what she’s up to and mimic everything she does in every way possible that I can. She looked into Japanese foods such as udon soup, tempura and mochi, etc. However, Japanese Cold Soba is one of the dishes that she just fell in love with and so she decided to launch it in our house. She especially loved that dish because it had special meaning to her. In my memory, we had it when we were in Japan for about three hours in the airport restaurant when our family was waiting to transfer flight from there to America about ten years ago. I guess it tasted amazing there and left a lasting impression on her.
It is a cold dish but we would have it all around the year because it is simply addicting and the taste overcomes our shivers all over our bodies that it brings on a cold day. All it takes a bottle of Kaeshi—the soup base, soba noodles and accommodations as grated white radish and finely chopped scallions. This dish is extra good when it is served extra cold in the summer with additional ice cubes or ice-somethings floating around in the fresh soup base inside a edgy looking fierce ceramic round bowl. First, my sister pours about a cup of Kaeshi on a small cute ceramic bowl with little water very carefully, smelling it depending on the darkness of the soup base. She claims that it has to look light brown mixed with water even though the Kaeshi soup base itself is dark brown. Voila! That’s the soup part. When it is sitting in the bowl with water, I usually stir it with just one chopstick so that the color would blend evenly throughout the whole thing. We love the soup base, extra cold. So, in oder to make it cold, my sister figured that she would place the whole bowl in the freezer and let is sit there until the noodles are cooked and ready to go. By the time we take out the soup base, it is usually about 1/4 frozen. That’s means excellence!
I didn’t like the Japanese Cold Soba as much as my sister did. That was the reason why I was neither passionate about making them nor eating them. Although my mind, body and soul would dehydrate on a sizzling summer day, telling me that I need to have those cold Japanese soba noodles to calm and energize my soul! Usual summer mornings, my sister and I get up late in the morning only to greet each other with indifference but with silent acknowledgement that we both exist and live in the same house. I think that she is a really hot-blooded- dinosaur because she turns the air conditioner high and still wants to constantly eat cold food. She would insist over and over to have cold Japanese soba noodles with me because she never wants to eat alone. May be she’s just trying to make me feel bad for eating her food and then lure me into take care of the aftermath dishes.To be honest, I’ve had Japanese Cold Soba enough since she always urges me to eat with her. It is to her philosophy that it tastes best when it is consumed with another person, how sweet. In her compassion, she asks me day after next if I want to join her in eating of her wonderful Japanese Cold Soba, I refuse. However, she grew up with me all my life, so she knows that she needs to make extra because I am known for indecisiveness and I change my mind quick under influence such as the wonderful uncovered smell of Kaeshi soup base.
Without resistance, I prove to her hypothesis helplessly that I decide to have it as well. It smells so good. It looks like soy sauce to me except it tastes much better and softer! The noodles are just cooked like any other noodles. Boil about 3 cups of water and let the noodles join in it. After the noodles are done cooking, it gets run through cold water to make it cool to serve it cool since it is a cold dish. I forgot to mention, when she is doing all these amazingly hard steps—she calls out to me to help her make the dish which I find ridiculous at my immature mind set since I didn’t want to eat it in the beginning anyway. She makes me take out a huge and heavy piece of white radish and grate it—about 5-table spoon full amount to accommodate the soup base.
Then the frozen Kaeshi soup base in a bowl is ready to come out and ready to be enjoyed. The cooled soba noodles are served on a plate arranged nicely into a roll of noodles about the size of half a fist if preferred. Rolls of noodles look so cute in the middle of the plate looking calm and gray—literally. It is made of 30% buckwheat; which is very healthy for the physical body and mind possibly in my opinion. Next to it sits the dish of frozen soup base and the radish I grated and my arm almost fall off. A delicious dish overcomes all the processes and the thoughts that go through our minds. We mix a good small amount of grated white radish and scallions into the soup base. Then, we take little bits of noodles and dunk it in the sweet soup base and slurp it up. Sometimes, because the soup base is so cold, when the noodle is dunked into the soup base, the noodles freeze into funny structure shape but we just eat it anyway.